Onboarding A New User - Video

Onboarding new Users with IDHub is a simple operation, which can be easily managed by any user, and approved by any access manager, or other role with approval permissions.
Onboarding New Users – Video Transcript
Hello, in this video, I’ll demonstrate how to onboard a new user into IDHub. First, let’s assume an organization has already purchased and installed IDHub on-premise or in the cloud. The first user, Jerome, has already registered himself and activated his IDHub license.
He’s also onboarded applications, roles, entitlements, and other users.
In this scenario, I will show you how an IDHub user requests to create a new user and what the approval process looks like.
Let’s first log in as our organization. In this case, Sath is the organization. We’re going to log in as an End-User. In IDHub, End-Users have basic access. They don’t have any managerial or administrator permissions.
To create a new user, Jack will request access from his dashboard by clicking on the request access.
From there, he’ll navigate to the service request page by clicking on the service request tab at the top of the page, he’ll search for a service request named create new user, and he’ll add it to the cart by clicking on the plus icon.
Notice that the cart quantity has increased to one. If we open up the cart, we’ll see that our “create new user” request has been added to the cart.
We’ll go ahead and proceed with this request.
Jack will create a new user, Noah Smith, the new sales manager at Sath, starting on May 17.
We’ll go ahead and enter all of Noah’s information into this form.
Noah’s manager is going to be Charles. We’ll enter his job title here as the sales manager, and he was hired as an employee. And again, his effective date is May 17.
We’re going to look to ensure that all of our information has been entered correctly. And once insured, we’ll go ahead and continue with this request.
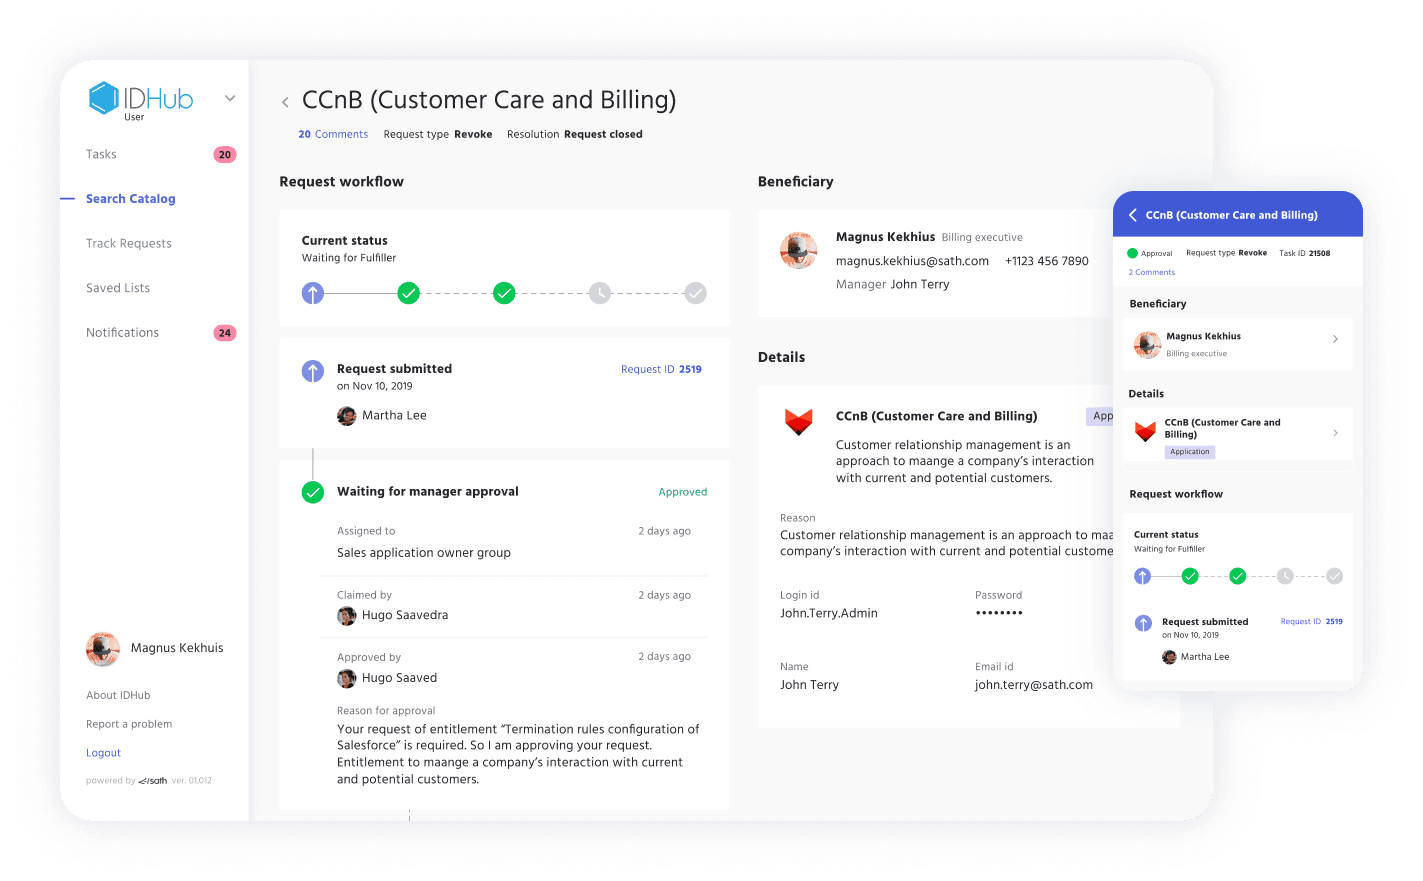
We’ll submit the request, and we can easily track it by clicking on this button here, track the request that pops up in the upper right. Or we can click on track request from the dashboard, and I’ll go ahead and show you what that looks like.
So it looks like Jack has submitted several requests today. Some are completed, and one is waiting for approval, which is the one we had just created. We’ll go ahead and open that up.
And we can see that the status is waiting for approval, and it’s been assigned to an access manager.
Only access managers have the permission to approve or deny a service request. Any user with an IDHub can request access for a service request, but only access managers can approve or deny this request.
If we click on this details box here, a right-hand panel will pop up, and that gives us information about the approval workflow here and, different service requests have different approval levels. So if this was a more complicated service request, we would have additional approvals here, level one, two, and three, which I can show you in a later video.
To view the details of this request. You click on the form button, and that’s where you can view all the details that you entered into this form for this new user.
We’re going to go ahead and close out of this logout and log back in as an access manager. Jerome is an access manager, and he’s going to claim and approve this request.
He’ll find the task by navigating to the tasks page by clicking the tasks button from his dashboard. Okay. The great part about IDHub is that we have a claim and approved process.
So let’s say there are multiple access managers within an organization. The claiming process will allow access managers to claim certain tasks, pull them off of the rolling task list and then approve them immediately, or possibly later in the day or later in the week after they have time to dig into the details.
So, in this case, we’re going to claim and approve this task. So we’ll open up the task, and we can view all the details we can see who created this task or this request. We can see that it was Jack. We can see that Jack’s manager is Joanna and we can contact her. If we have any questions about this request, we can also see the form and details about this new user.
And we can see Jack’s profile if we click on his name. So if we wanted to contact him, we could contact him directly at his email or phone number if we had questions about this request.
I’m going to close this panel here and go ahead and claim it and approve this request.
And you’ll notice that there’s a pop-up that the task has been performed successfully. And also that the task is no longer on Jerome’s task page.
We’re going to go ahead and log out as, as Jerome and log back in as Jack, the original end-user who created this request, and we’re going to track the request from his dashboard so we can see what the current status is.
We’ll click on track request, and all of Jack’s requests will pop up, and we can see that the new user we created today has been completed.
And if Jack created ten new users today, he’d easily be able to find the details about which user he’s looking at by clicking on the details box, opening up that right-hand panel, clicking on form, and looking at all the details for the new user.
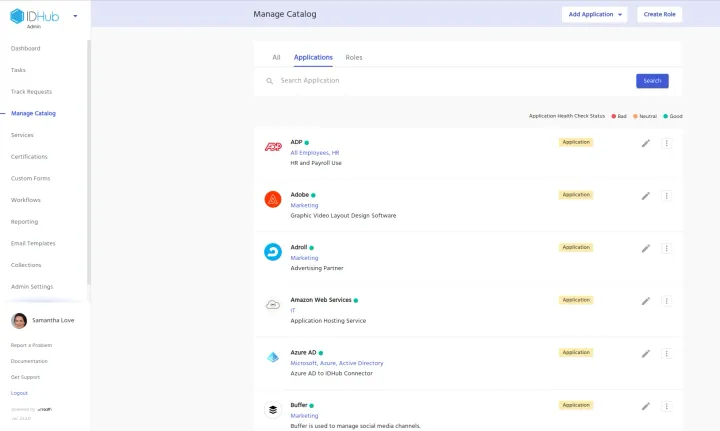
We’re going to go ahead and close out of this. And now we’re going to validate that Noah was actually added to IDHub to do that. We’ll go back to the catalog, click on the Users tab and go ahead and search for Noah.
Oh, there he is. We’ll pull him up. We can see that he is a user with an ID hub. We can see who his manager is, what his job title is. The status is active and what his access is. He doesn’t have any access right now, but I’ll show you how to add applications and roles to Noah’s profile in a later video.
There is one more step to validate and activate Noah’s account in IDHub. Noah will have to log in to his email and update his password. So we’re going to log out right now. We’re going to go to Noah’s email.
I’m going to pull up an email. Welcome to IDHub. Within this email, it’s a welcome letter. It tells Noah what his username is and what his temporary password is. So we’re going to go ahead and log into IDHub with this temporary password and his username.
And, this will prompt Noah to update his password.
Changing his password is going to activate his account in IDHub.
Once his password is updated, he’ll be able to log in, and from his dashboard, he’ll have all the same options that any End-User does, and he’ll be able to look at his profile. So we’re going to do that by clicking on the “my profile” button. And this will pull up Noah’s complete profile, where he can see who his manager is, that he’s an active user, what his access is. Again, he doesn’t have any applications or roles at this time, but I’ll show you that in a later video.
That concludes the onboarding process for a new user and ID hub.
Thank you so much for your time. And I encourage you to watch some of our other videos.
Have a great day.
Meet compliance and eliminate costly audit fines.