Adding A New Role - Video
What is an IDHub Role?
IDHub Roles are used to represent the functional responsibilities of a user. When a Role is assigned to a user, he or she is granted all access to applications and permissions within that Role. Roles are useful when an application requires multiple permissions across multiple target systems. Learn how to “Add A New Role” into IDHub.
Adding New Roles Into IDHub- Video Transcript
Hello, welcome to IDHub.
In this video, I’ll demonstrate how to add a new Role.
To begin, let’s assume an organization has already purchased and installed IDHub on-prem or in the cloud. The first User has already registered himself and activated his IDHub license. In this scenario, I will show you how an IDHub Administrator adds a new Role.
To begin, let’s login with our organization name, and then we’ll go ahead and login as an Administrator. Charles is an Administrator within IDHub, and he has access to an Admin App, as well as a User App, which are located on his dashboard.
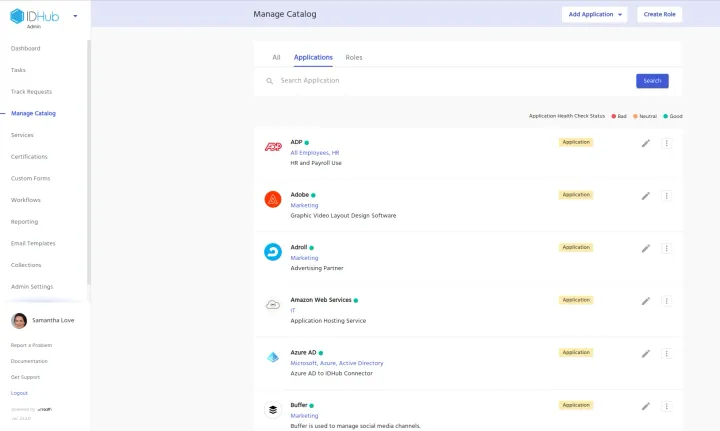
From the Admin App, which is up top here, the User App is on the bottom. From the Admin App, we’ll go ahead and click on “Manage Catalog”, which will take us to the catalog items, where we can edit, add, and delete any items found in the catalog.
From here, we’ll navigate to the “Create Role” button. We’ll begin with “Basic Details” of the Role. This Role is going to be called “Marketing Employee”, and the description here will be any employee on the Marketing Team, would be assigned this Role.
So the “Role Owner” would be the person responsible for all Role related actions. IDHub will also suggest a User, but this can be changed. So in this case, we’re going to add Charles as the “Role Owner”.
Then, we’ll go ahead and add an “Approval Workflow”. So, the Role will be a “Manager Approval Role”. Meaning, the direct manager of the beneficiary, also known as the requester, will need to approve this new Role when it’s requested.
We’re going to make this “Requestable”, so any User within IDHub can request the Role. IDHub is neat because it allows you to add conditions to Roles.
A “Role Condition” assists with determining various scenarios. When a specific Role needs to be assigned to a User, when a Role is created, a condition can be associated with that Role.
Using the “Role Condition Query”, multiple conditions can be combined using “and/or”, to form the query. For example, we can say for this particular Role, if the department equals Marketing, then that User will automatically get this Role assigned to their account.
So when they’re hired, if we say that “Marketing” is their department, then they’ll automatically get the Role, “Marketing Employee”, assigned.
We’re not going to add any conditions for the sake of the demo, but it is a great tool that IDHub can easily work with.
So right now, we’re under Applications and Entitlements. And here, this page allows us to add any Applications and Entitlements that would be associated with this Role.
Let’s say when the Role is requested, the User would automatically get MailChimp, Premier Viewer, Slack, and Zoom. So when someone requests this Role and it’s approved, they’ll automatically get these Applications, along with that Role.
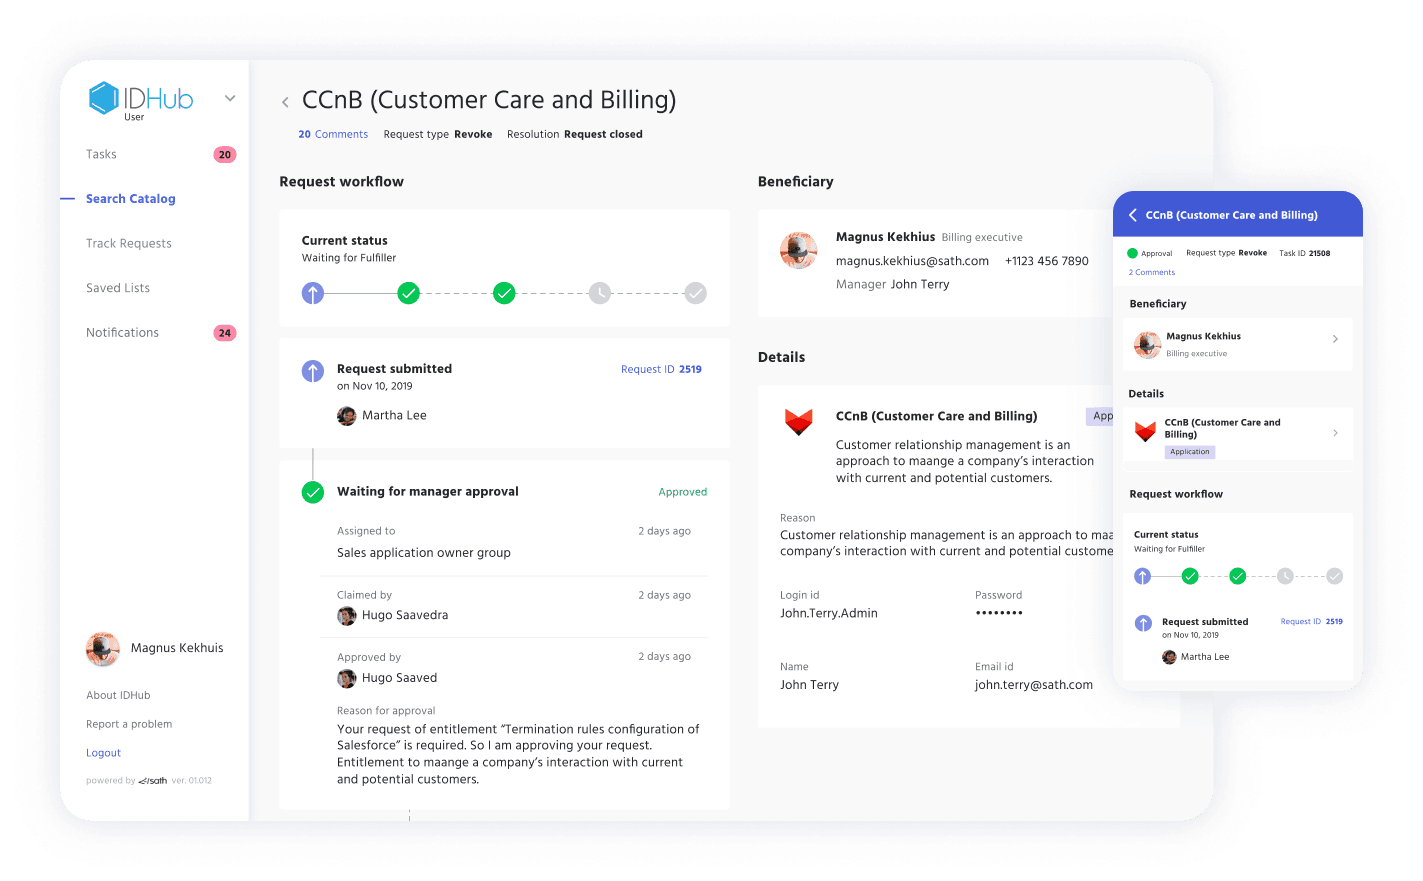
We’re going to submit this, and it will now be assigned to an Access Manager. We’ll go ahead and navigate to our “Requests” page, where we can view the request to add this new Role.
Here we can see the “Marketing Employee” Role. We’re “Waiting for Approval”.
And if we open this up, we can see the current status again is “Waiting for Approval”, and it’s been assigned to an Access Manager.
So now we’ll go ahead and logout of Charles’ account, and we’ll login to Jerome’s account. Jerome is an Access Manager and he has permissions to approve this new Role request.
And from the dashboard, we’ll go ahead and navigate to the “Tasks” page by clicking on this button here.
This will bring up all the tasks that have been assigned to Access Managers. We have a claim and approval process, which is great because it allows an Access Manager to claim a task, or any manager for that matter, that a task has been assigned to.
It allows this Access Manager to claim this task and the task will then be removed from the rolling task list. All the tasks that have not been claimed and been assigned to a particular Role, would stay on that page until someone actually claims it.
So we’ll go ahead and claim this task or this new Role request. And then we can go ahead and approve it as well.
Now you can also click into this, any task for that matter, and it’ll bring up everything related to this new request.
If there are any conditions that are there, any Applications or Entitlements that are attached to it, all the details, and you could also approve and claim from within as well. We’ll approve it, and notice how the task has now been dropped off of Jerome’s task list.
“Task Action Performed Successfully”. It was a success, and now we can navigate to the User App, so that way we can validate that this Role is now available in the catalog, and ready to be requested by any User within the organization.
So we just go to the User App, we search our catalog. We’ll go ahead and click on the “Roles” tab, and we’ll search for that new Role.
And here it is a “Marketing Employee”, and we can see the “Approval Workflow” here, the “Description”, any Applications that have been attached to that Role.
So again, when somebody requests for access to this Role, “Marketing Employee”, all of these Applications would then be added to their account once the Role has been approved. And then “Members” would tell us any members that have access to this Role.
It’s brand new, so no one has requested it.
That concludes the video on how to “Add a New Role into IDHub”. I also have another video that will show you how to “Bulk Upload Roles”. Thank you so much for watching, and have a beautiful day.
Tune into more videos like this on our blog page.
Automate tasks and save IT time.