Fulfillment Workflow
This out of the box workflow is used in the provisioning of Disconnected Applications. This generates a Fulfillment task which can be either approved or rejected by the Fulfiller.
How To Access the Fulfillment Workflow
- Go to ‘
Workflow' in the Admin Module of IDHub using the credentials of a user that has the role of 'System Administrator'with them. - You will see the Fulfillment workflow in the workflow page.
How to view/edit the Fulfillment Workflow
- Click on the edit (pencil icon) on the Fulfillment Workflow card from the Workflow page.
How the Fulfillment Workflow works
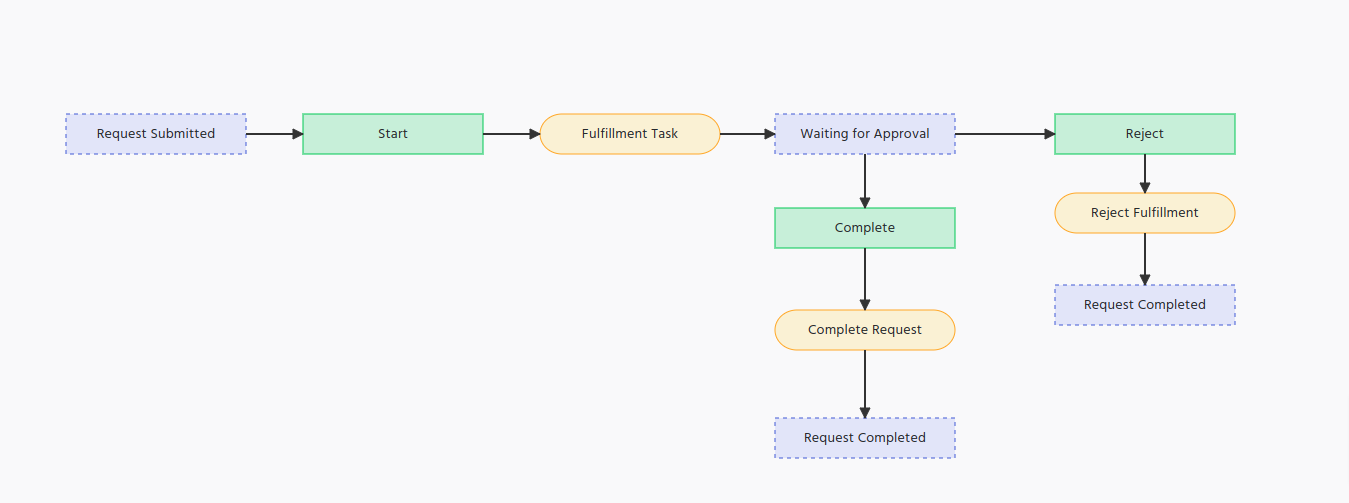
- The Fulfillment workflow starts with the State Node (Request Submitted)
- Start Node (Action node) is the 2nd node, which states that the request workflow has been started
- In the next step, Fulfillment Task needs to be generated. Therefore Create Task operation node is used here to generate the Fulfillment task.
- Now the request is waiting for the Fulfilller to take action on the task generated. Waiting For approval state node is put here to denote the state of the request.
- Now from here, either the request can be rejected by the fulfiller or the request can be approved.
- In case of Rejection flow:
- Reject Action node is provided and then the Request Completed state node to denote that the request is completed.
- In case of Approval Flow:
- Approve action node is for the fulfiller to approve the task
- Complete Request operation node to complete the request
- Request completed state node to denote that the request has been completed once the fulfiller has approved the request.
- In case of Rejection flow: