Creating a Role
This document would elaborate on how you can create a role in IDHub using the easy to use Role Creation Wizard.
How to create a Role
- Go to ‘
Manage Catalog' in the Admin Module of IDHub - Upon reaching the manage catalog page, Click on the
Create Rolebutton. - You will taken to the Role Creation Wizard.
Role Creation Wizard
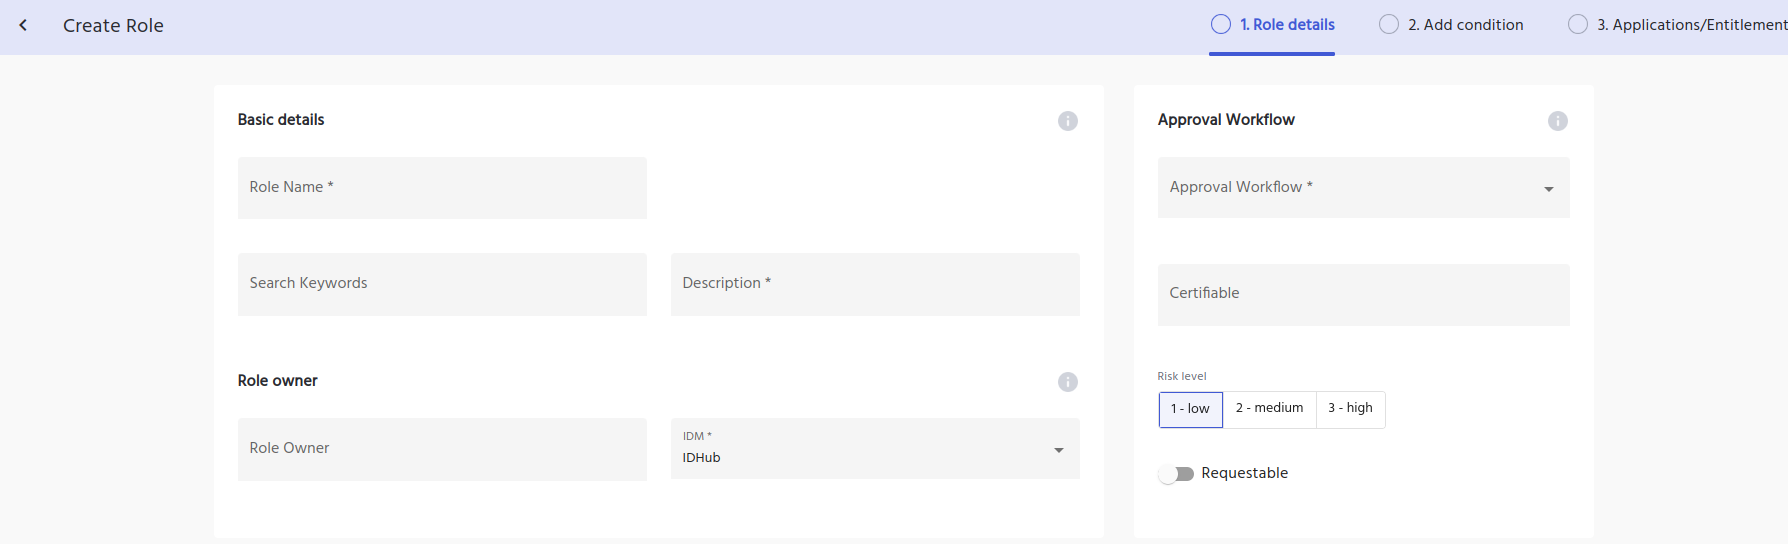
Understanding the Basic Info Needed in the Role Definition
This section requires basic information about the role like,
Role name- This is name of the role whose information is being entered into IDHub
Description- You can enter some description for the role you are on-boarding for better user understanding
Role Owner- Enter the name of the user who would be the owner of the role.
Approval Workflow- This is the workflow of the role that you can select from the drop-down.
Certifiable- This multi-tag keyword information may be applied as a filter in many different locations. The most frequent usage of this is to detect certain compliance-related tags, such as HIPAA, NERC-SIP, etc.
Risk Level- This metadata is used to communicate risk scores to users of the role. A person who has access to the role will have a total risk score, which will be divided into three categories: High, Medium, and Low. High is a risk score of 3, Medium is a risk score of 2 and Low is a risk score of 1
Requestable Toggle- This serves to determine if the role is available to end users for manual requests
Search Keyword- Here you can enter some keywords, which would help you refine and search for the role that you have created.
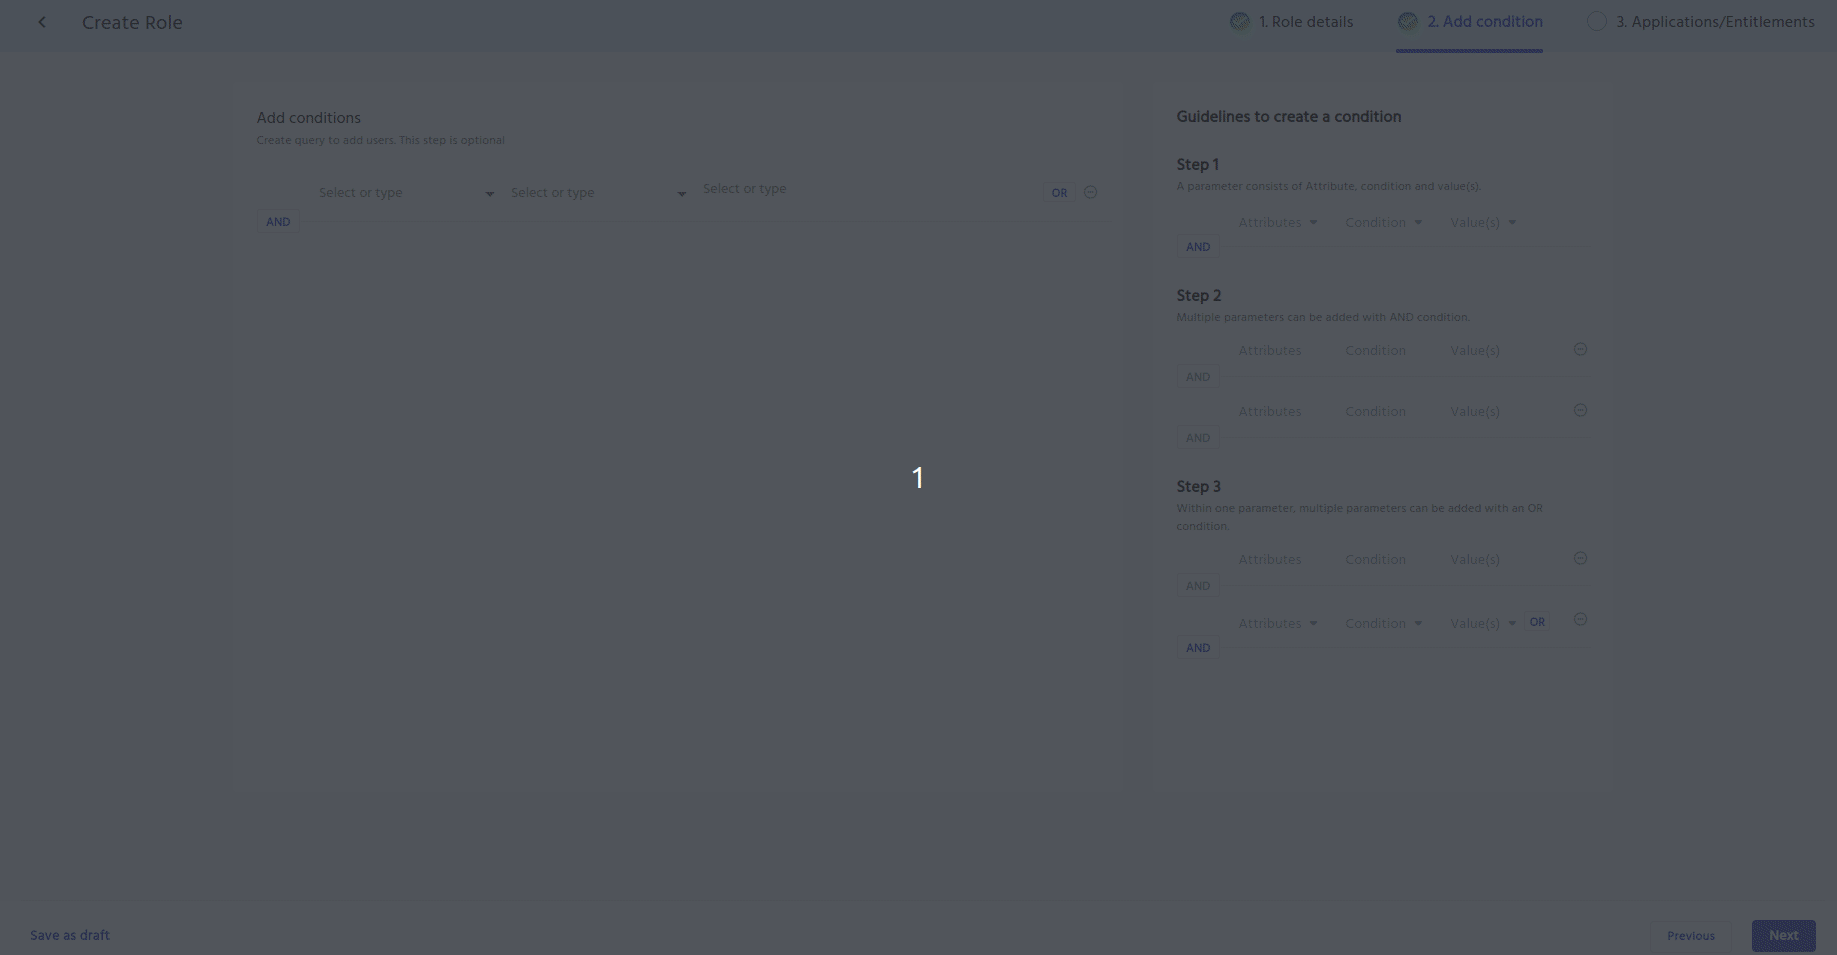
Understanding how to add a condition in the Role definition
IDHub provides an easy way to add a condition to the role, so that when that condition is matched the user would automatically get that role.
For instance: You might want that all users in the HR department must have access to the role.
Then you add the condition “Department = HR” (See below)
You can also add multiple conditions to the Role, to cater to some more complex scenarios. For instance you might want that users belonging to the HR department and whose location is NOT United States should get access to the role that you are creating. Then you add a condition as shown below:
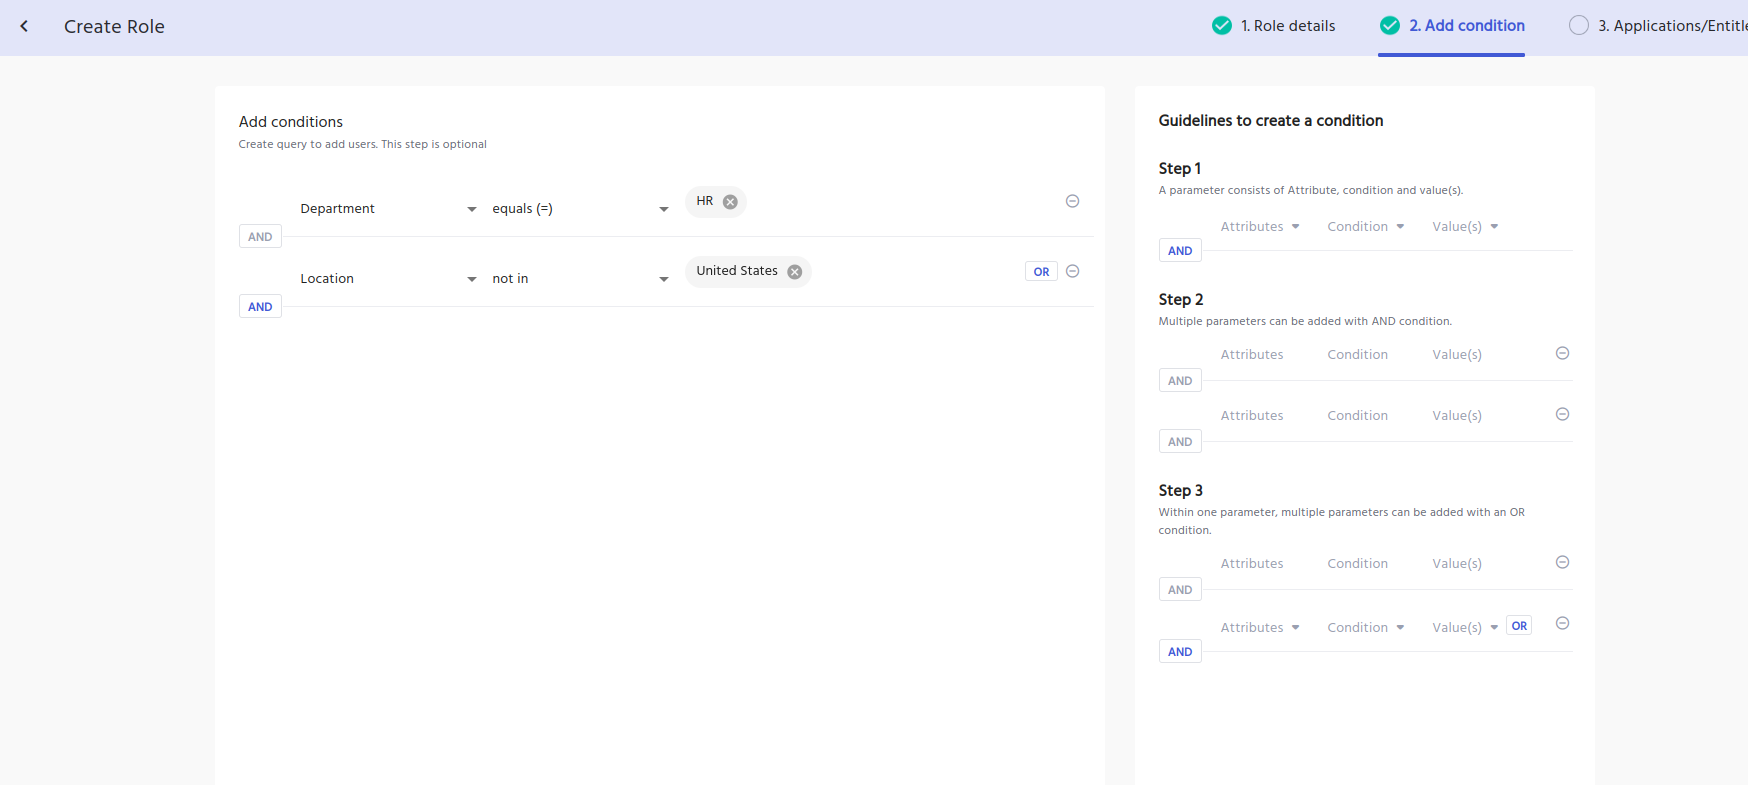
Click on the minus to remove any condition.
Select the Application/ Entitlements for the Role Definition.
Now the last step of creating the role definition is to add the application / entitlements that would be there for the role and when the role is provisioned for the user, then provisioning would be done for those items as well.
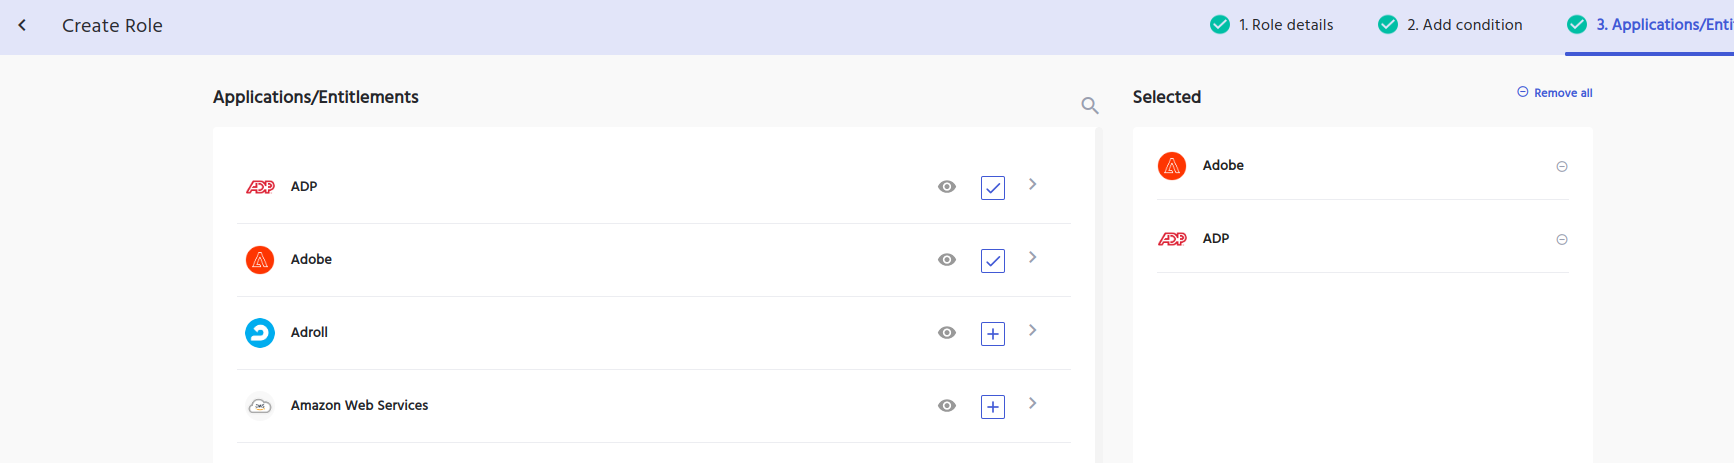
- Click on the plus button would select the resource
- You can also search for the items that you want to select by clicking on the search icon
- You can click on the eye icon, which will open a RHS showing the details of the application
- Click on the right side arrow for each application, which will show you the corresponding entitlements for that application below
- Click on the Remove all link to remove all the items that you have selected so far for the role.
Understanding the approval process
After entering all the required information, the request is submitted for approval to the ‘Access Manager' of IDHub.
This approval and onboarding process is managed by an OOTB workflow named ‘Access Manager Workflow’
Access Manager upon going to the ‘Tasks' page upon logging into IDHub can Claim and Approve the task.
Post approval, the role is successfully onboarded with desired configurations. The newly added role can be viewed in the ‘Manage Catalog' section of IDHub after approval