Okta Connector Tutorial
Purpose of the Guide:
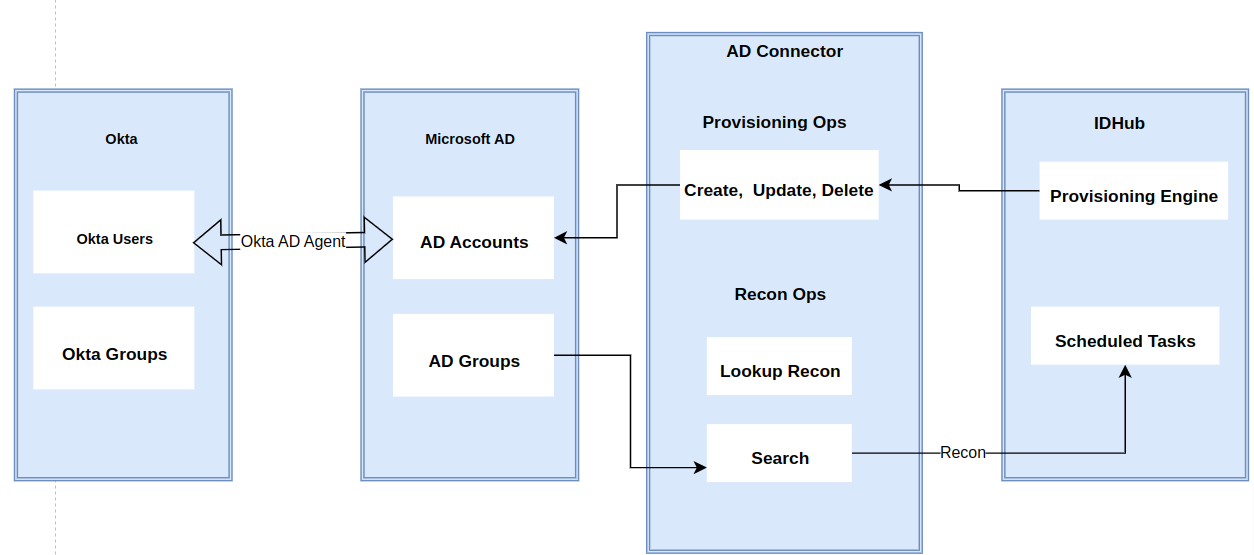
This guide talks about how to connect Okta with IDHub and sync Okta users and groups to idhub and vice-versa.
Okta’s inbuilt AD integration flow is used to connect okta with the AD server
Target Audience of the guide:
This guide is for those users, who would like to sync Okta users to idhub and vice-versa using IDHub Okta connector.
Pre-requisite:
- Okta account
- IDHub account.
- Microsoft Active Directory account.
- Setup Active Directory with Okta Active Directory agent. (discussed below)
Flow for the Okta-AD-IDHub Integration
Set-ups required in Okta
First of all you need to connect Microsoft Active Directory account to Okta. The steps are described below:
- Go to your Okta Admin Dashboard
- Then click on the Directory ( under the left navigation bar)
- Then click on the Directory Integrations
- Then click on Add Directory → Add Active Directory
In this guide we are assuming that you have a Microsoft Active Directory Account.
Downloading & Installing the Okta agent installer at AD server
You will be directed to the following page:
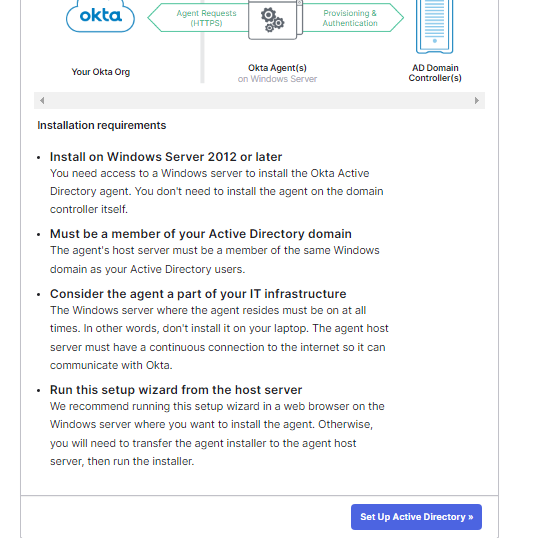
Click on the Setup Active Directory button, After that click on the download agent button as you can see in the screenshot below:
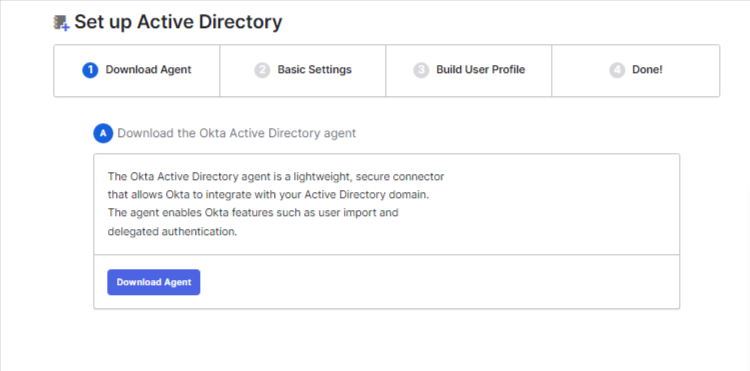
The okta agent file would be automatically downloaded. Now you need to login to your AD server and install the agent at your AD server. Make sure that you login to AD server as an administrator. While installing the agent at your AD server, it would ask for the Okta organisation URL, which is given in the screen below:
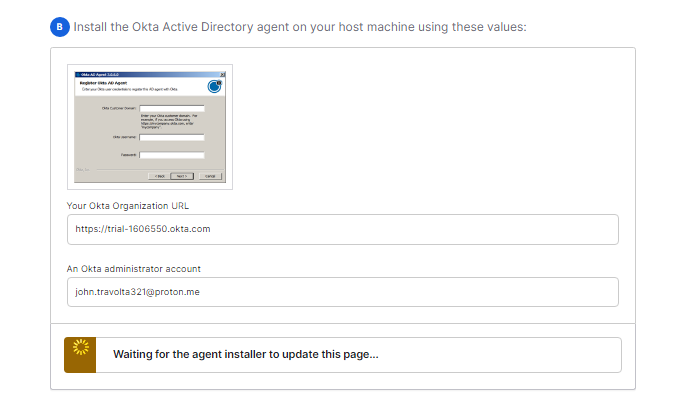
Once the agent has been successfully installed and the agent has been started on your AD server, this page would automatically refreshed and the following would be shown:
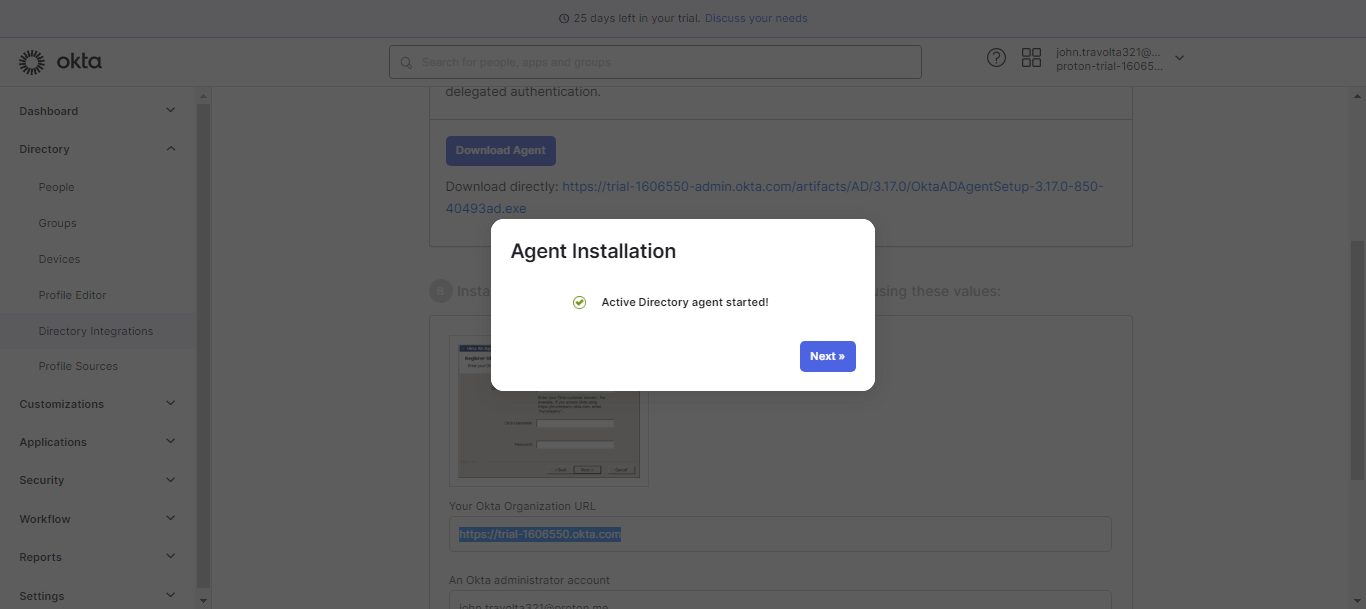
After that click on the next button and you would be taken to the next screen which is the Basic Settings screen.
Basic Settings Configuration
This is the basic settings screen, where you would be able to set and select the OU (organizational units) from where you need okta to sync users from. For example: As you can see in the screen shot below, if the users in the AD server lies under ‘IDHub’ folder → users → employees, then that you need to select the same in this screen. Similarly as per the location of the groups in your AD server you can do select the required folder for the groups too in this screen.

Building User Profile
In the next step, Okta will sync users from your AD server instance and show that in the following screen.
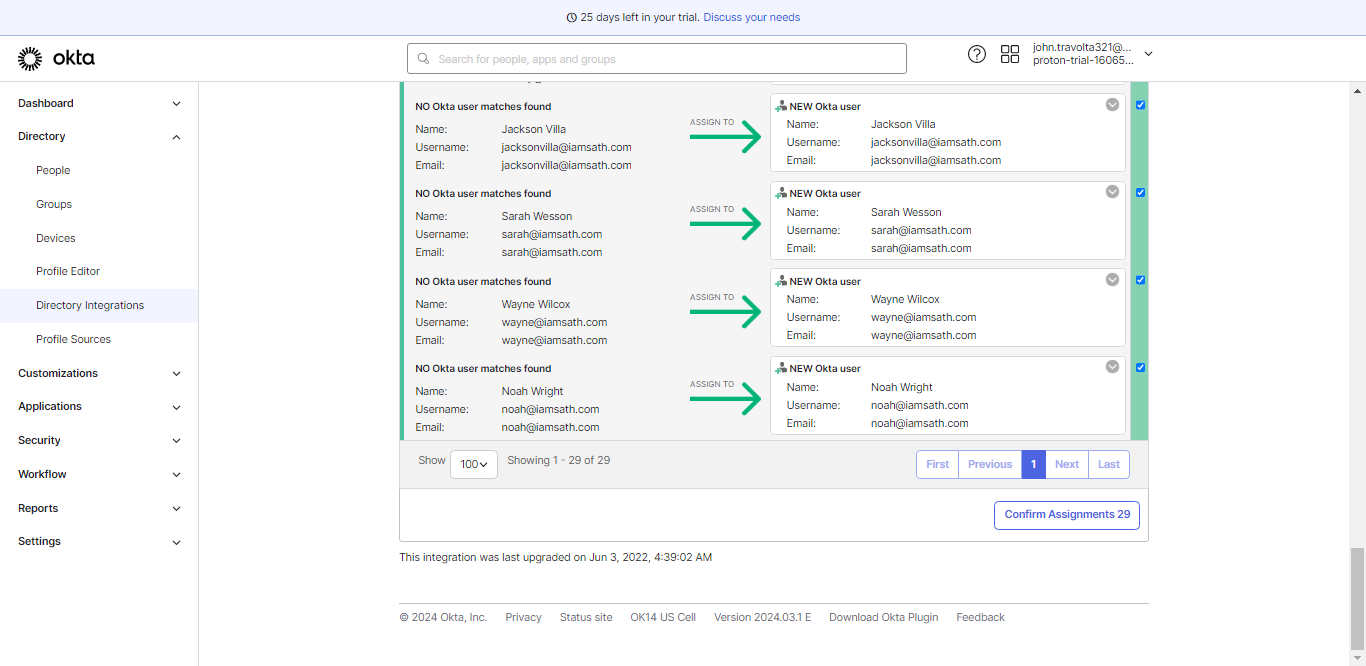
Here okta shows the details of the users and if there is no match, it shows new okta user would be created. And if there is match, it also shows that there is a match. Now for every option, you have the option of either ignoring the user or over-write the details with the existing user or simply create the new user in okta.
After selecting the required configuration, click on the button “Confirm Assignments”, okta would show the following screen:
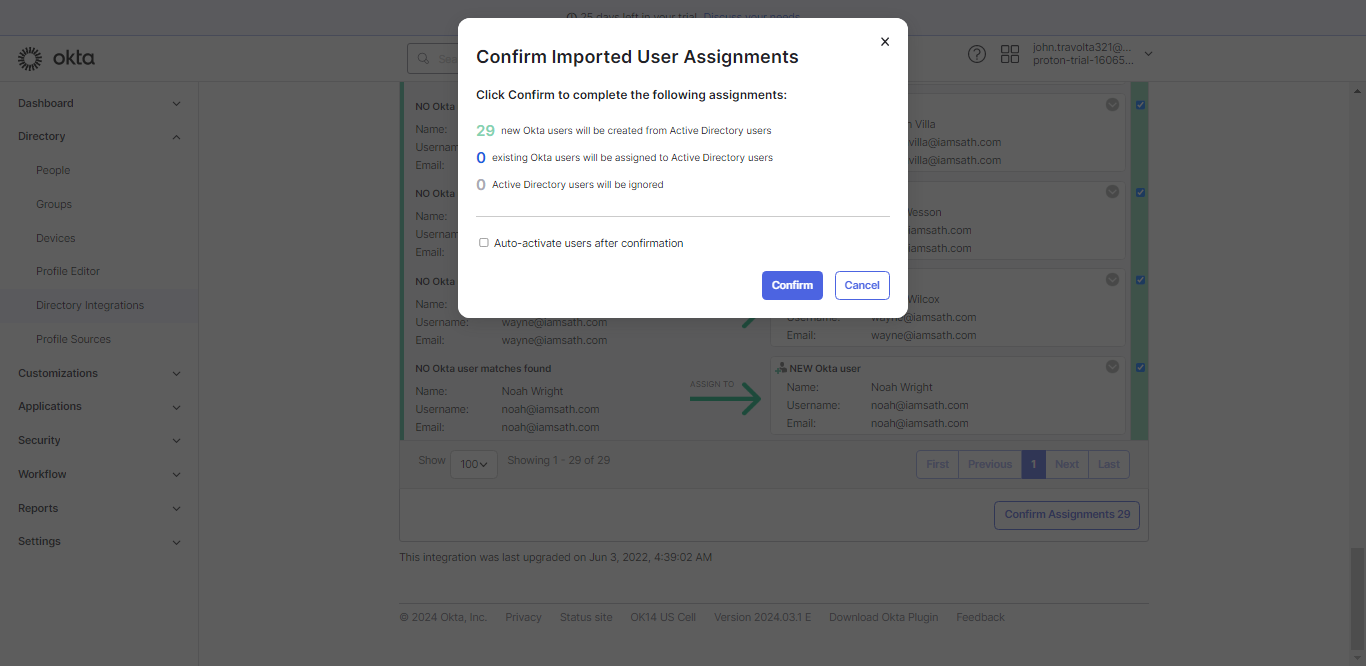
In this screen, this shows that 29 users would be synced from AD to OKTA, you can confirm the same or continue to make changes in the previous screen. Once you click on the confirm button, Okta would create or update the users from your AD server instance accordingly.
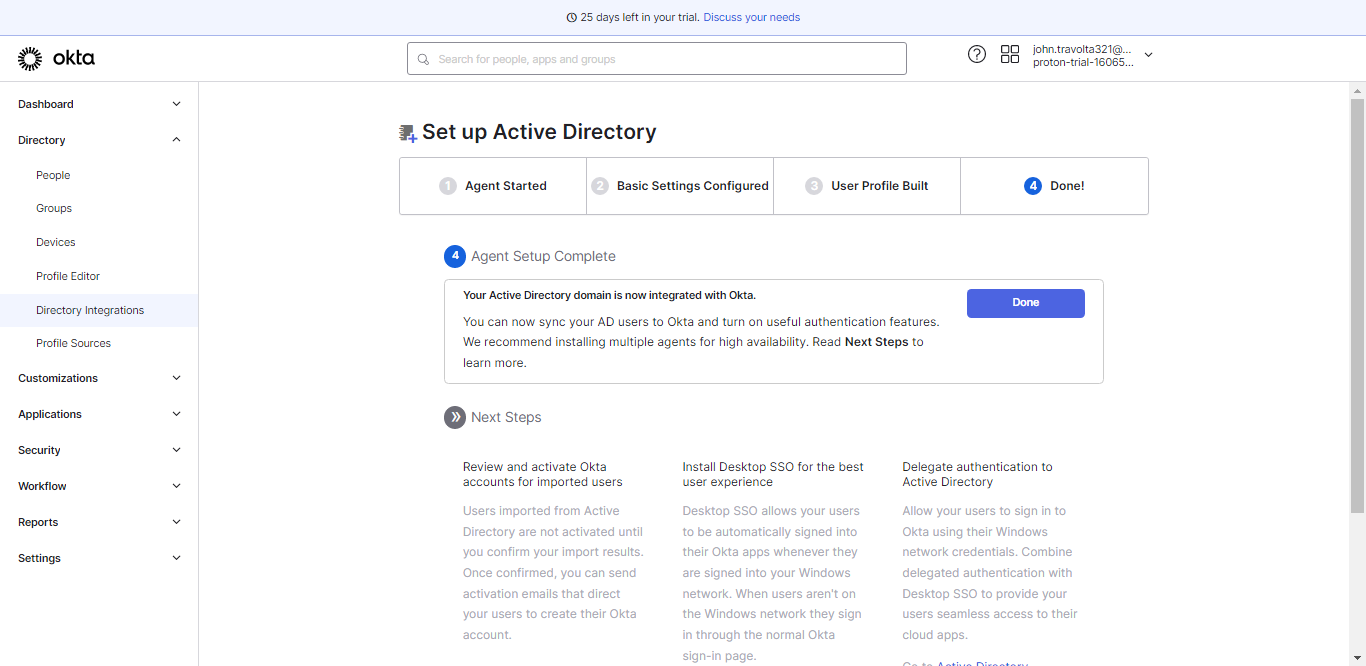
Setup Complete
This is the confirmation screen, which shows that Okta has successfully synced users from your AD server.
Onboard AD connector in IDHub
Now the next step is to onboard AD connector in IDHub, Click Here to learn more about how to install AD connector in your IDHub tenant. Once you have installed AD connector, you can provision any IDHub users to AD and that user would also be automatically synced to Okta as well.
When you do recon, data will come from AD server and it will NOT trigger a sync from Okta to AD. This is upto Okta configuration. You have to configure this on Okta for triggering a sync from Okta to AD.