IDHub and Entra ID Field Test: Integration and Application
Purpose of the document
The document provides a detailed guide on integrating Entra ID with IDHub using the connector onboarding wizard. It covers prerequisites, creating a tenant in IDHub, onboarding Entra ID, managing user provisioning and revocation, and performing certification checks.
This document is valid for IDHub version 23.5.0 or later. Also, please do note that, this document is for testing purposes.
Who can use this
The guide on integrating Entra ID with IDHub is primarily intended for IT professionals and system administrators who are responsible for managing user access and security in organizations. These users should have a basic understanding of Microsoft Entra IDand be subscribers of IDHub. The guide is particularly useful for those looking to streamline their user provisioning and revocation processes through IDHub's features, ensuring a seamless integration with Entra ID.
What you will learn in the document
- What are the Prerequisites?
- How to create a tenant in IDHub?
- How to Quickly On-board Entra ID using the On-boarding Wizard
- Pick a connector
- Pick a Tenant
- Add your application credentials
- Verify & Install
- On-Board Application
- Verify the onboarded Entra ID Application
- Creating a Birth-right role & User and checking auto provisioning
- Removing User & Checking Auto Revocation
- Add a User in Entra ID & Check Auto-Provisioning
- Running Certification & Checking Auto-Revocation
- Ending Notes
What are the Prerequisites?
You would need a IDHub Subscription and your tenant before you can on-board Entra ID into IDHub. Below are the steps of getting IDHub Cloud subscription and creating a tenant.
How to create a tenant in IDHub
- Go to Sath Website
- Under the pricing main menu click on Try
- You will be redirected to the Cloud trial signup page
Enter Basic Details in the signup page
Please enter your basic details here in order start your IDHub Cloud trial subscription
- First name
- Last name
- Password
Enter the Tenant name
- After signup you will be asked to enter the tenant name.
- Please enter the tenant name in this page.
- Tenant name will be used to login to your tenant from the IDHub cloud page.
- Tenant ID is auto generated based on the tenant name that you have entered here.
- This serves as a unique identifier for your tenant and will be used by our Support team.
- You can also enter a different Tenant ID, if needed.
Click on Agree and start now button to complete the signup process.
If you already have a sath account, then you can click on the link “Sign in with a different sath account”, which will take you to the log out page. You can log out from there and then re-login from your existing sath account.
Get an email with credentials to login to your IDHub Cloud Tenant
After this you will get an email with your IDHub tenant URL and the credentials to login as you can see in the screenshot below:
How to On-board Entra ID using the Connector on-boarding Wizard
- First you need to go to the sath website and at the top navigation menu go to identity connectors and then click on Entra ID.
- Then you will be taken to the connector details page, in this case this is the Entra ID connector details page. Click on the button deploy in the cloud.
- You will be redirected to the IDHub connector onboarding wizard.
Pick a Connector
At this point you will have to select the connector that you want to onboard. You need to select MS Entra ID from the dropdown. Then you enter the name of the connector. This connector name will help you identify the connector. Click on the next button.
Pick a Vault
After that you will be directed to the the pick a vault page.
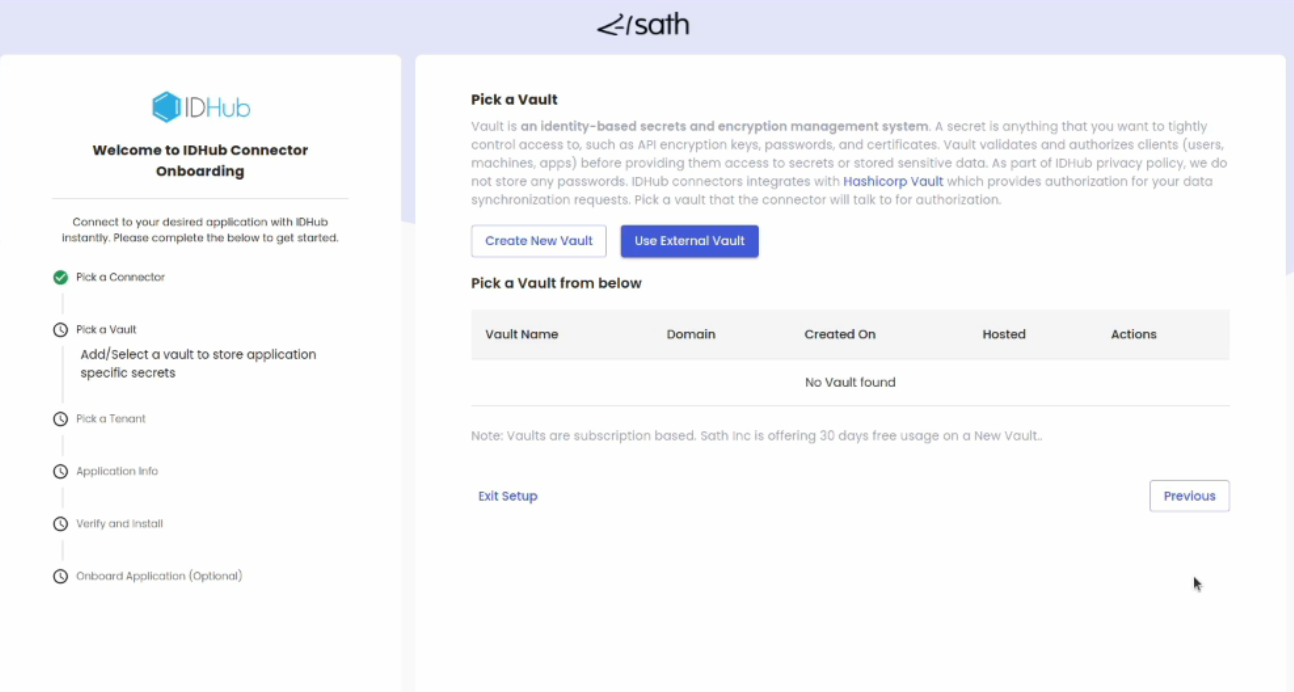
Here you can either create a new vault or you can use the external vault (If you already have a vault subscription). In this video, the Create new vault button is clicked. A pop-up window will open, where you need to enter the vault name. Click on the get vault button after entering the vault name.
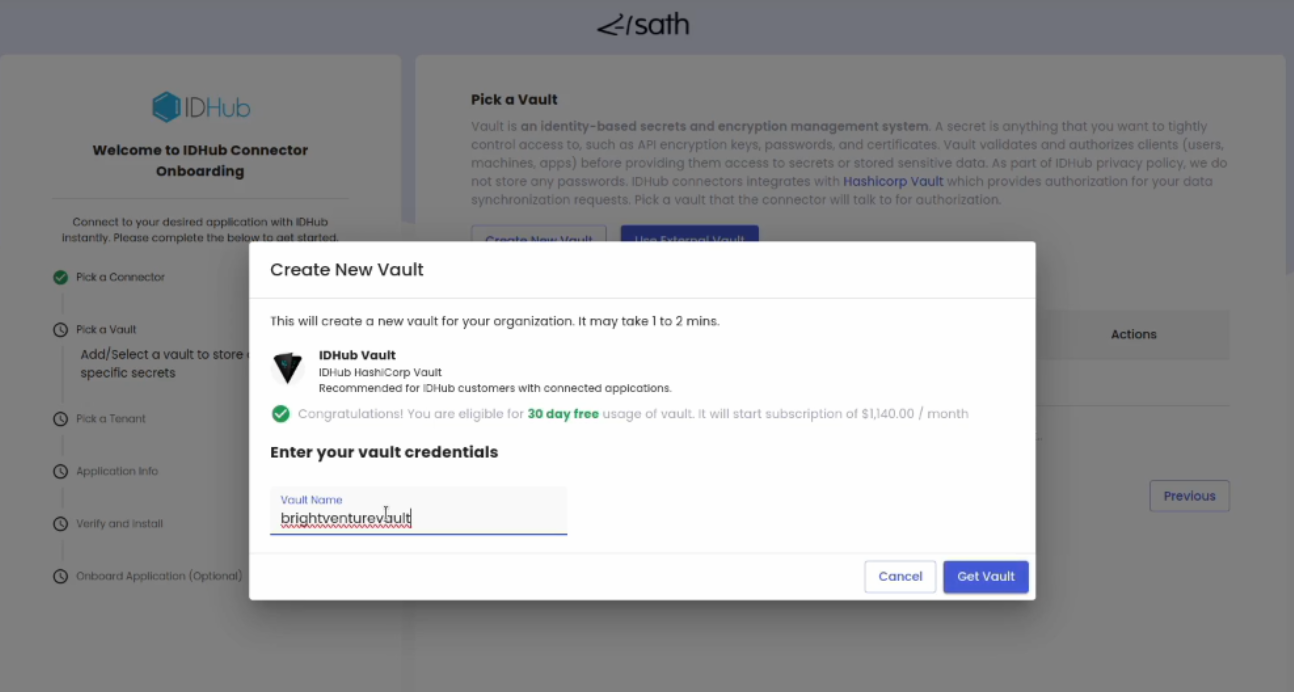
We provide you with a 30 days free trial of the vault subscription. After the trial expiry it will be charged on a monthly basis.
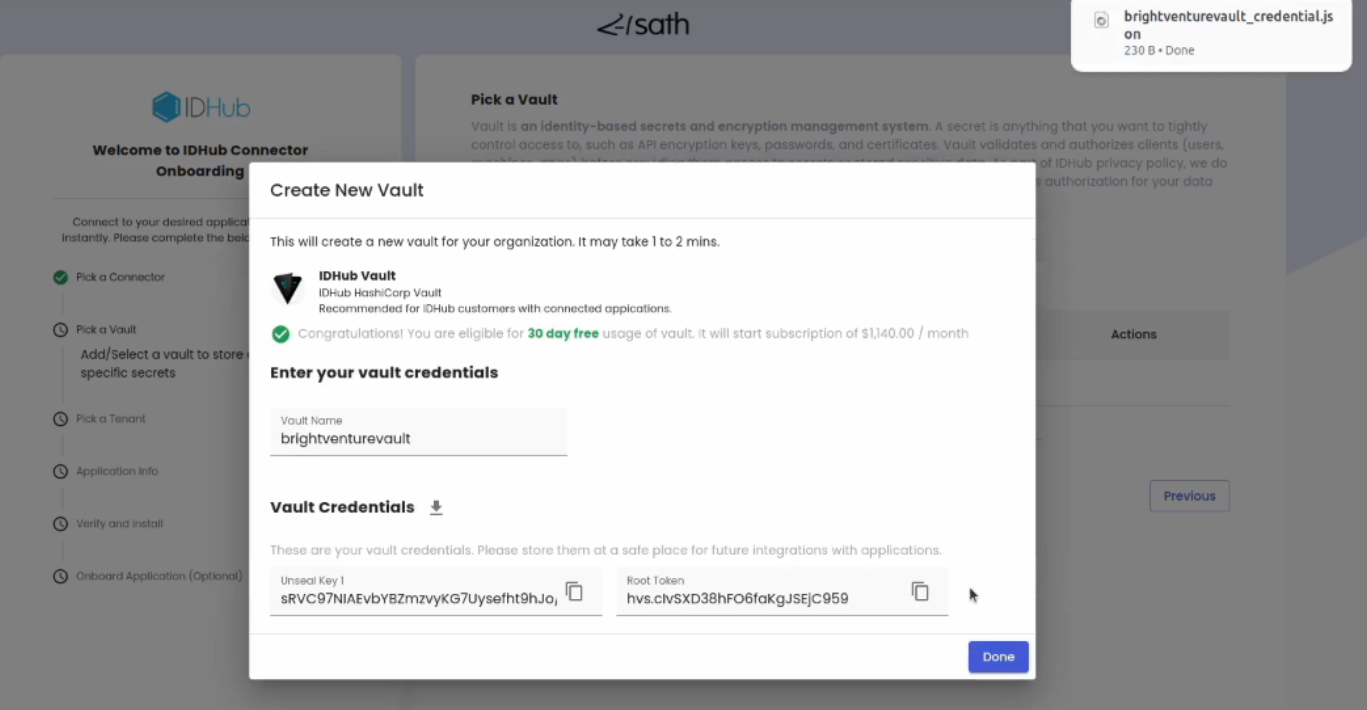
Another pop-up window will open, and it will show the unseal key and the root token creds for the vault. A file with the credentials for the vault will also be automatically downloaded. Keep this in a safe place for future reference and integrations with other applications. Click on the done button.
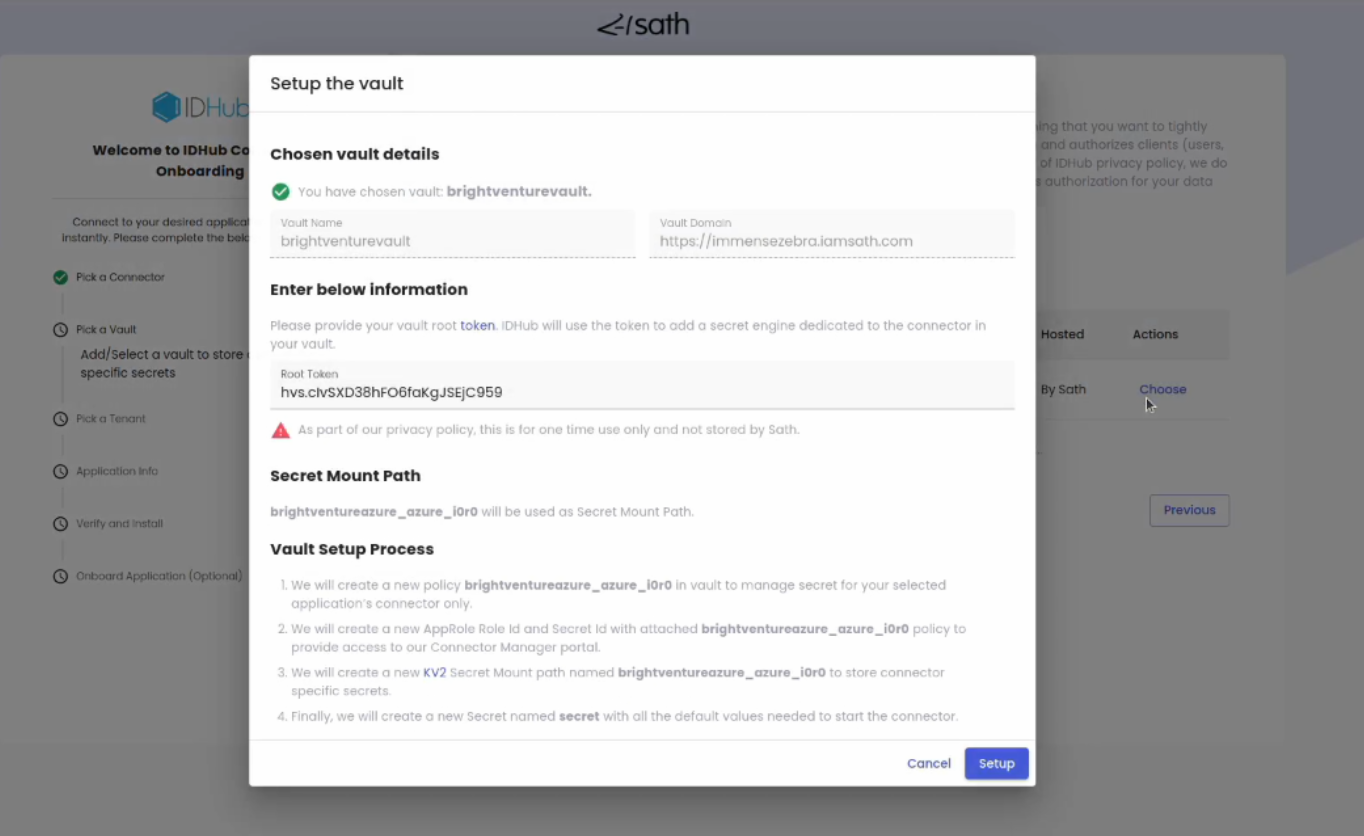
At this stage, click on the choose link and it will display the setup vault pop-up window. Here the root token will be automatically populated since this is the first time setup. Subsequent setups will require you to enter your root token creds for the vault. Click on the setup button.
Pick a Tenant
In the next screen you will have to select the tenant where the connector will be installed. Note that if you do not have a IDHub subscription, then the setup will first ask you to get a IDHub subscription before you can proceed with the setup.
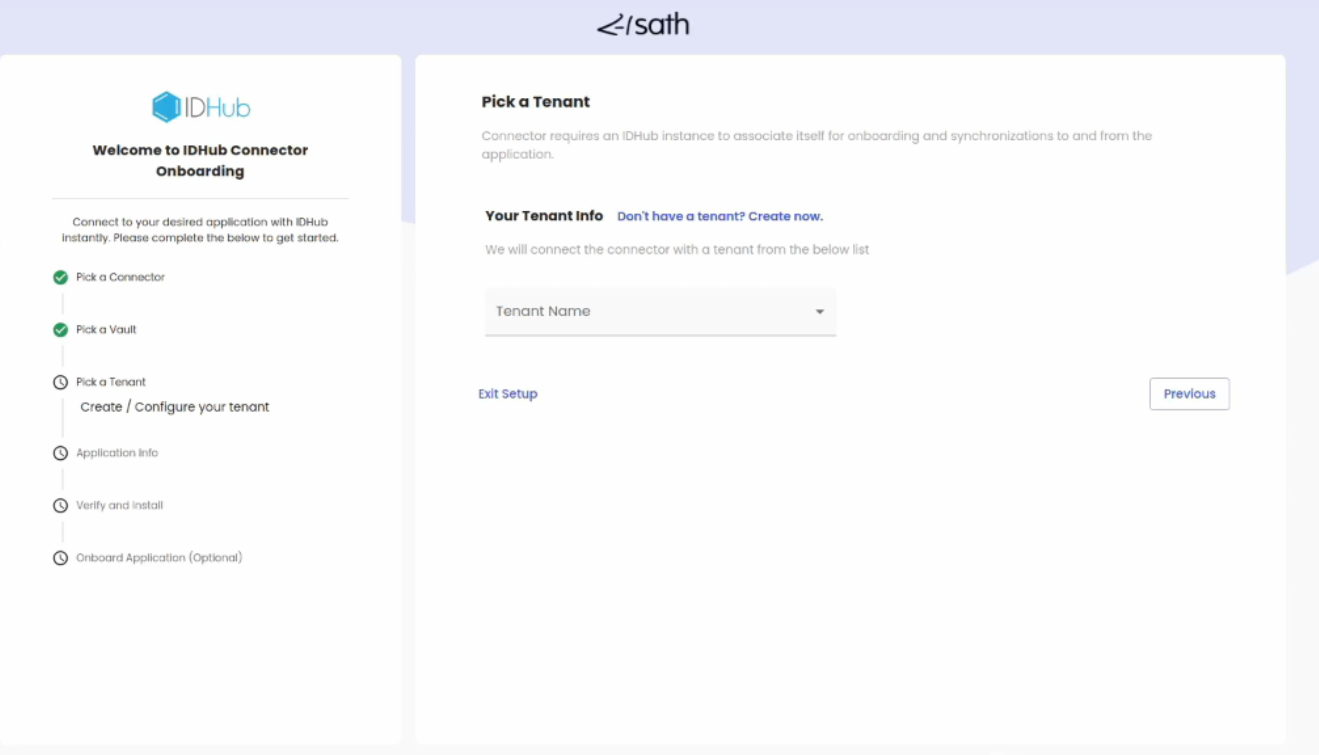
You select the tenant from the drop-down and click on the button Verify Tenant. Please make sure that you have the admin credentials of your tenant to proceed with the next steps.
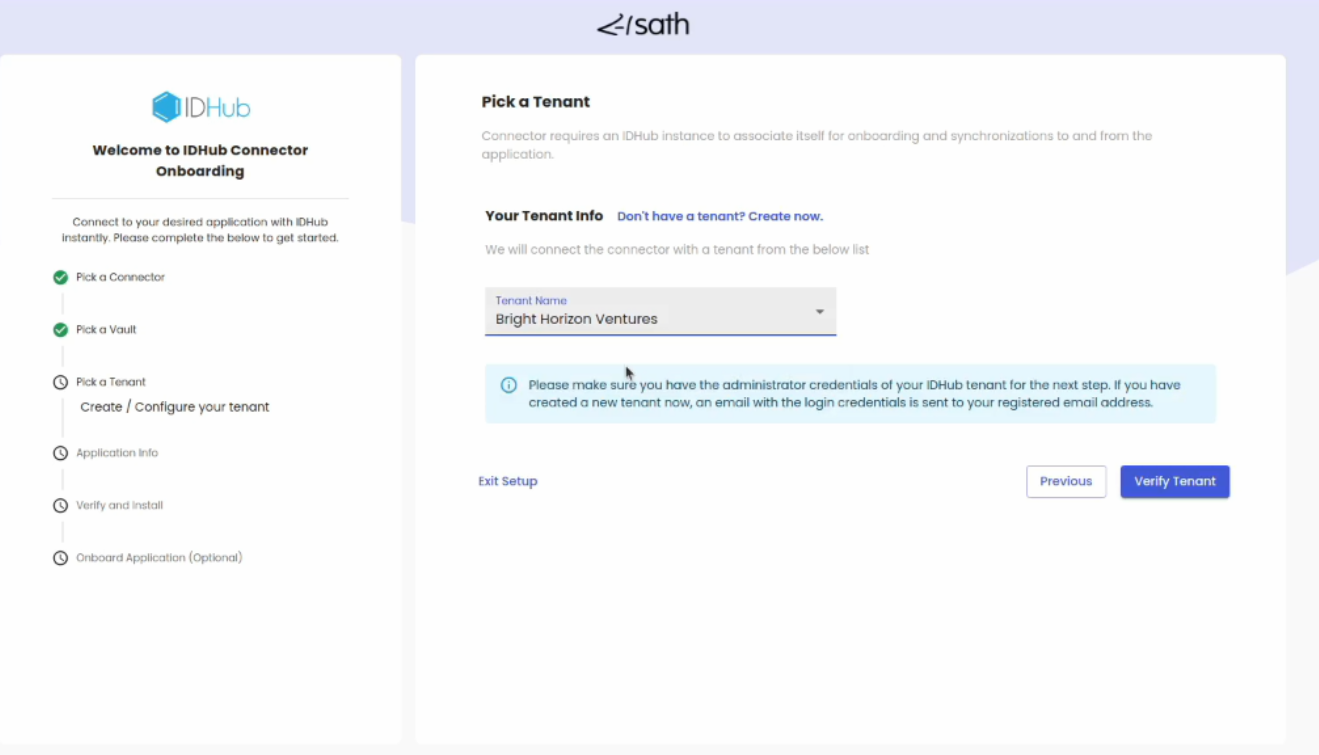
Now another pop-up window will appear and it will ask you to enter your admin creds for the tenant. Note that, if you are already logged into your IDHub tenant, the setup will verify the tenant and the pop-up window will automatically close.
Add your Application Credentials
Now the next screen set-up will ask you to enter the creds for your Entra ID instance. For Entra ID setup, you will have to enter the Entra IDClient ID, Entra ID Client Secret and Entra ID Tenant ID. Click on the submit button after entering the required information.
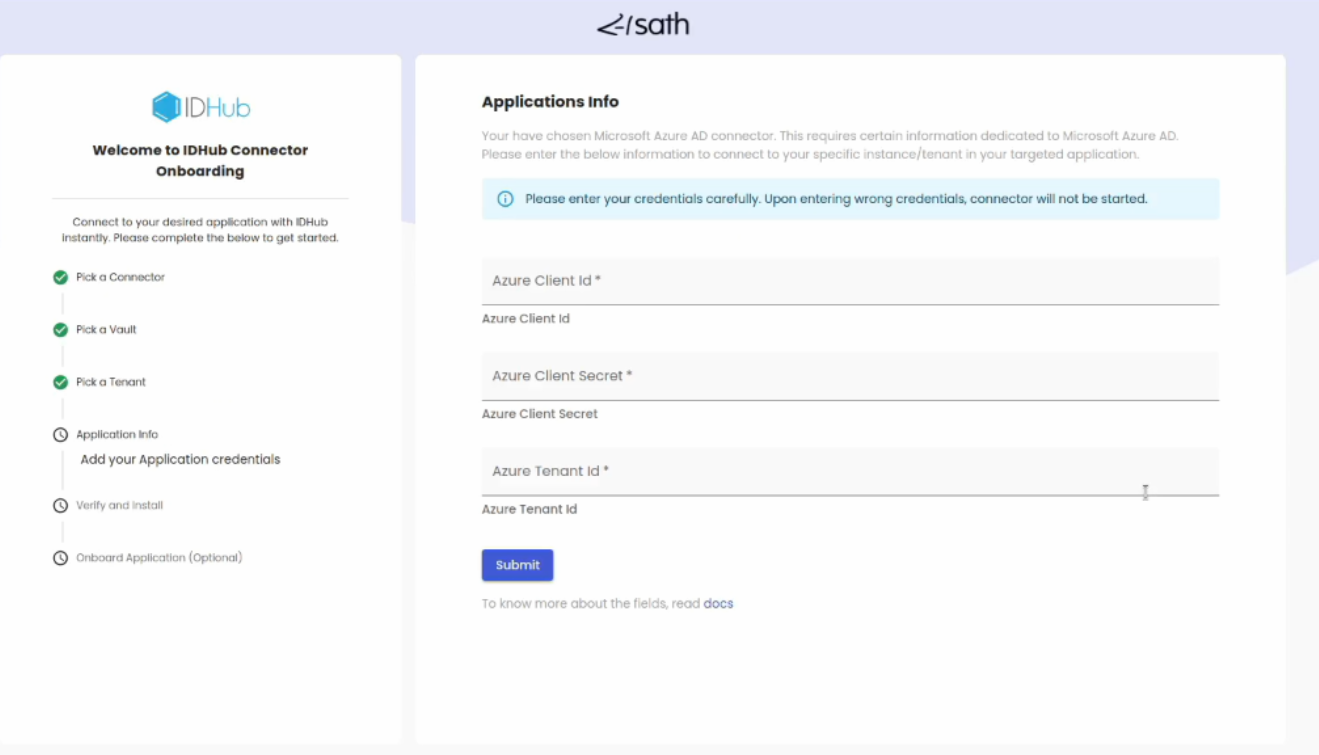
You can also click on the documentation link at the bottom of the screen to get more information about how to set up your target system and get these credentials.
Setup will then add the target system configuration details and then click on the set-up vault button in order to proceed further
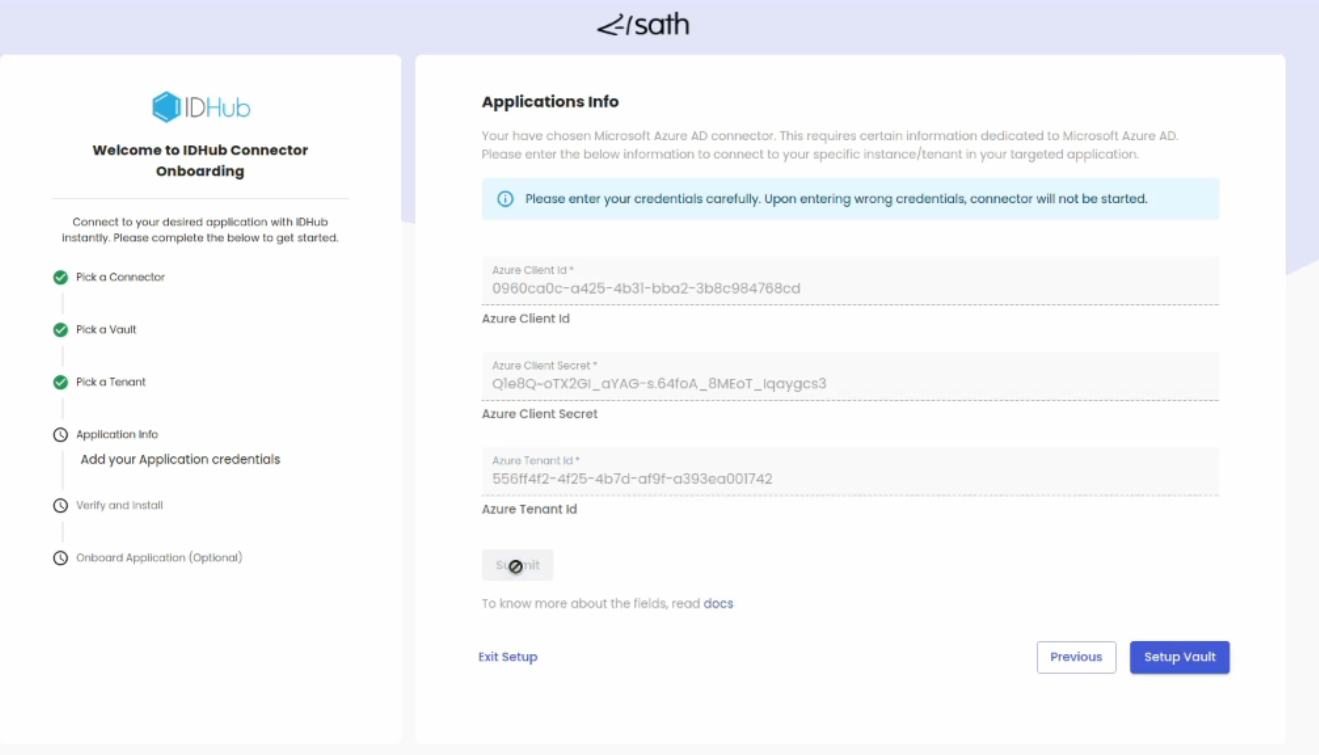
Setup will then automatically download the RoleID and secretID of the which will help you to log into your connector manager system. Click on the next button.
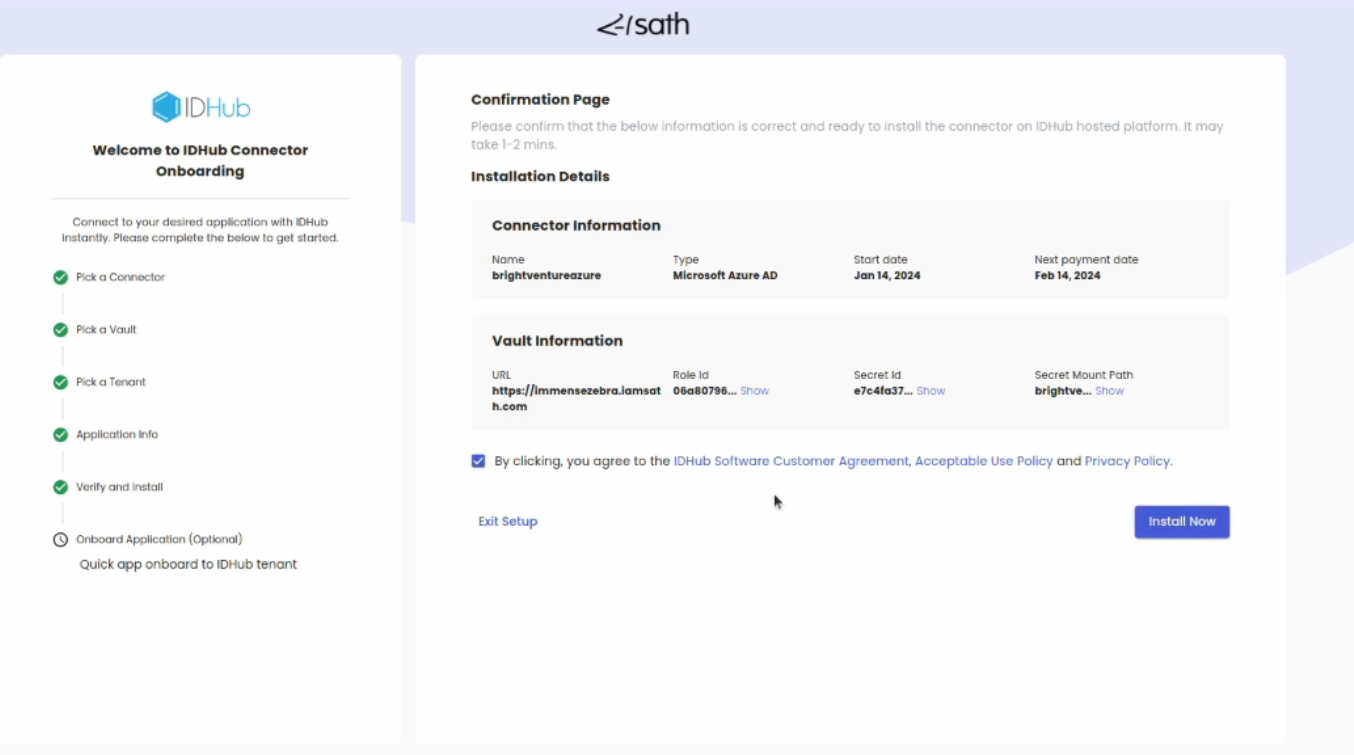
Verify & Install
Next is the confirmation page and will display the installation details of the connector. Click on the agree to terms checkbox and then click on the button install now. The setup will then take some time to install the connector
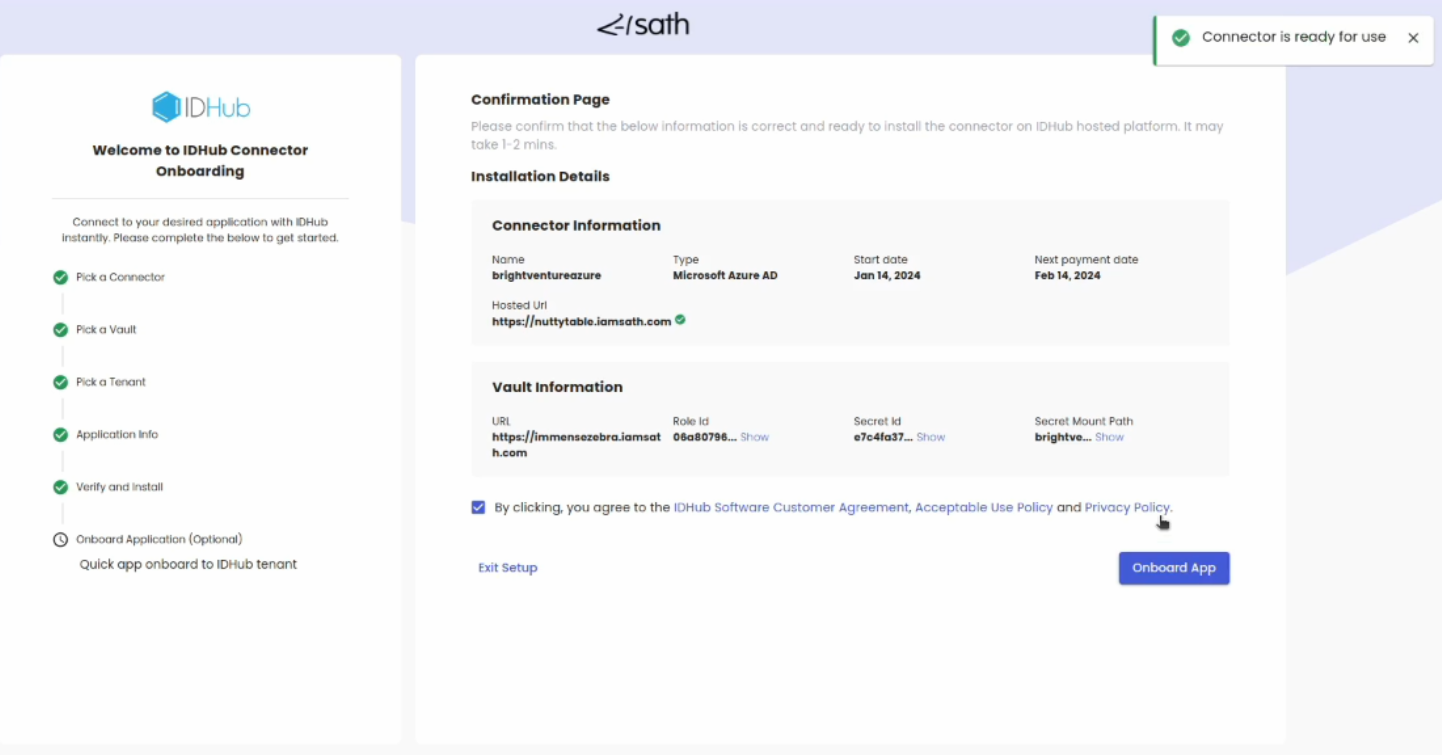
A connector is installed successfully and is ready to use, a button is displayed to onboard the application. This is the optional step. This enables you to on-board the Entra ID application to your tenant from the set-up. Click on the on-board app button.
On-Board Application
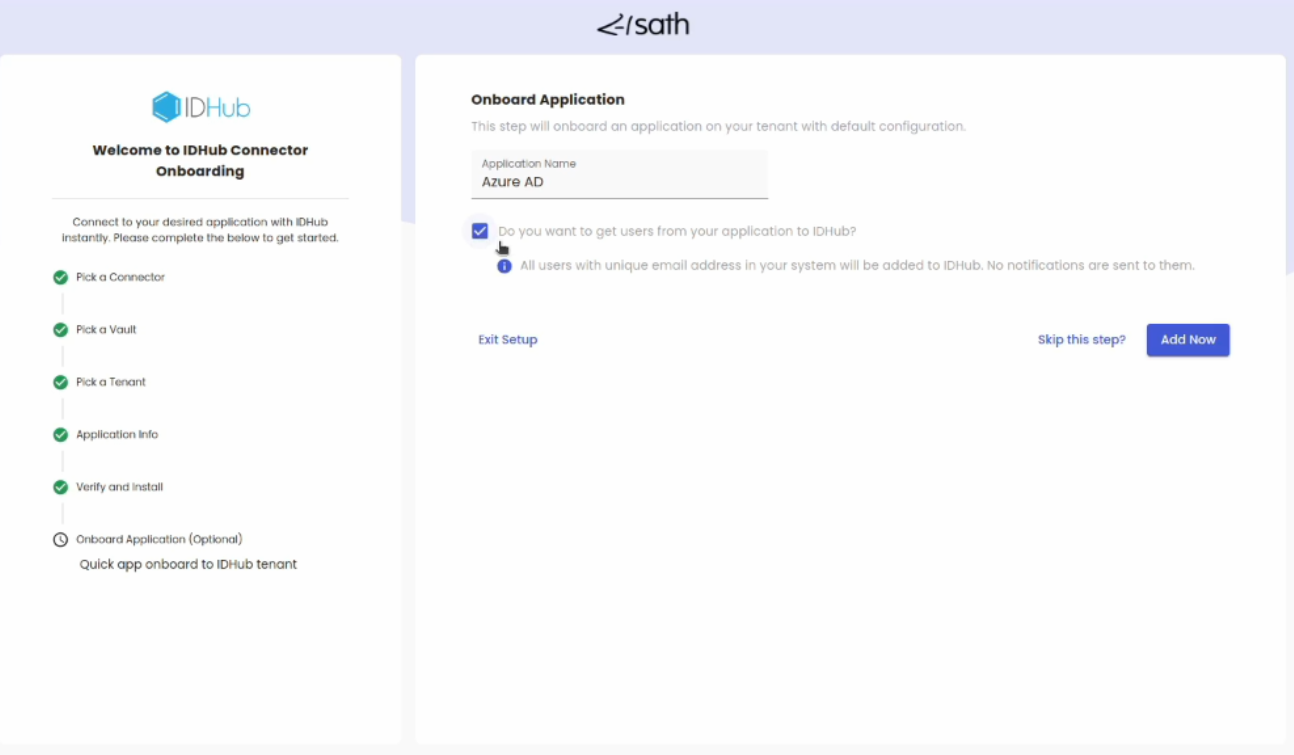
In this screen enter the name of the application. If you want to get users from your Entra ID instance to IDHub then you can click on the checkbox below as well. All users with unique email addresses will be added to IDHub. Now click on the ADD now button.
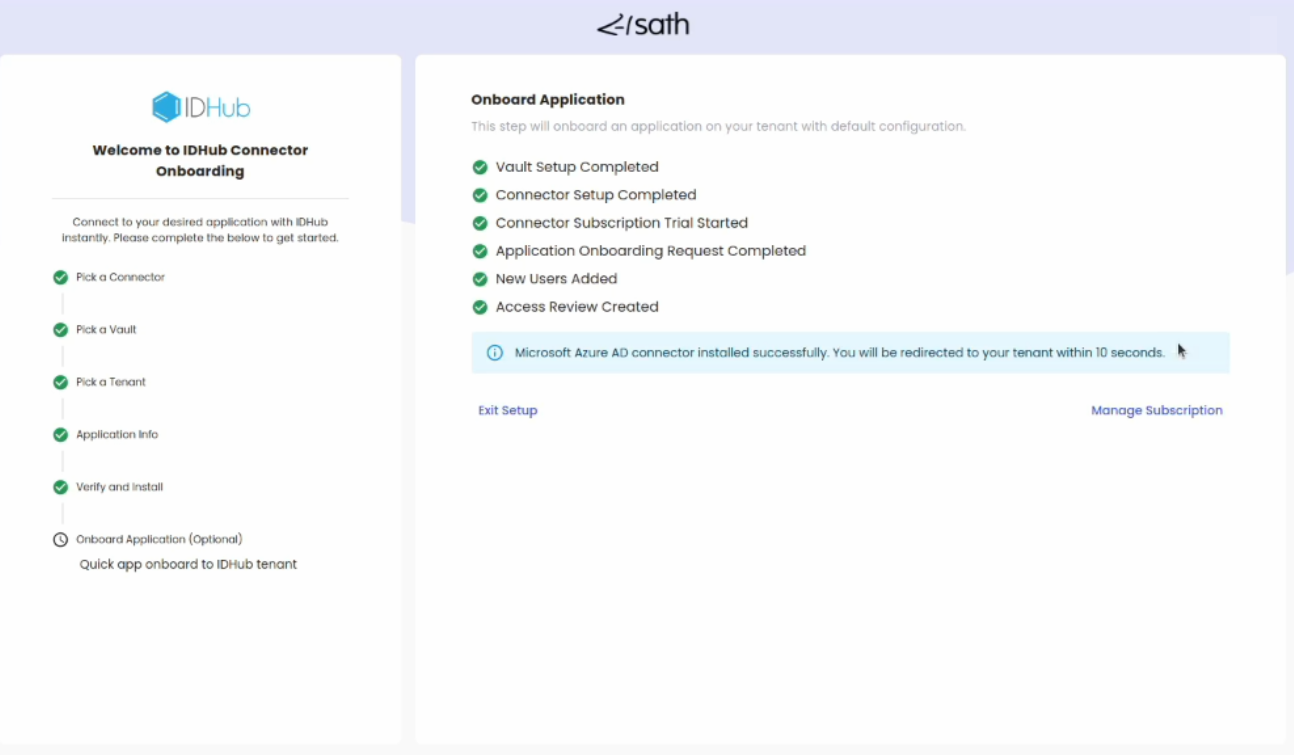
Setup will take some time and display the confirmation message. At this stage, Entra ID is successfully installed and optionally your Entra ID application is also onboarded to IDHub.
Verify the onboarded Entra ID Application
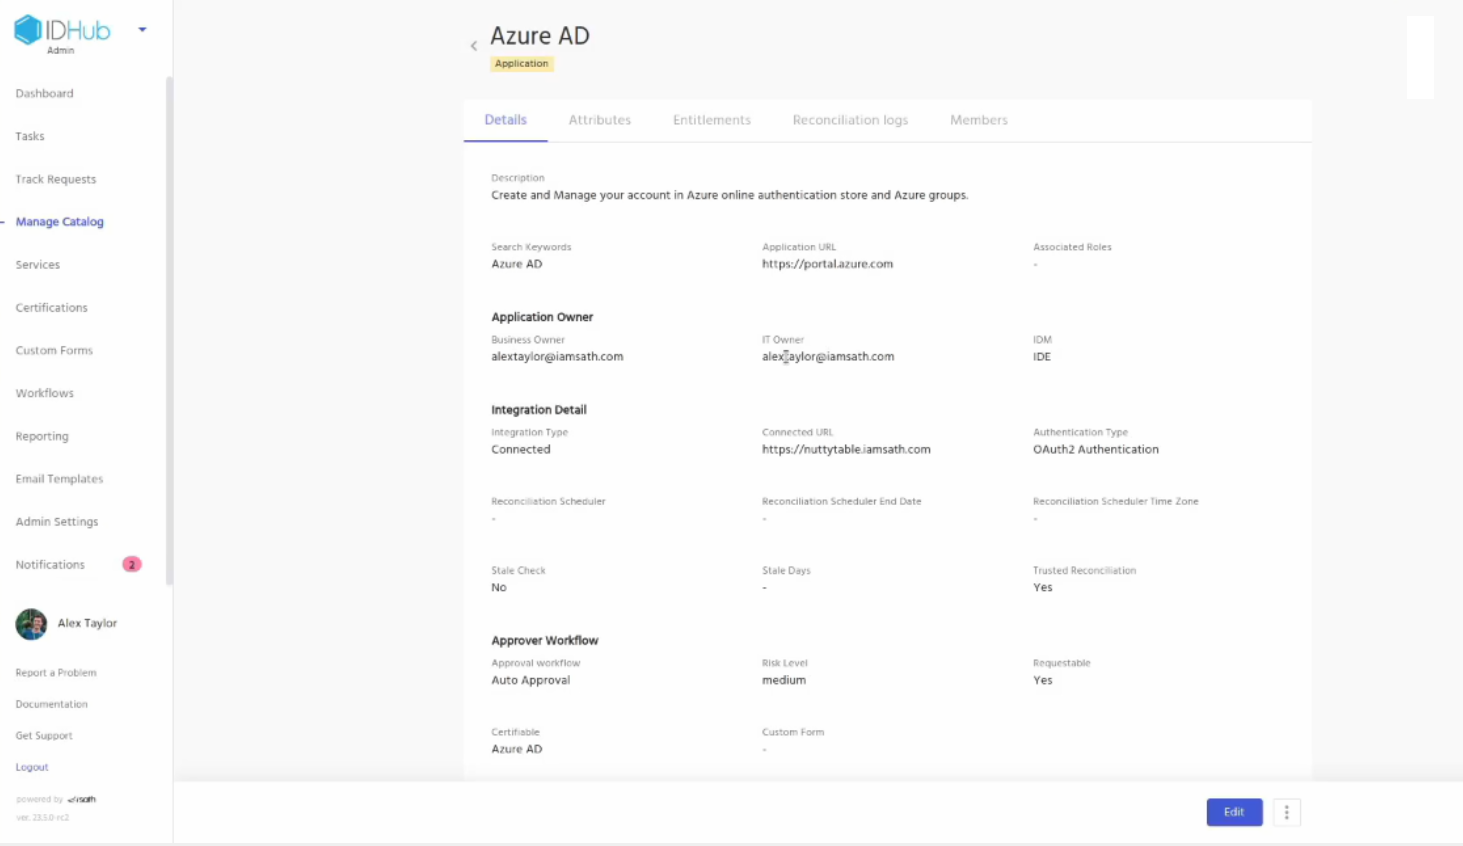
Now, log into your IDHub tenant and then click on the Manage catalog. You will see the Entra ID application. Click on it. You can see the details of the application
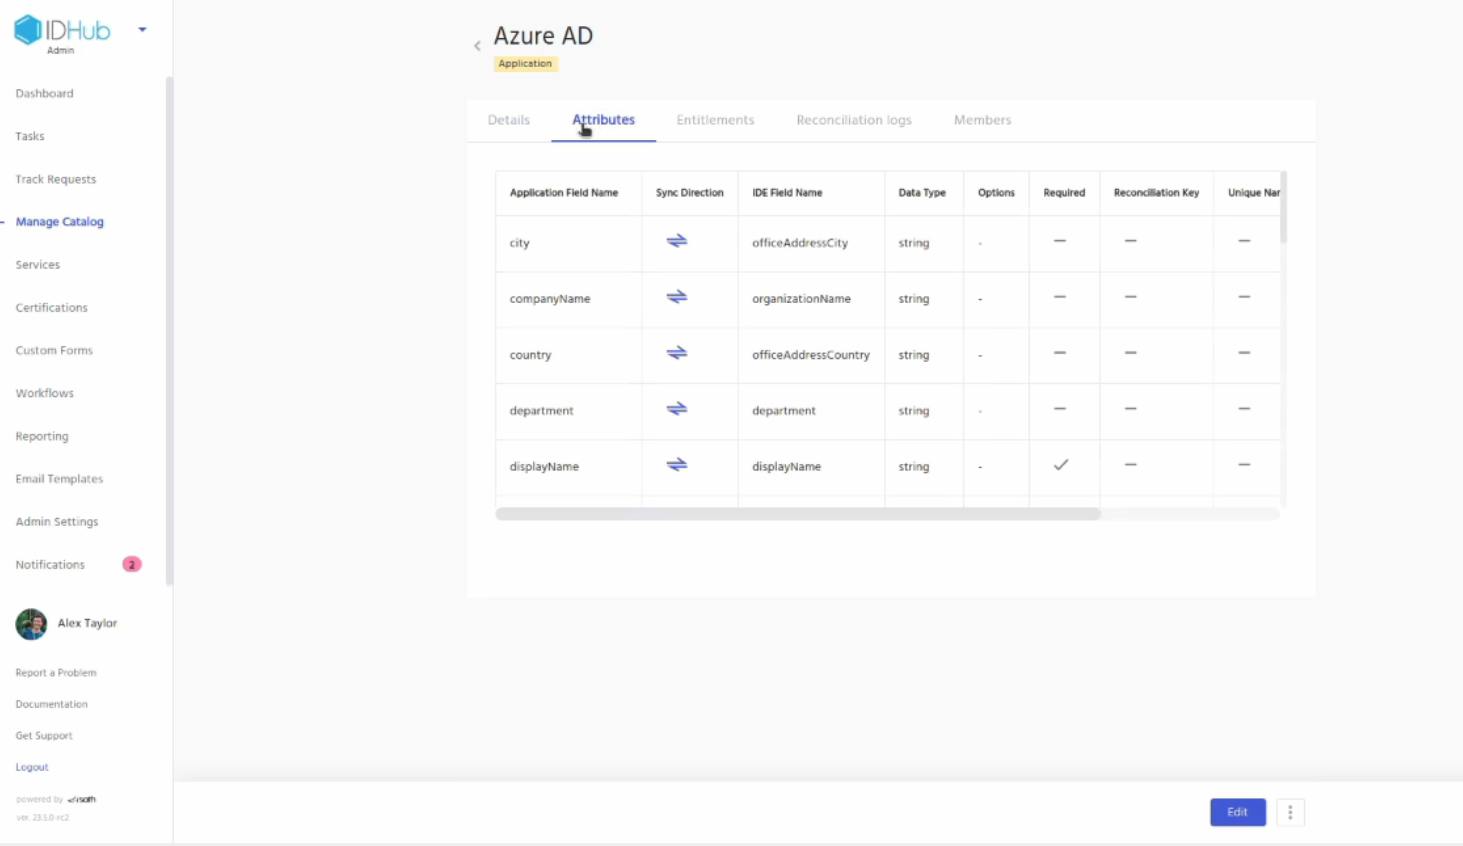
Click on the attributes tab and it will show you the different attributes of the application along with it’s sync directions.
Click on the Entitlements tab and it will show you the different Entra ID groups as entitlements.

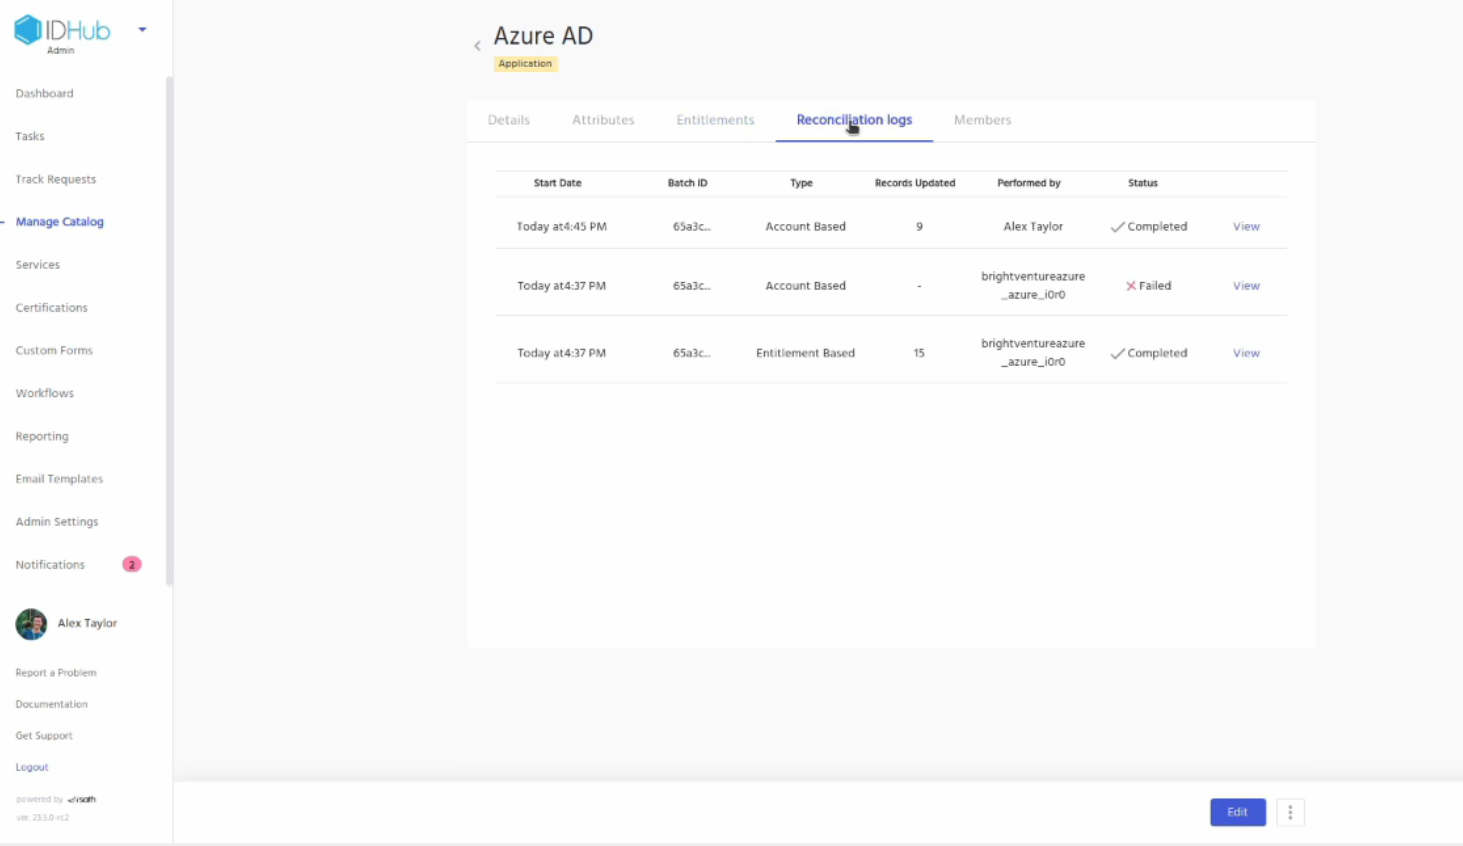
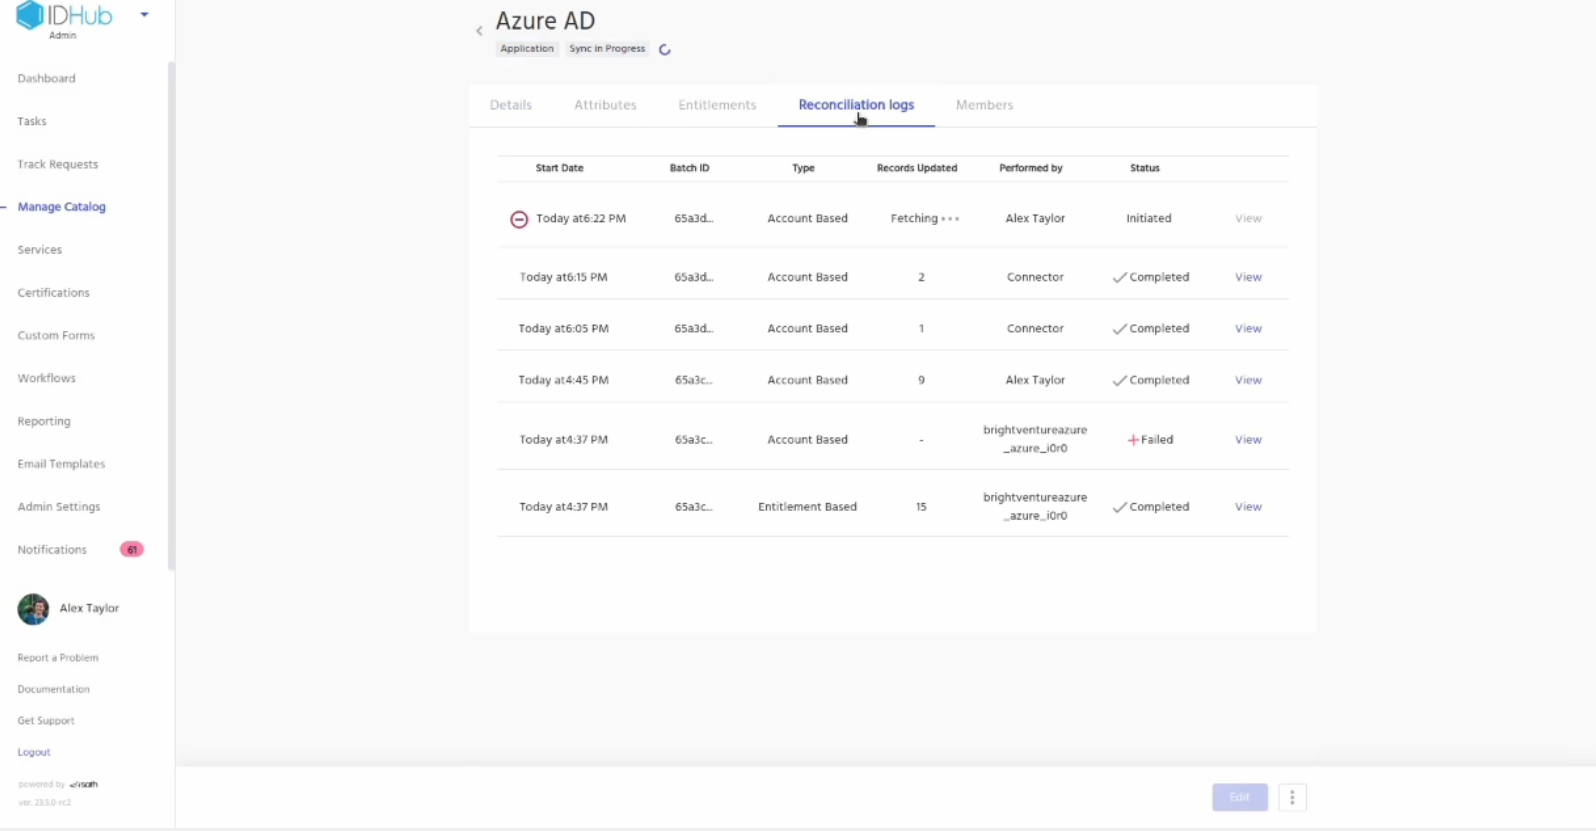
Click on the Reconciliation logs and it will display the reconciliations that IDHub has made for the application
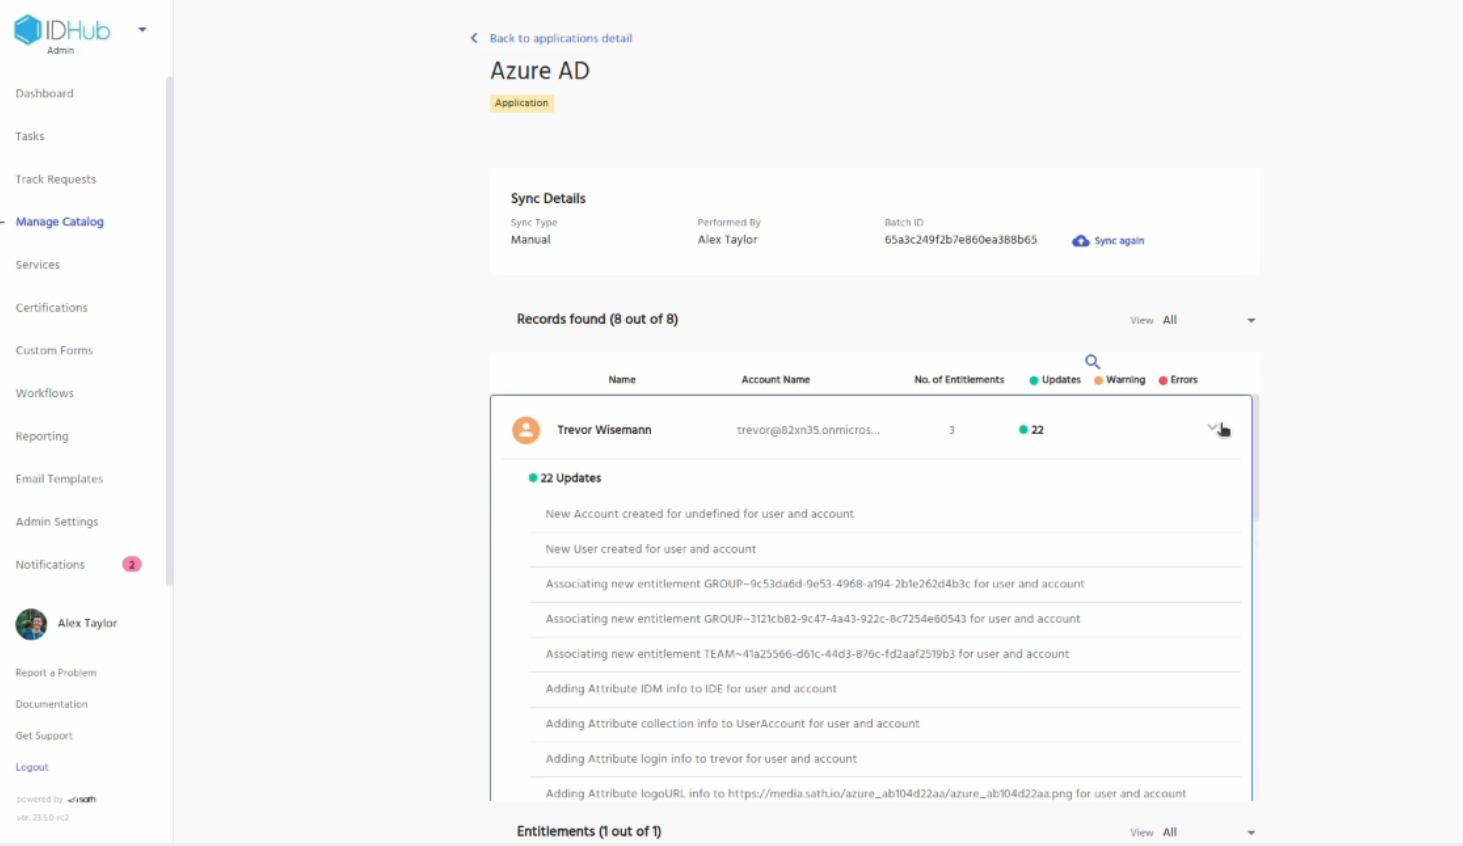
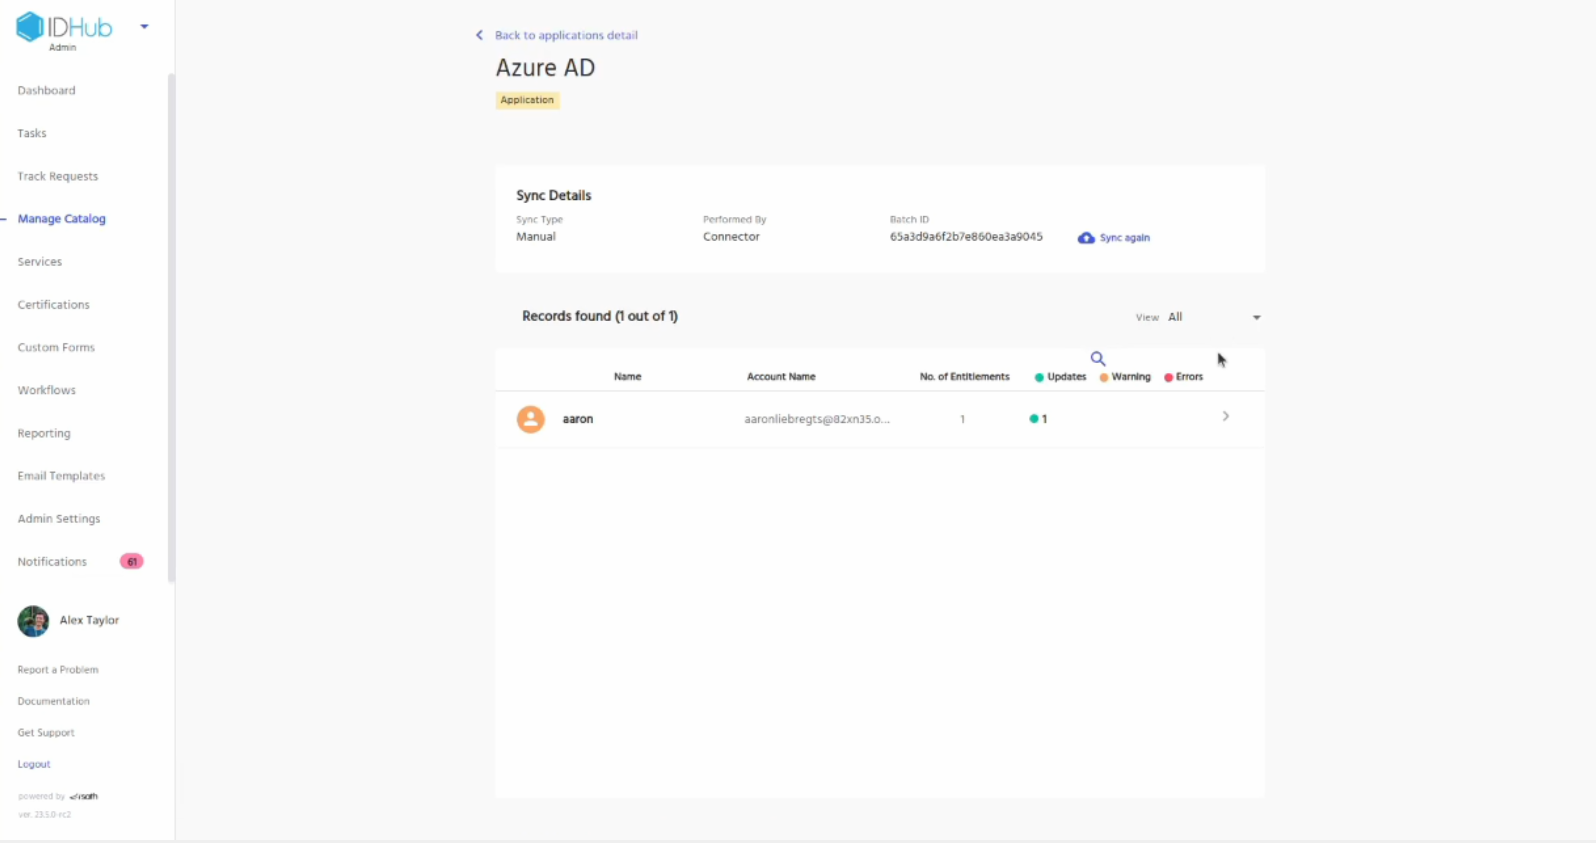
Click on the view link in one of the logs. You will be redirected to the details of the log where you can see the users or entitlements that have been synced.
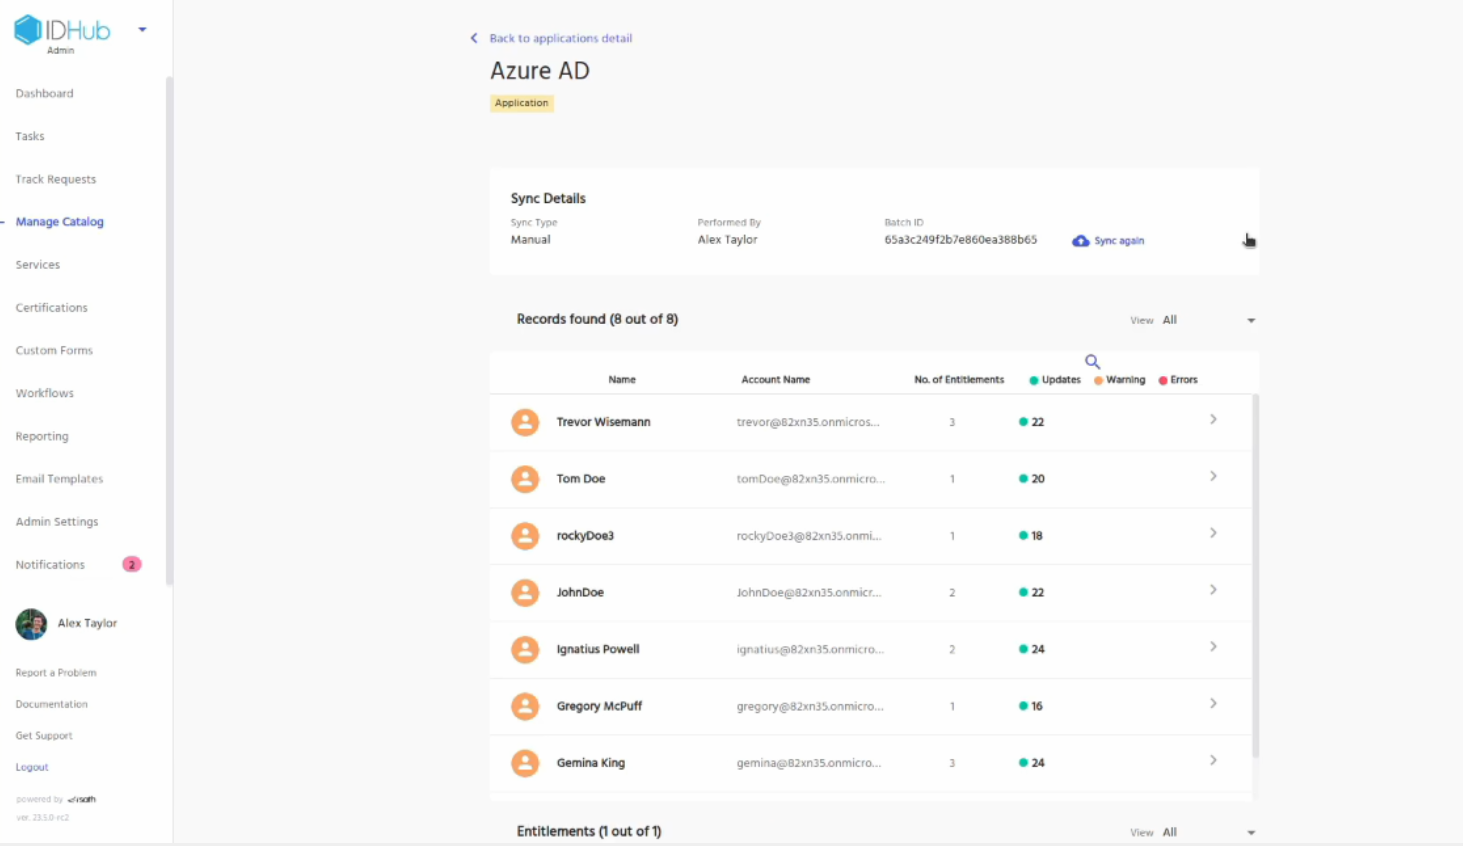
You can also click on the down arrow for each account and see the updates that have been made for each one of them.
Click on the members tab, Here you will see the users who have access to the application.
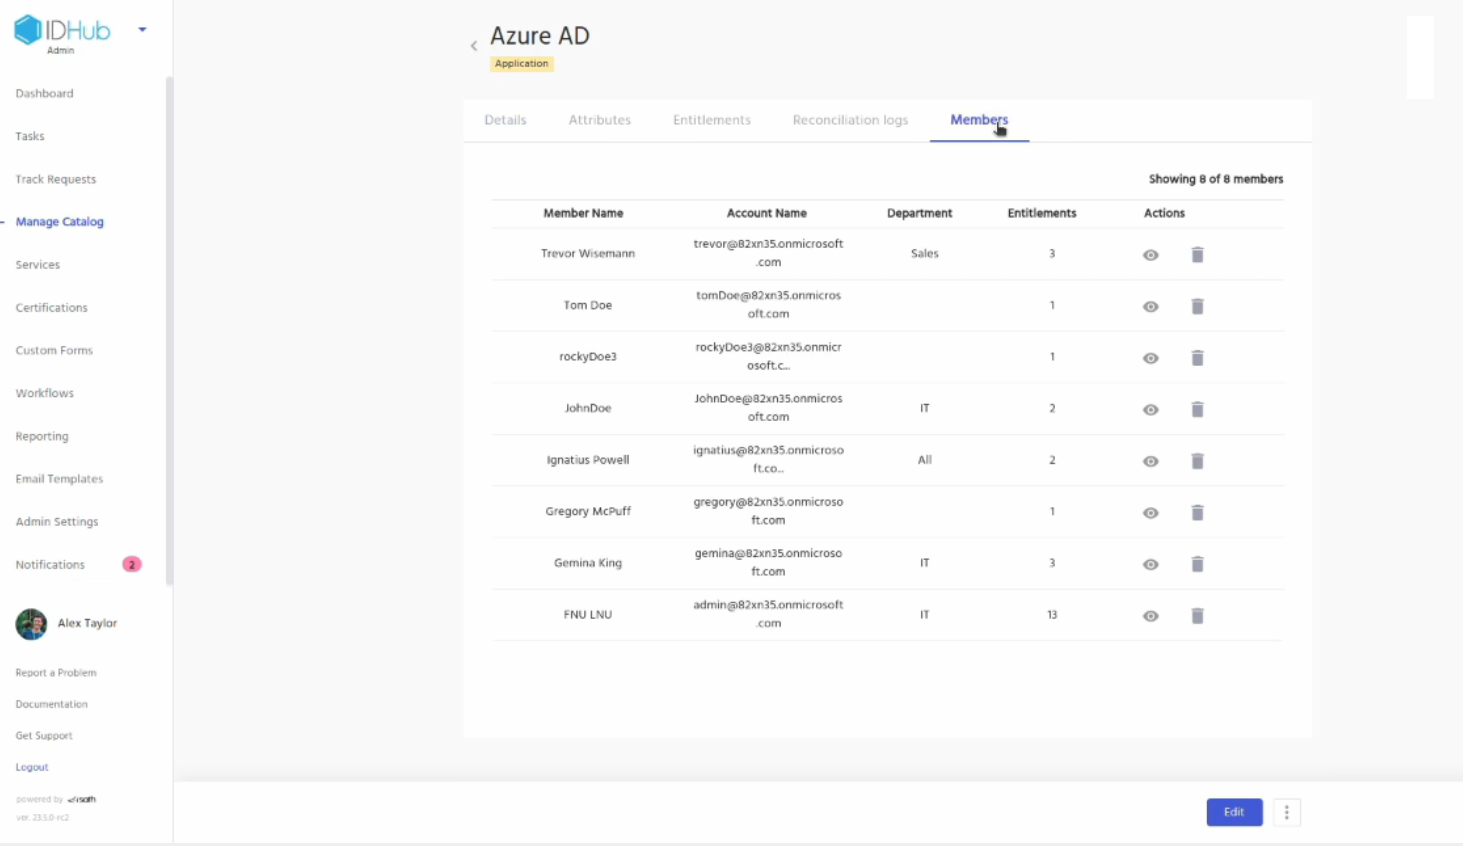
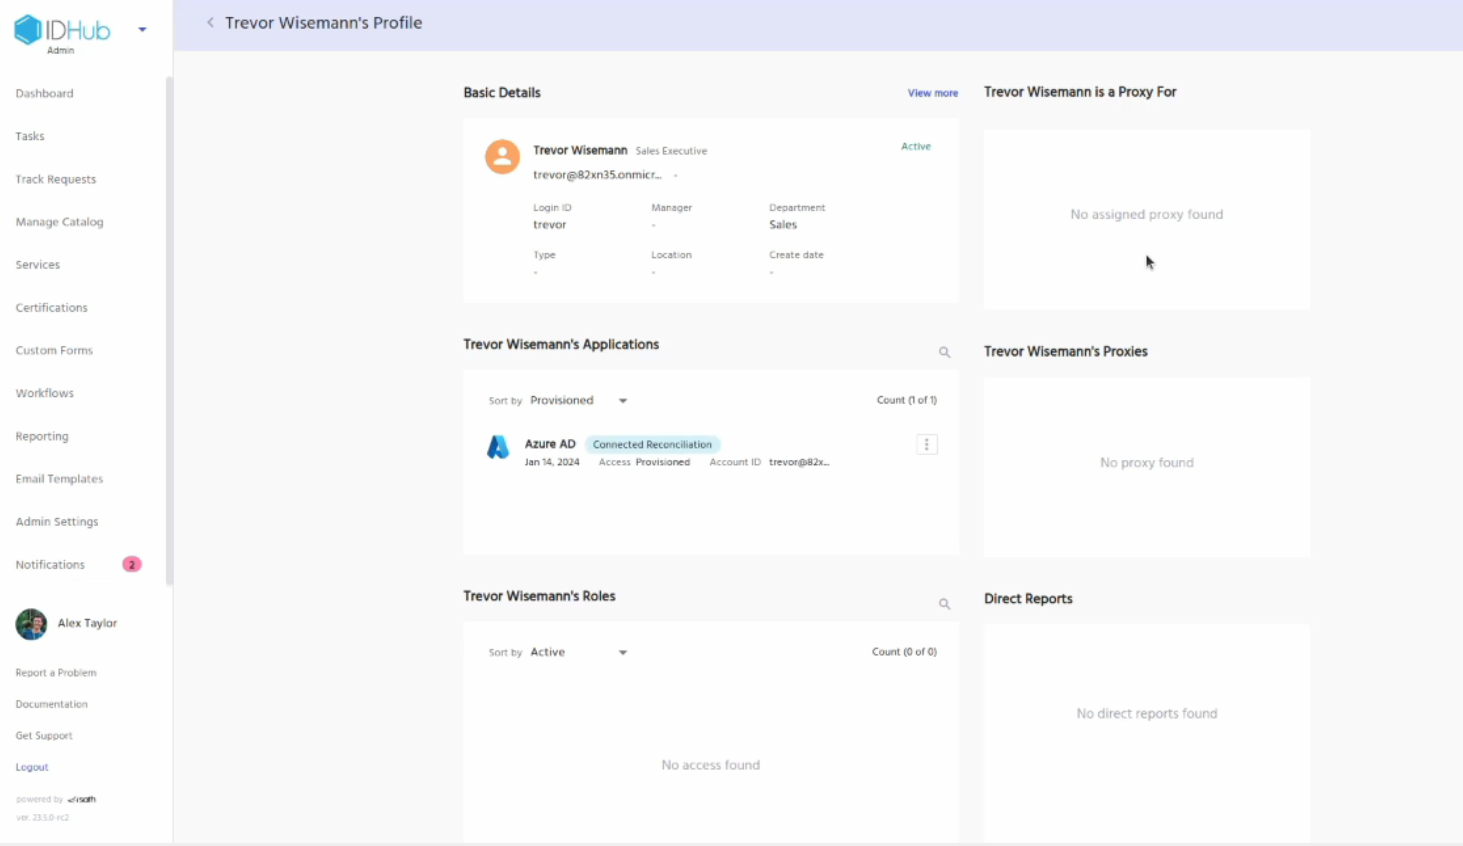
Click on the view profile button for one of them user, This will take you to the user profile page. Here you can see that the Entra ID application is provisioned for the user.
Creating a Birth-right role & User and checking auto provisioning
Creating a Birth-right Role For User
Now let’s create a role with a condition that all users who have a department is sales can automatically get Entra ID provisioned for them. This is particularly important if you have a scenario where users of a certain department would like to automatically get access to Entra ID.
For creating a role, goto Manage Catalog and then click on the Create Role button. You will get a screen as shown below:
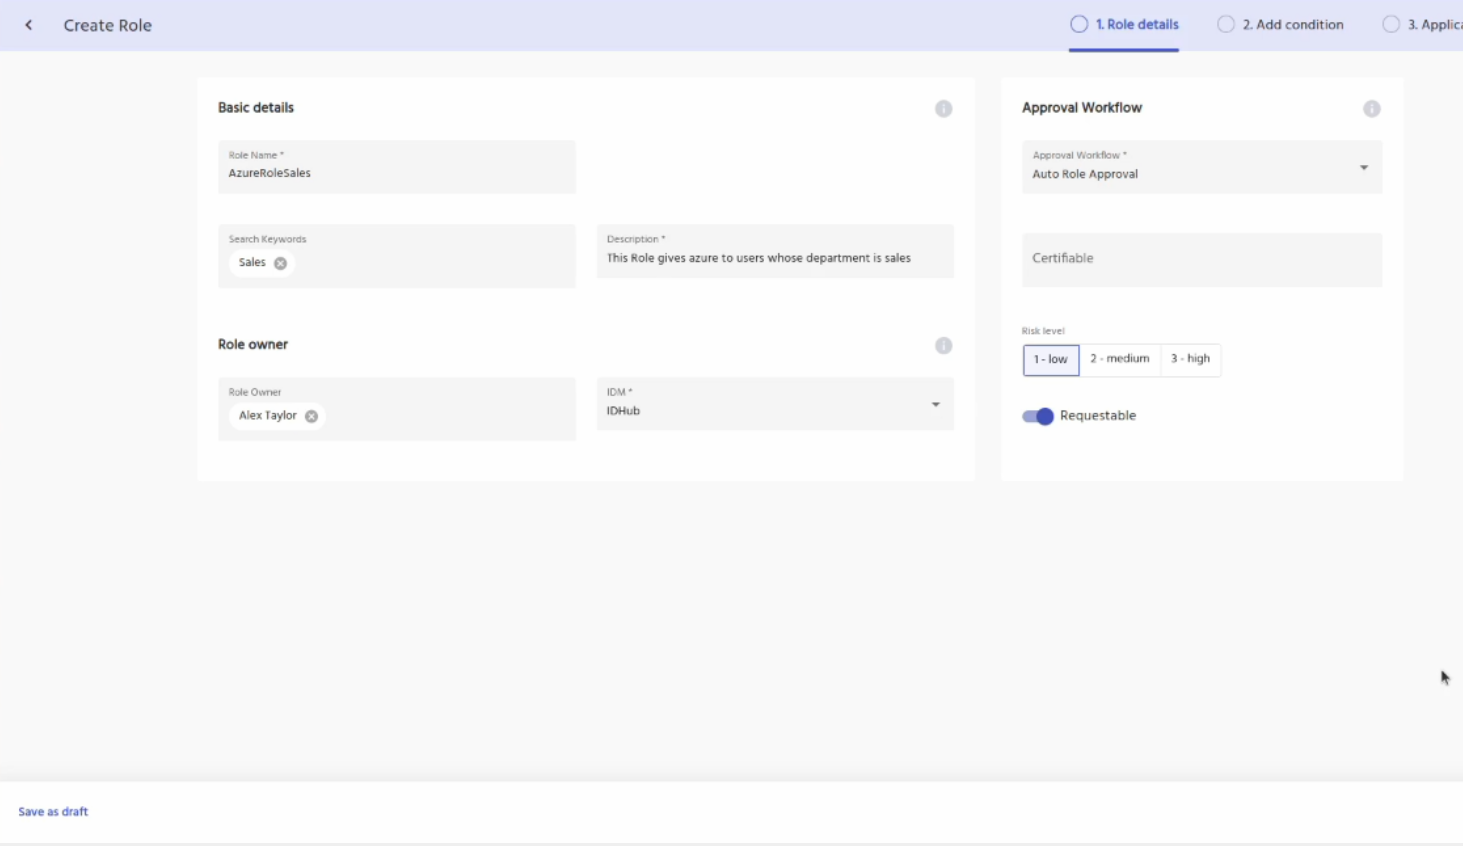
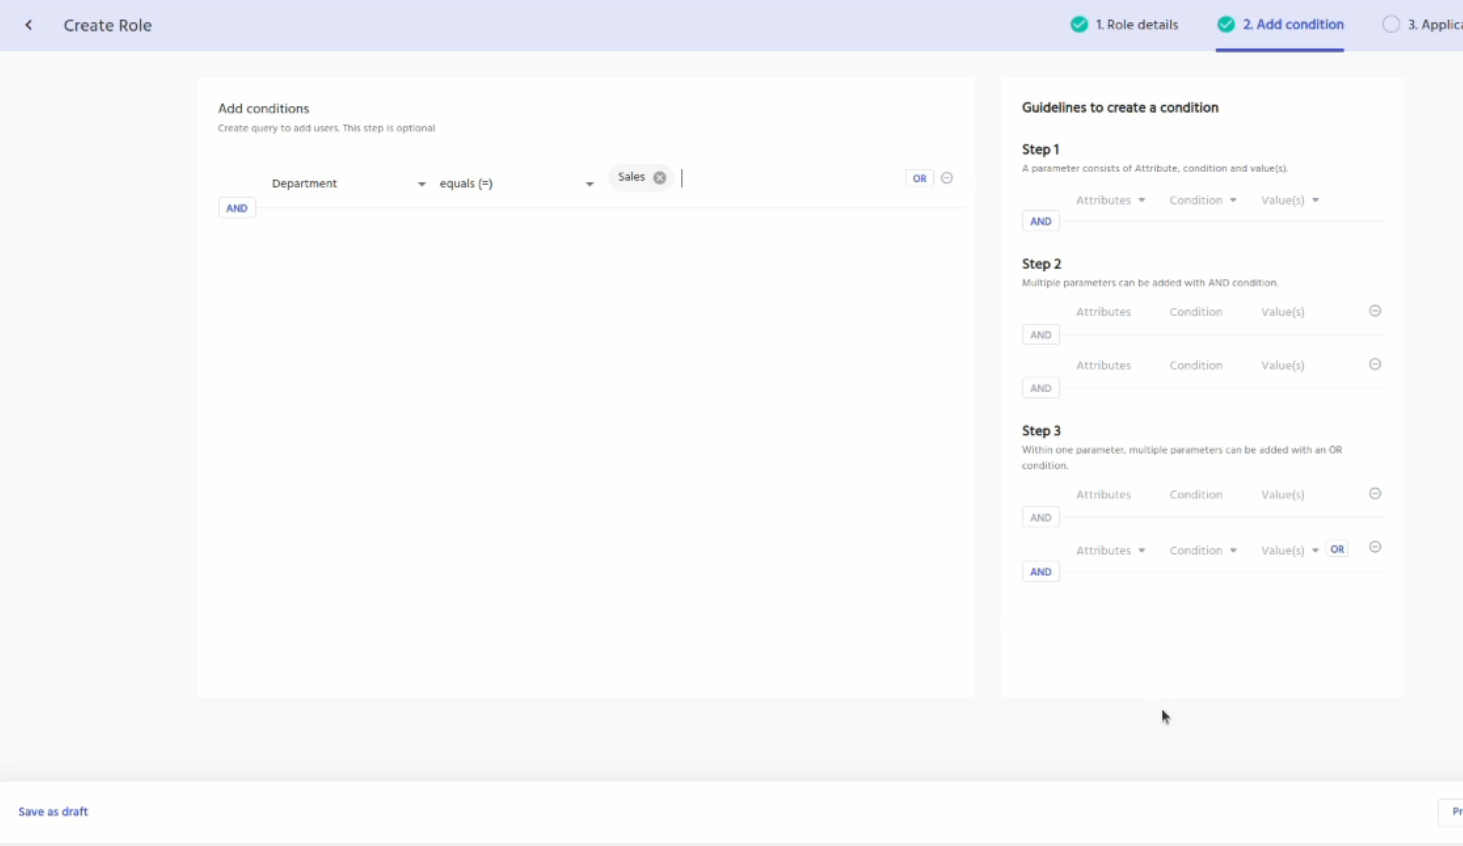
In the first screen enter the required basic details of the role and then click on the next button. In the next screen add a condition, that department is sales as shown below.
Next, Add the application Entra ID by clicking on the plus button. Click on the down arrow and you will see the entitlements. Optionally you can add entitlements to the role as well. For entitlements, you might have to specify whether the entitlement attribute is of a member type or owner type or both.
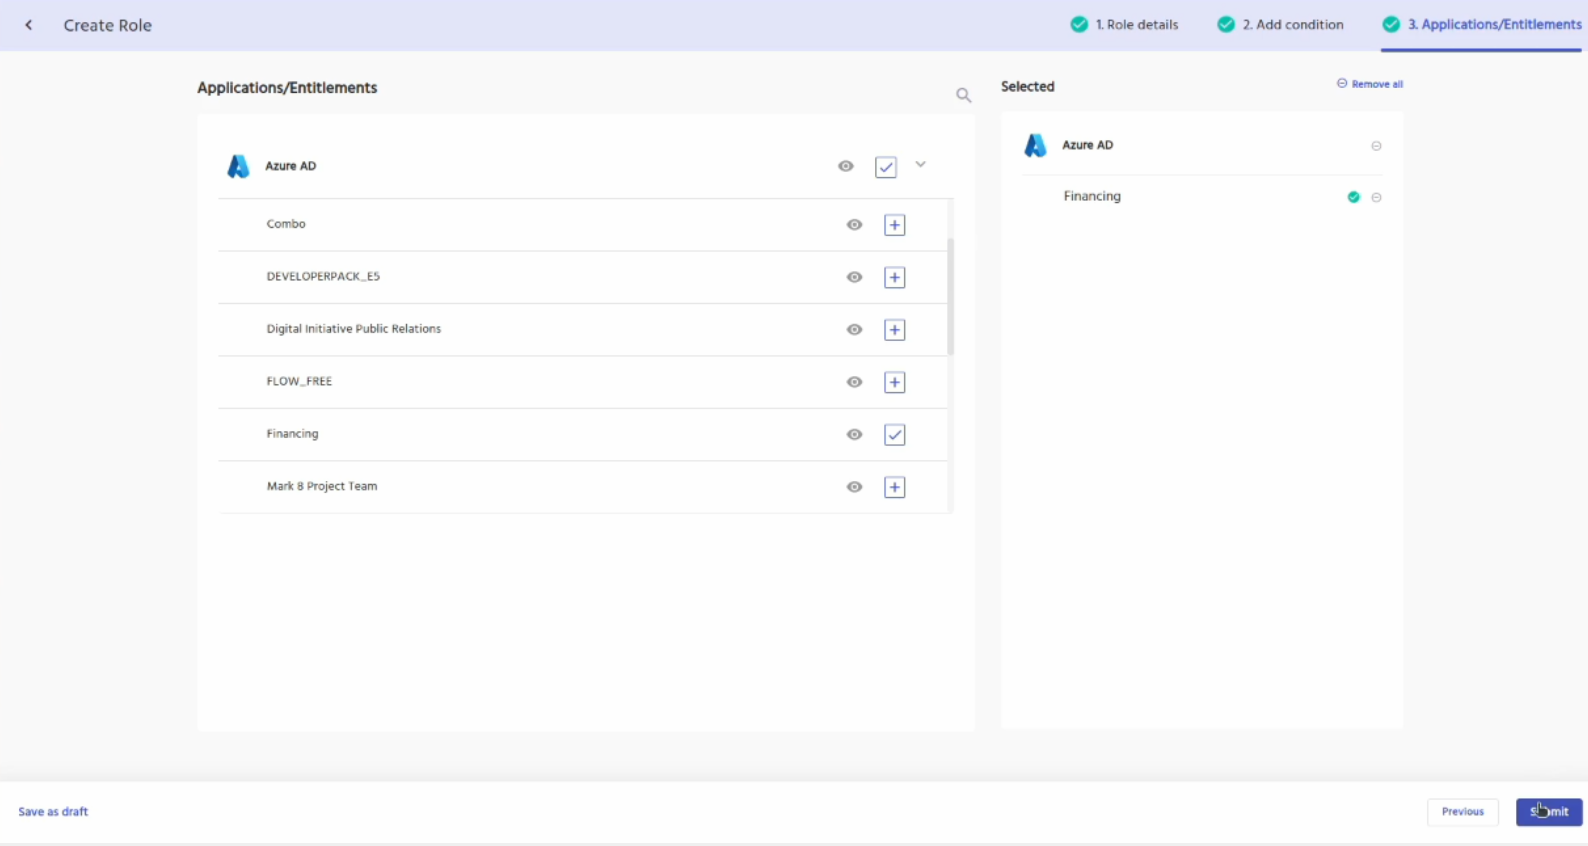
Click on the submit button. Enter a reason for creating the role.
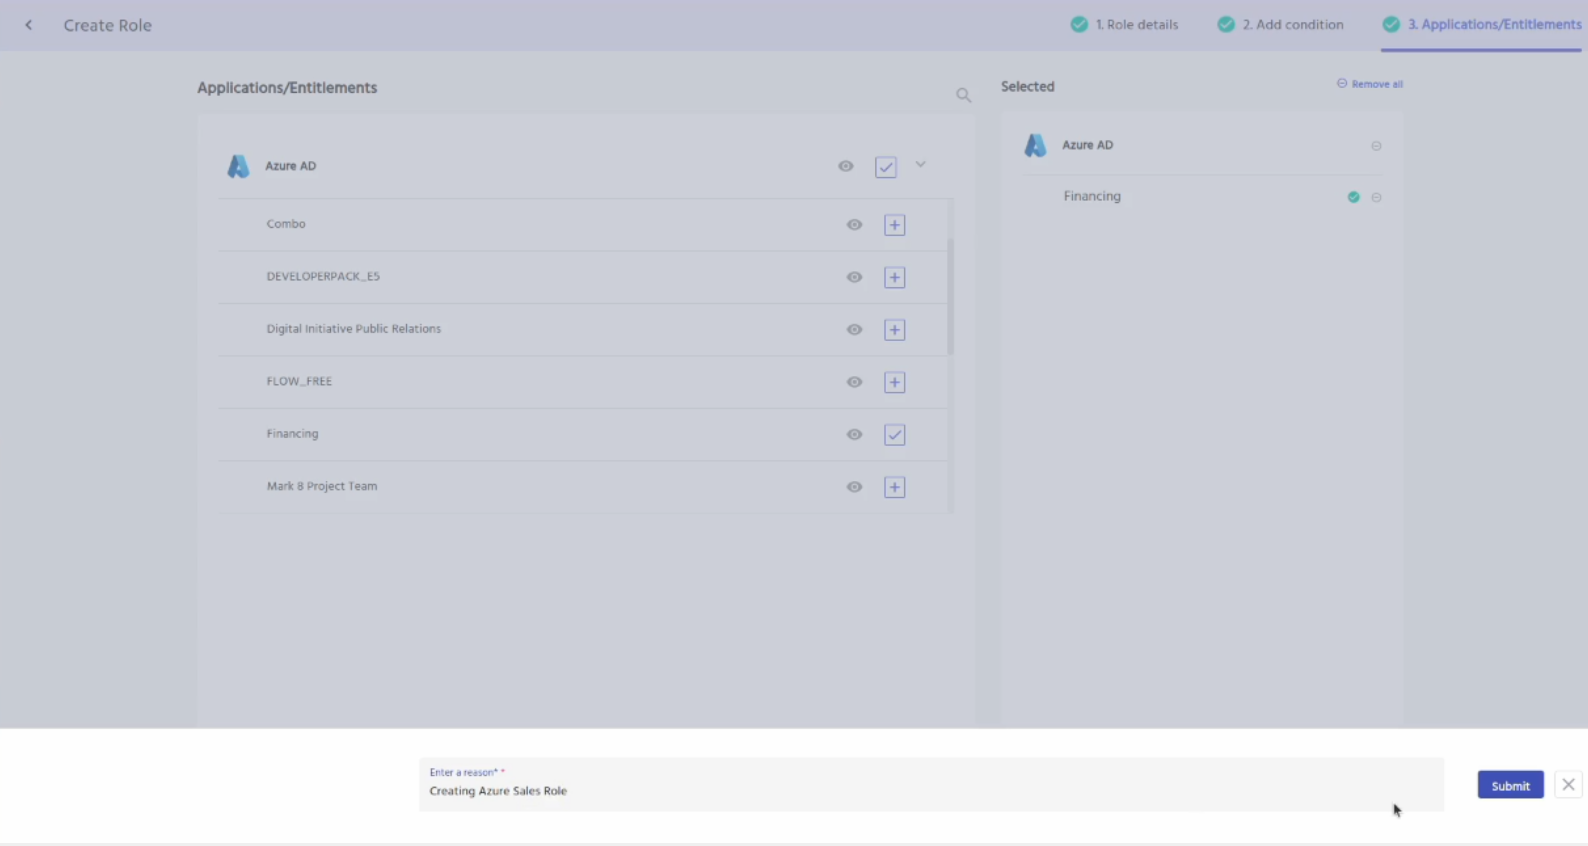
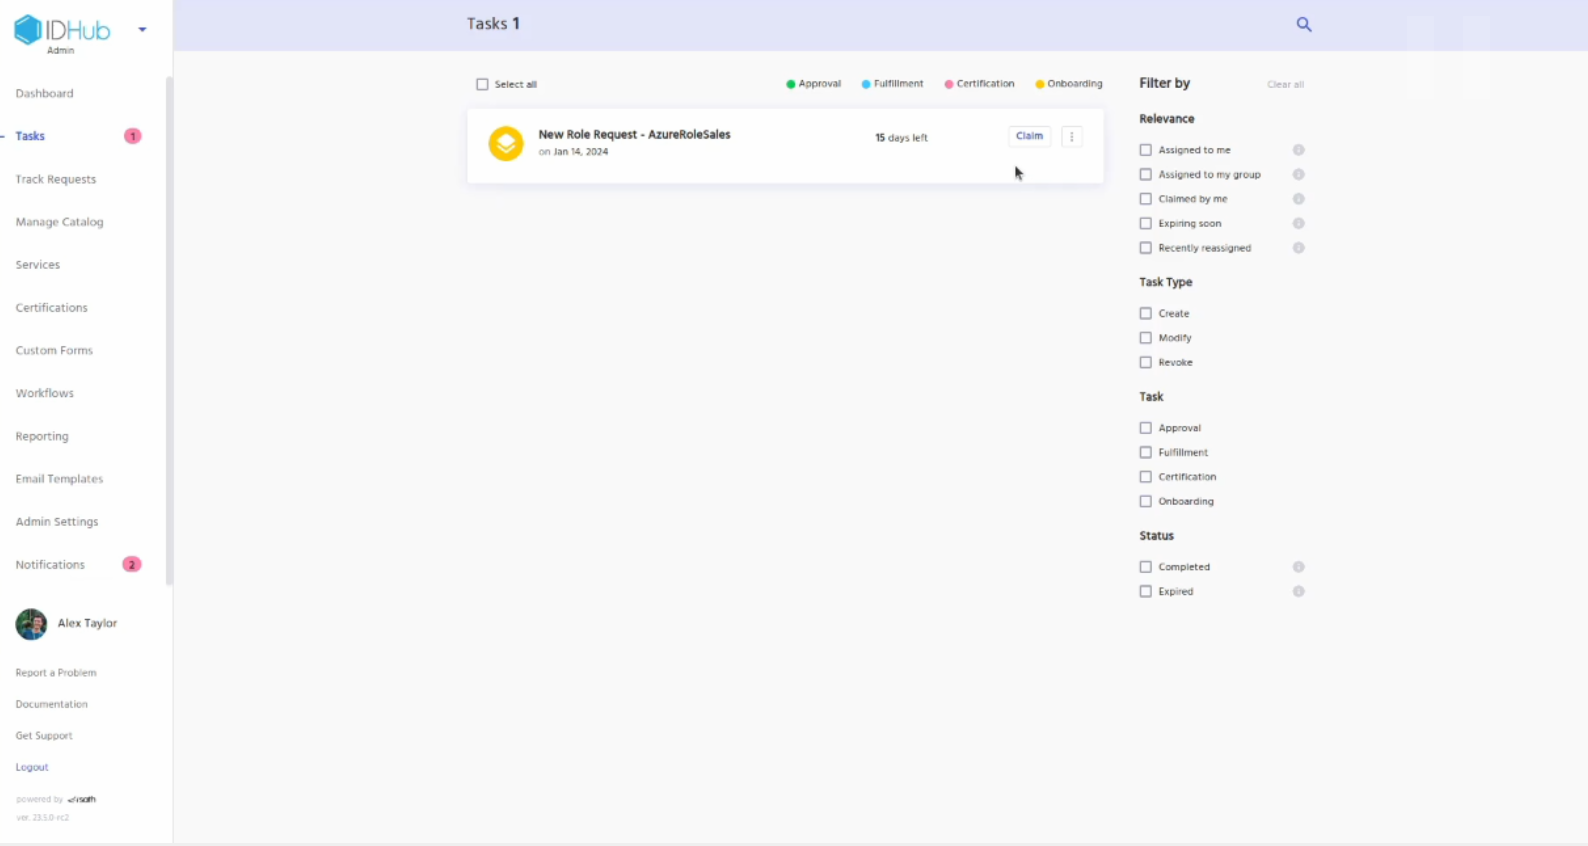
Click on the submit button again. Goto tasks, claim and approve the role.
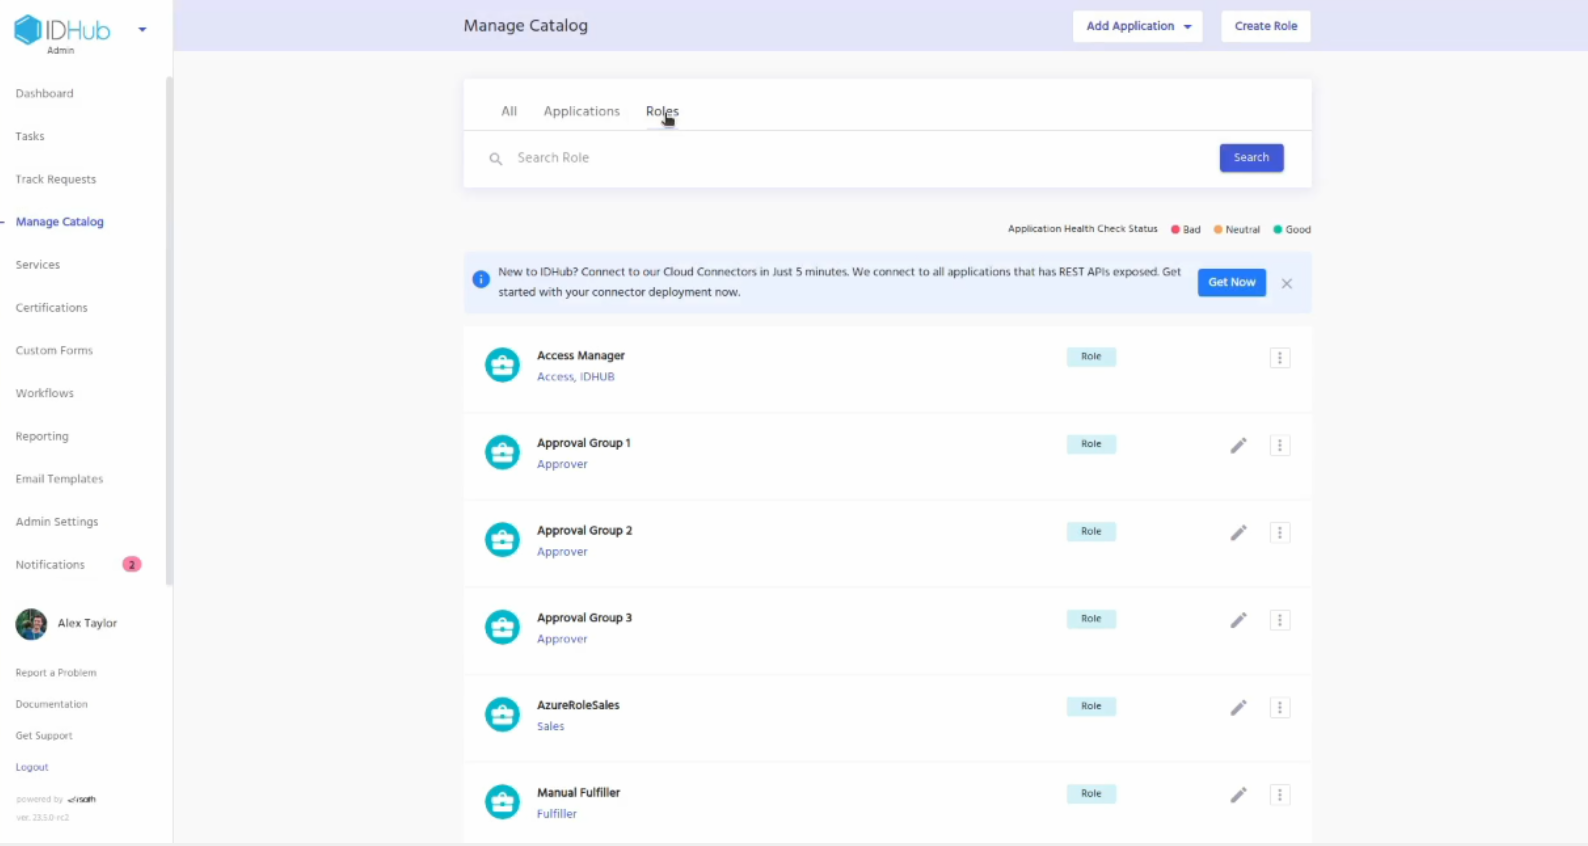
Goto manage catalog and click on the roles tab. There you will see the role that you just created.
Creating a New User whose attributes matches the role condition
Now let’s create a new user whose department is sales to check whether that user automatically provisioned Entra ID application or not. For creating a new user goto the IDHub user app, click on the search catalog, click on the service requests tab and then click on the new user request. Add it to the cart and click on the proceed button and you will be taken to the screen as shown below:
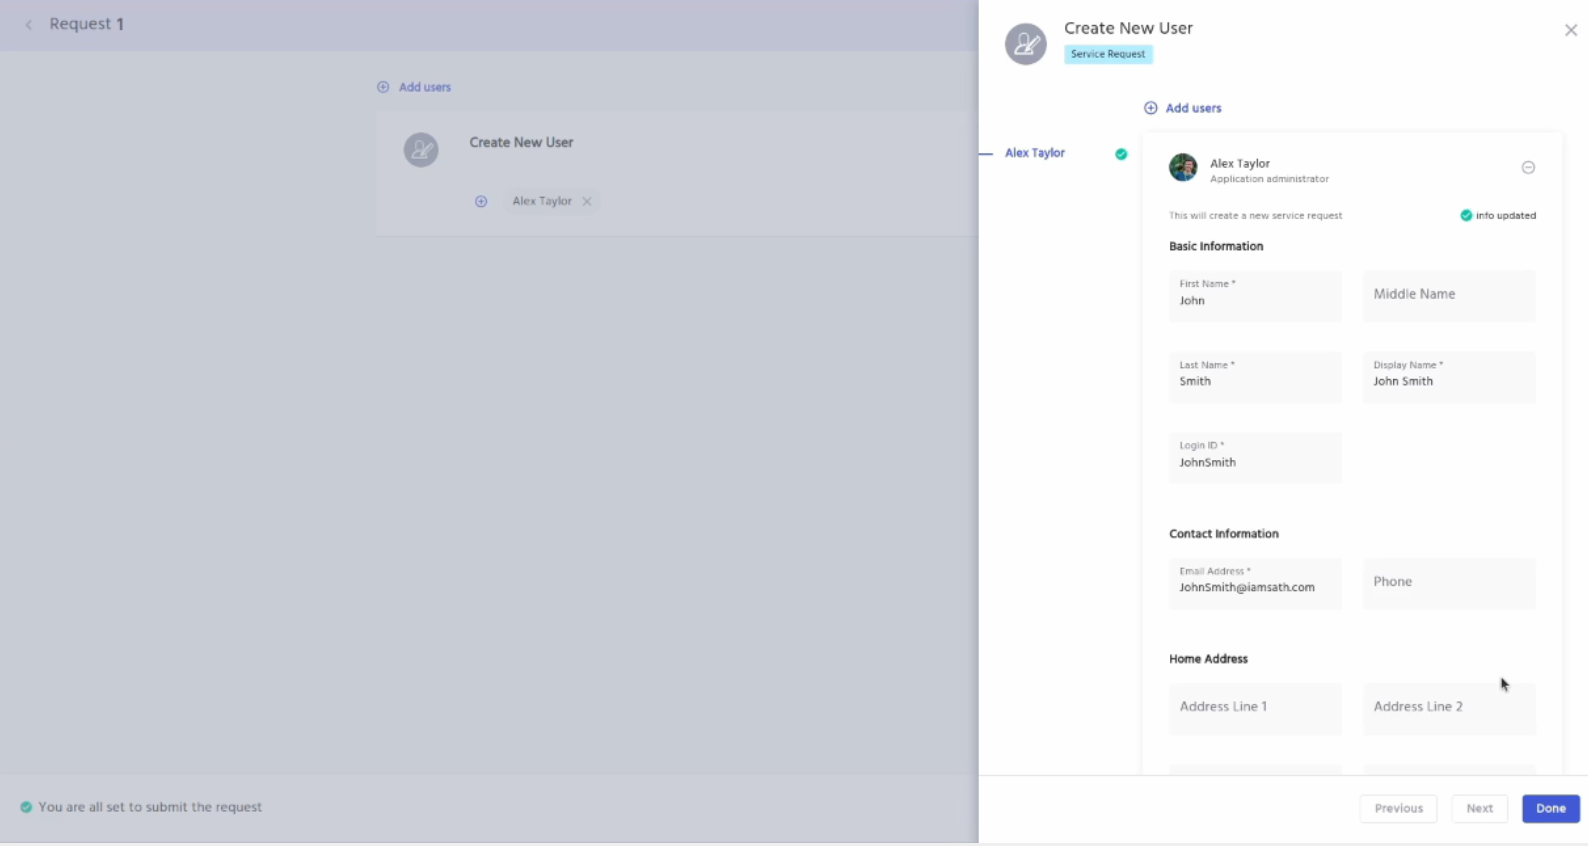
Here enter the required information to create the new user. Make sure that the email address of the new user should have the same domain name as your Entra ID instance. Click on the DONE button. Click on the continue button.
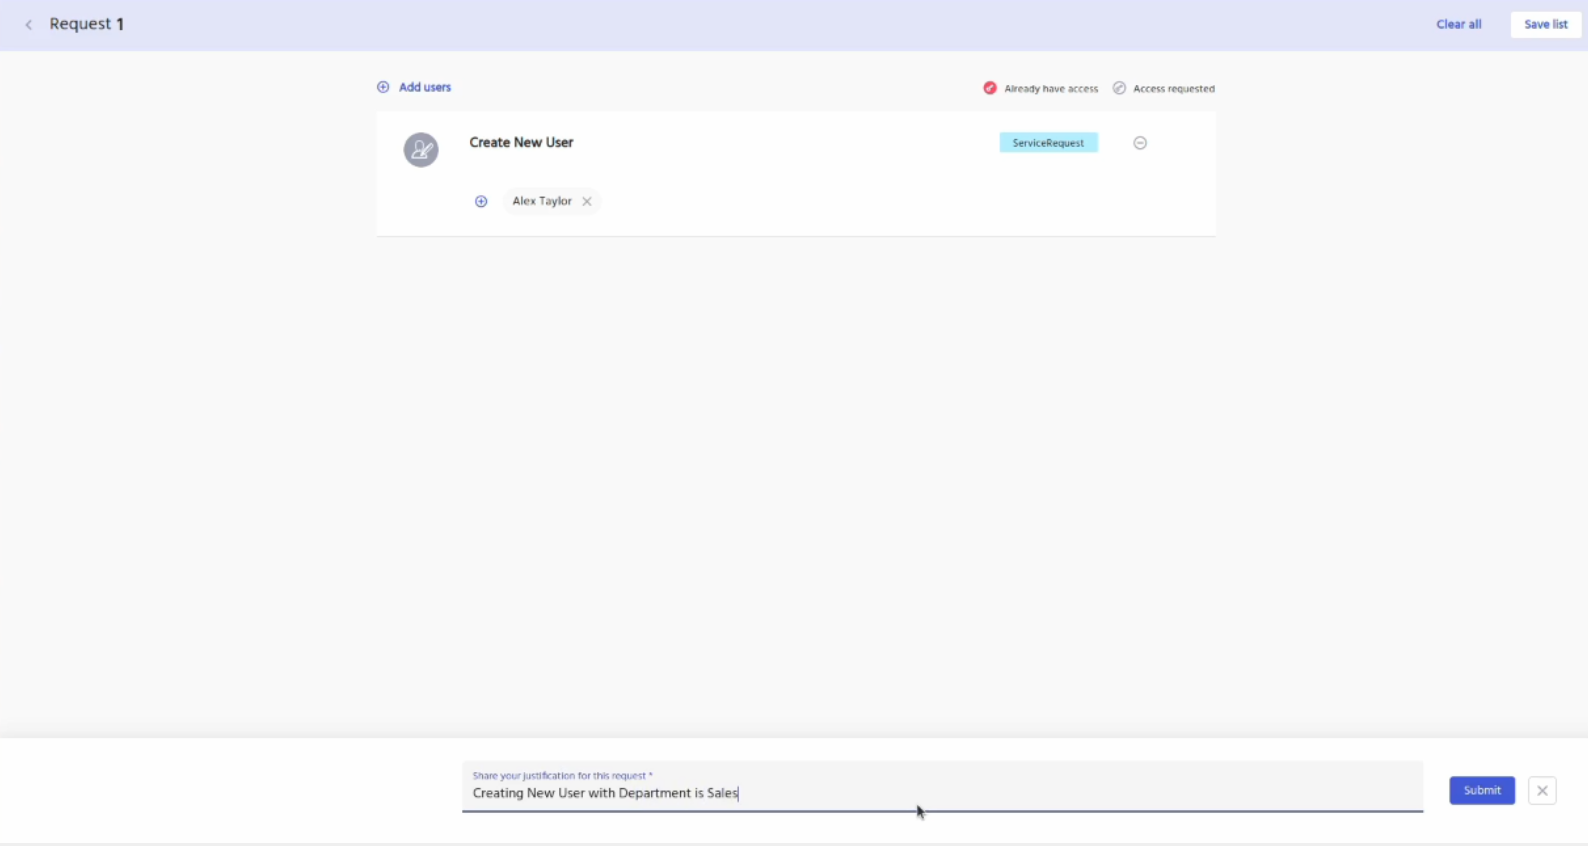
Enter a justification for the request and then click on the submit button.
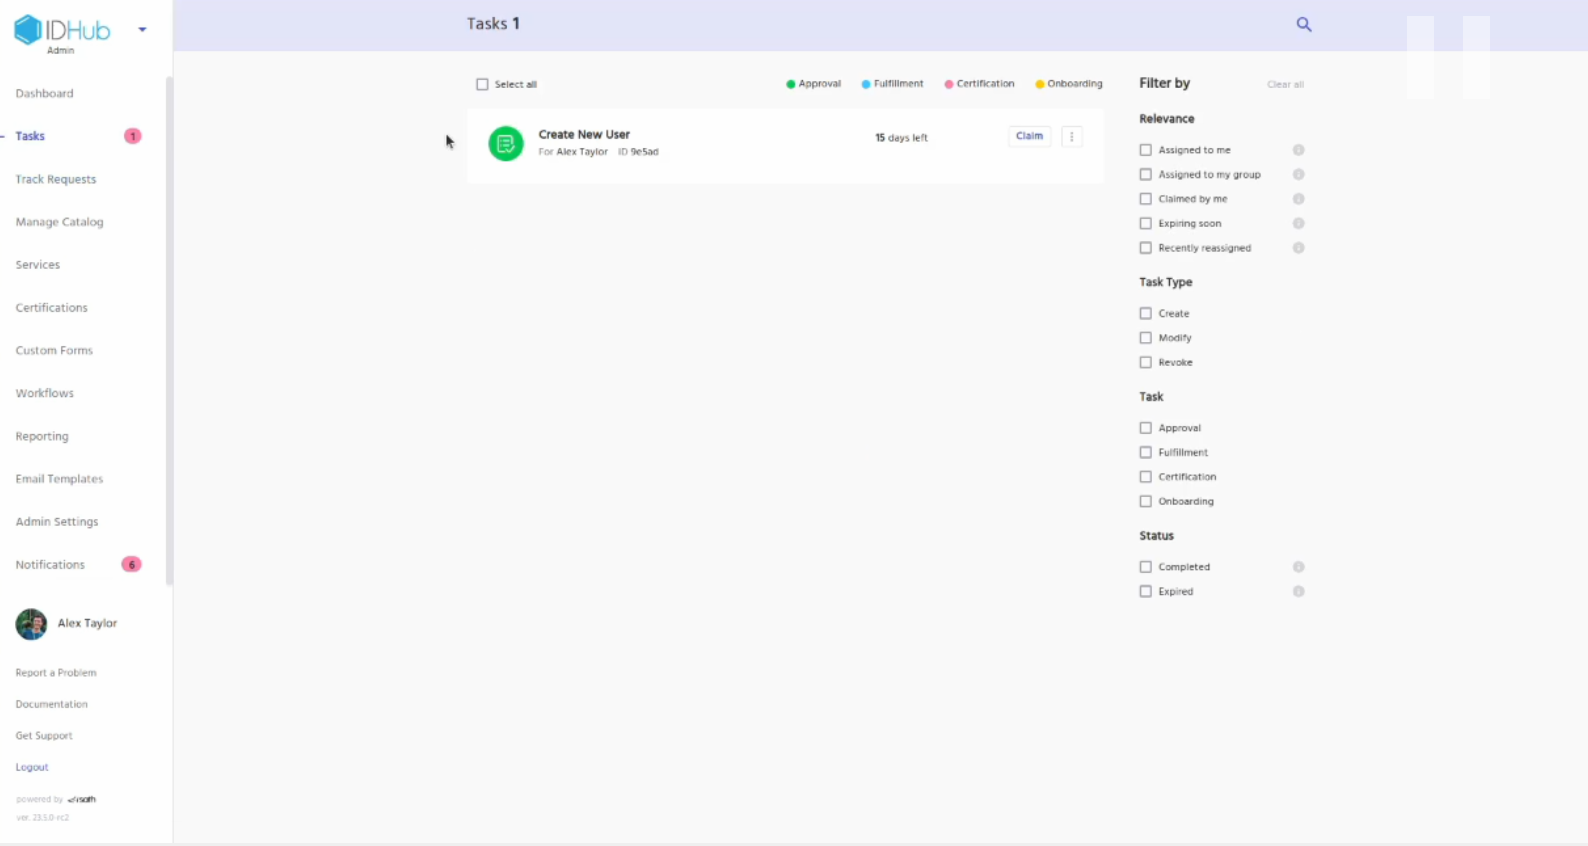
Now, Goto tasks and then claim and approve the request.
Goto Search catalog and click on the user tab. You will see the new user that you just created.
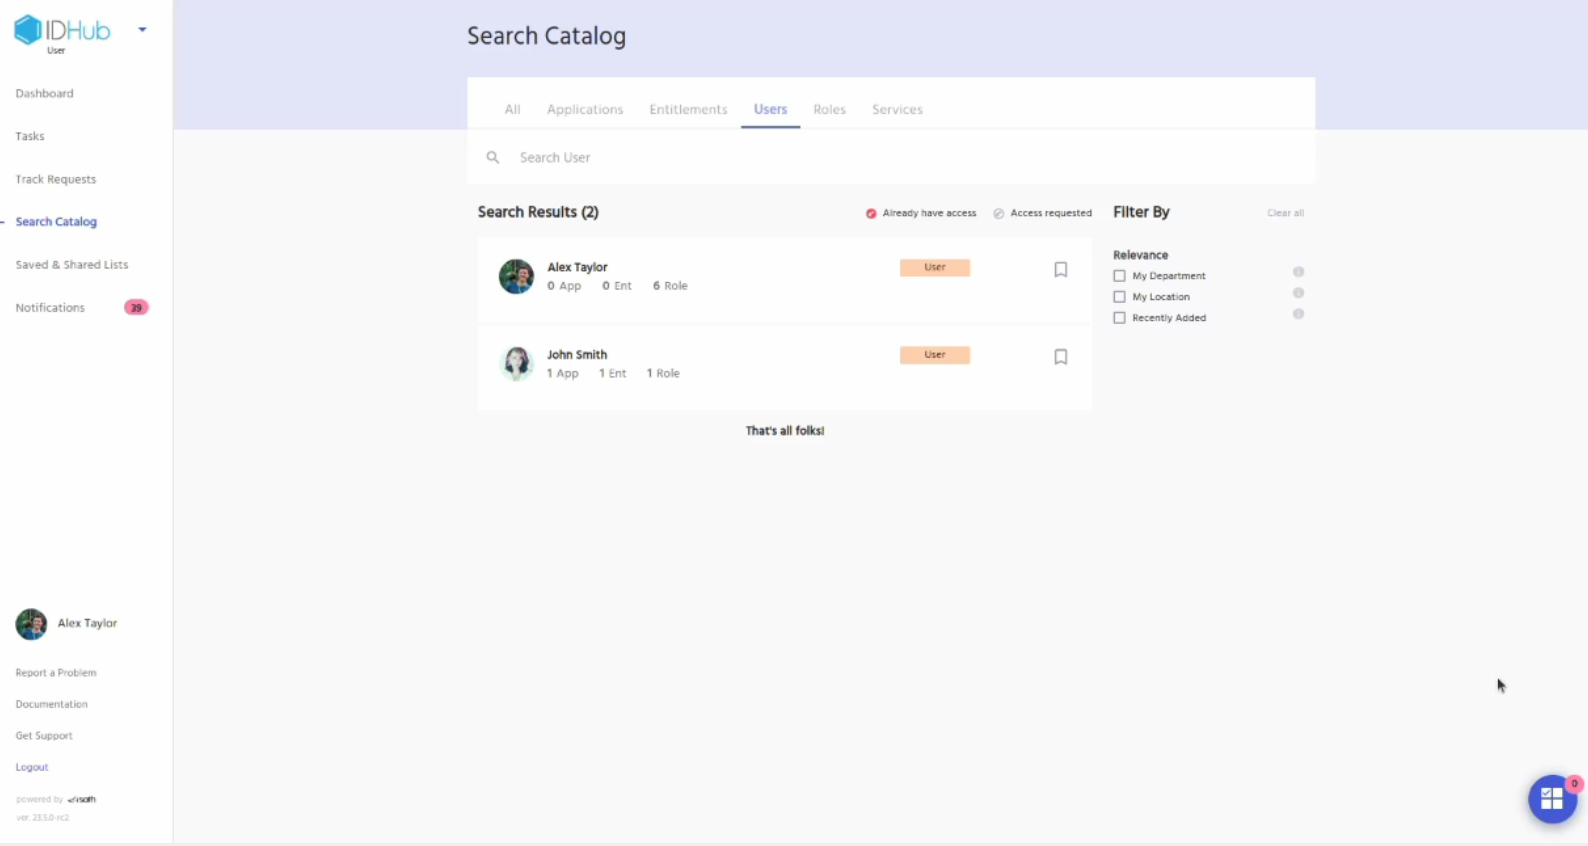
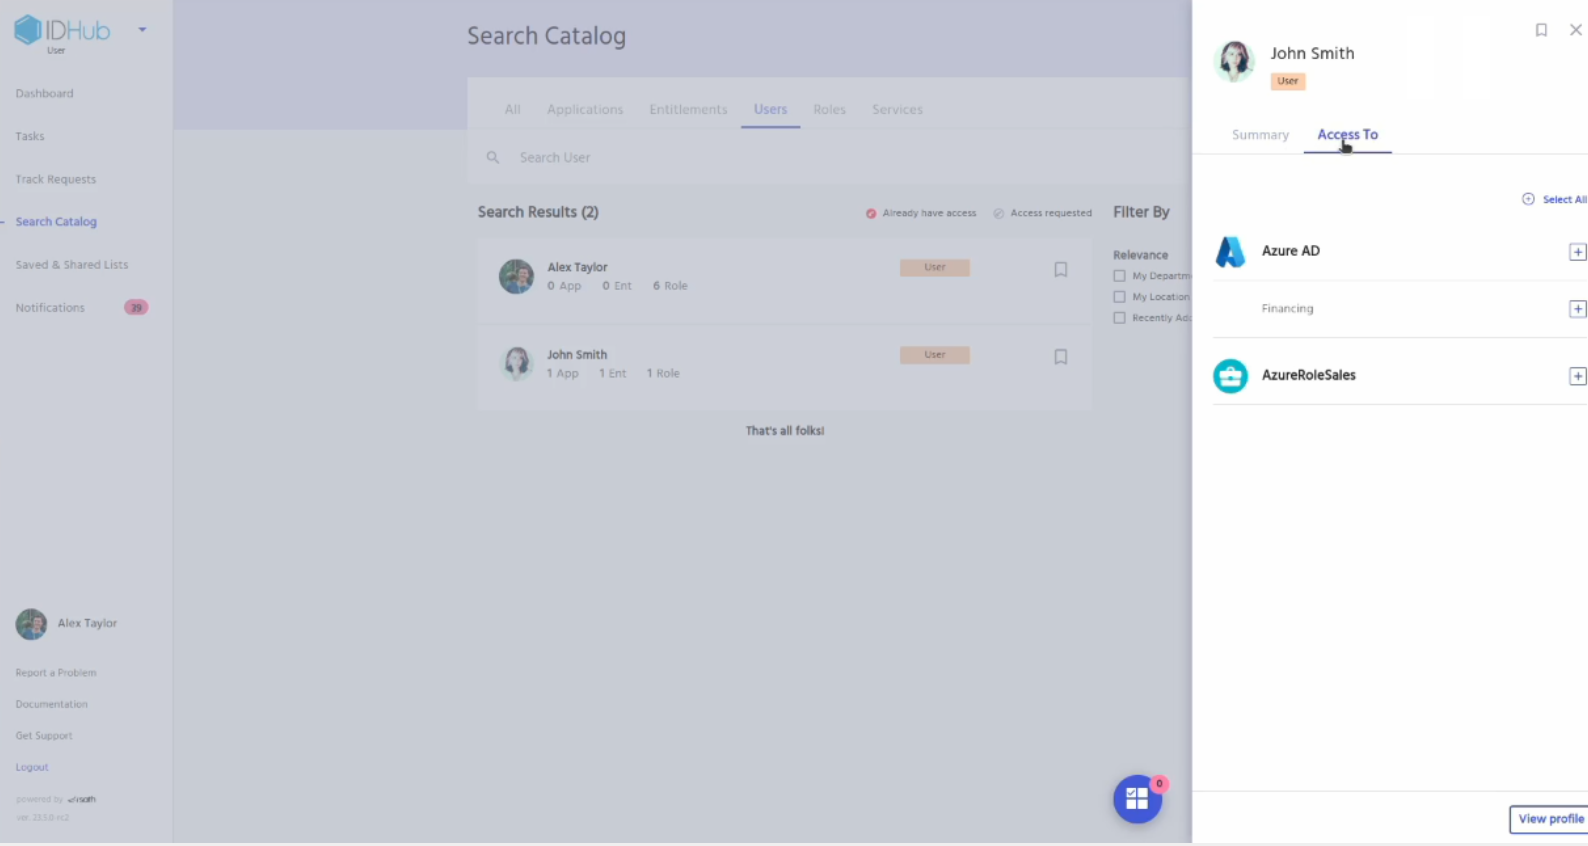
Click on the user card. A RHS will be displayed, Click on the AccessTo tab of the RHS and there you will see that the Entra ID application along with the role is auto-provisioned for the user.
Removing User & Checking Auto Revocation
Removing a User
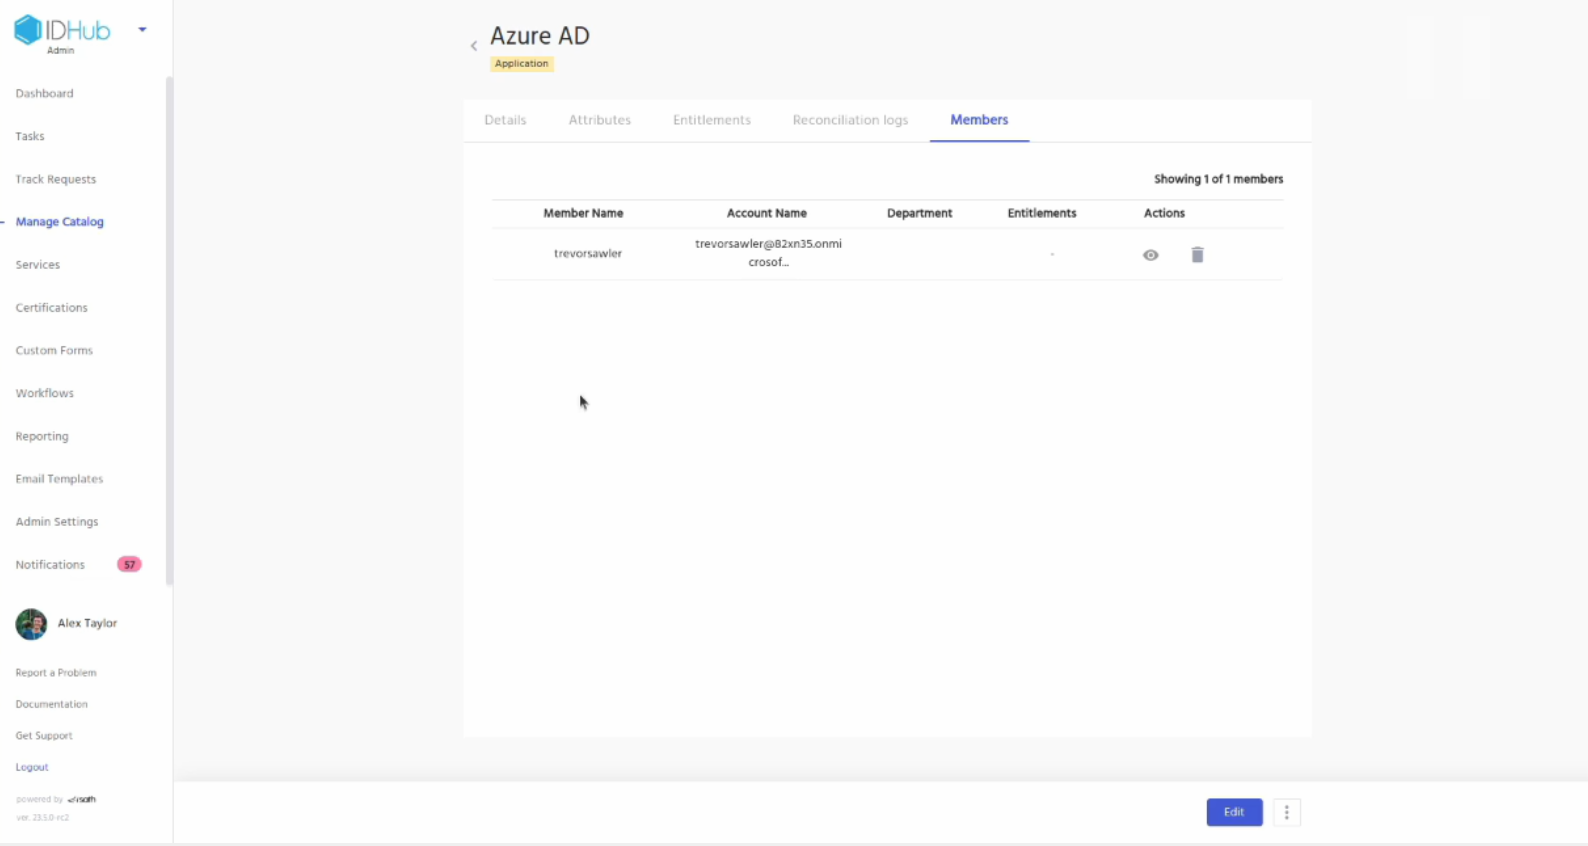
Go to the manage catalog. Click on the Entra ID application card and then click on the member tab. There also you will see the users who have access to the Entra ID application.
Now let’s remove that user and see if the revocation is automatically done for the user.
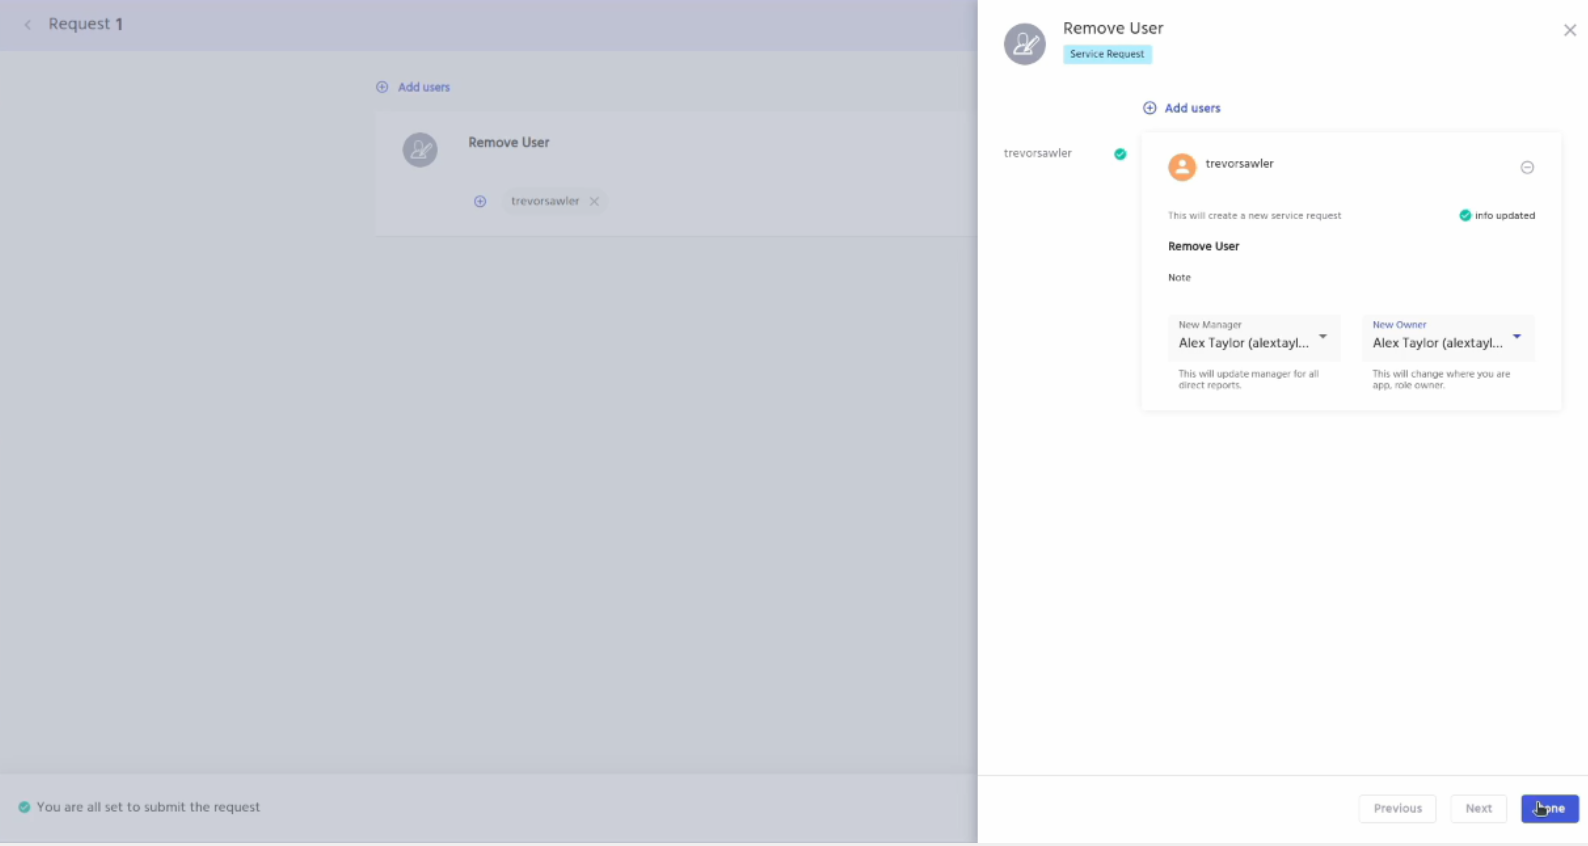
Goto search catalog, click on the services tab and then add remove user to the cart and click on the proceed button. In the next screen enter the user who you wish to remove and then click on the continue button
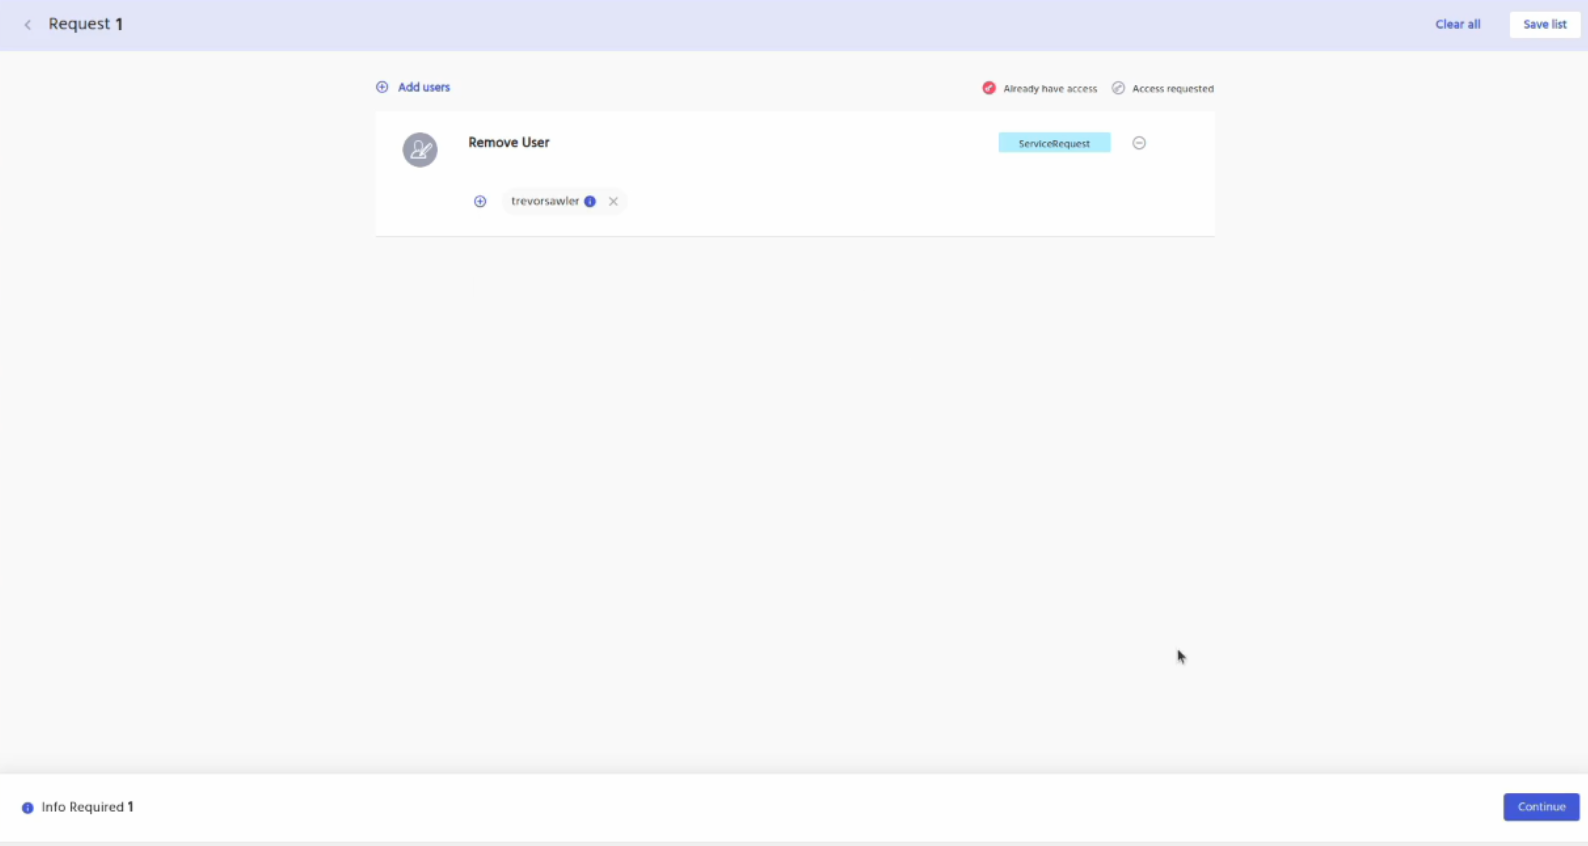
Enter the new manager and the owner and click on the done button.
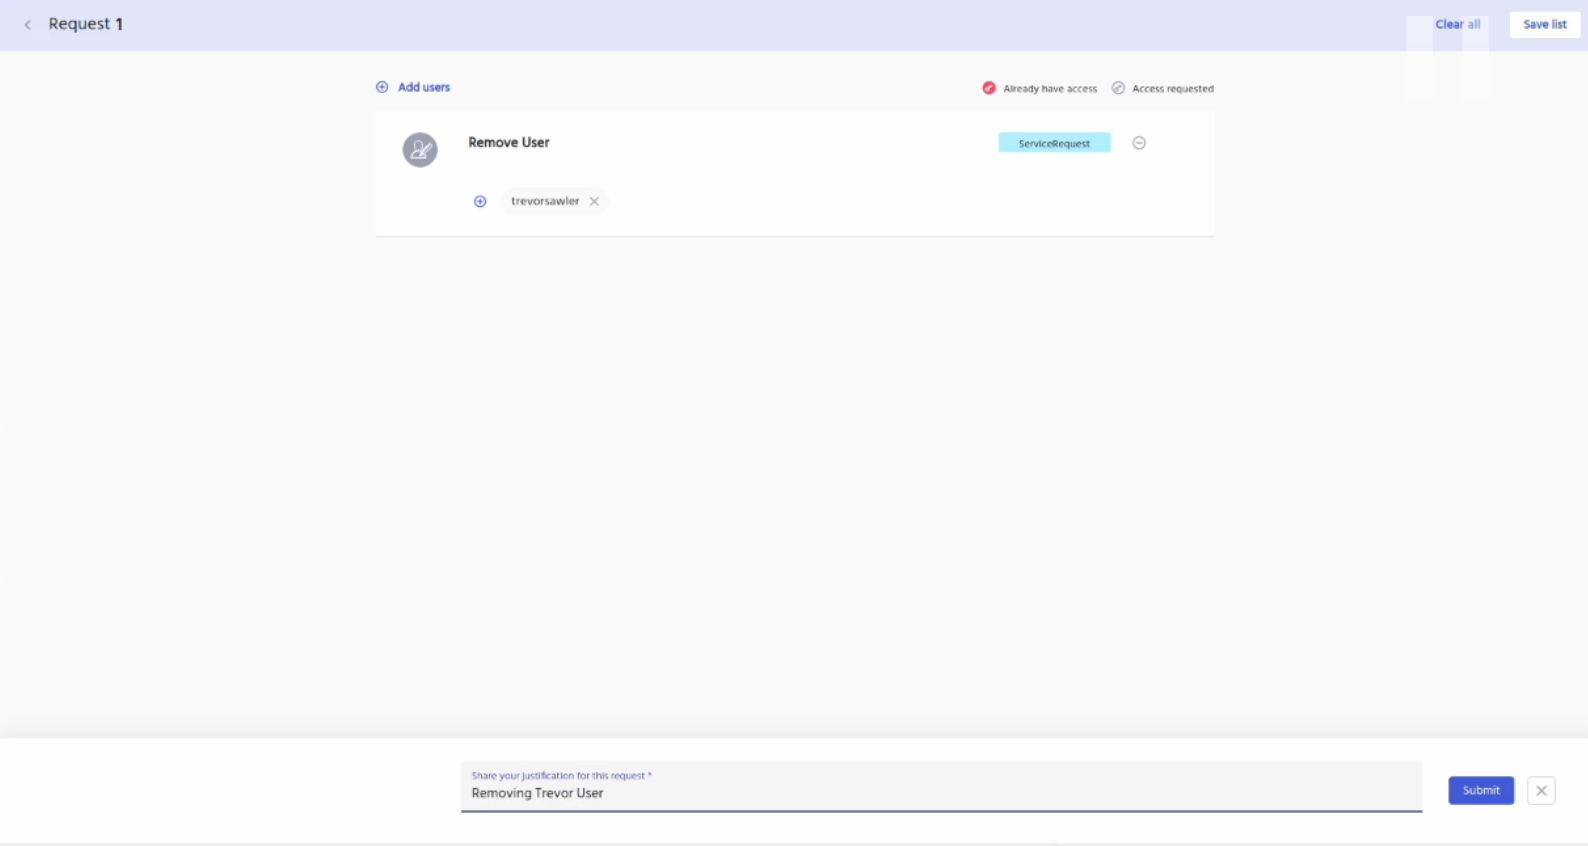
Enter your justification for the request and then click on the submit button.
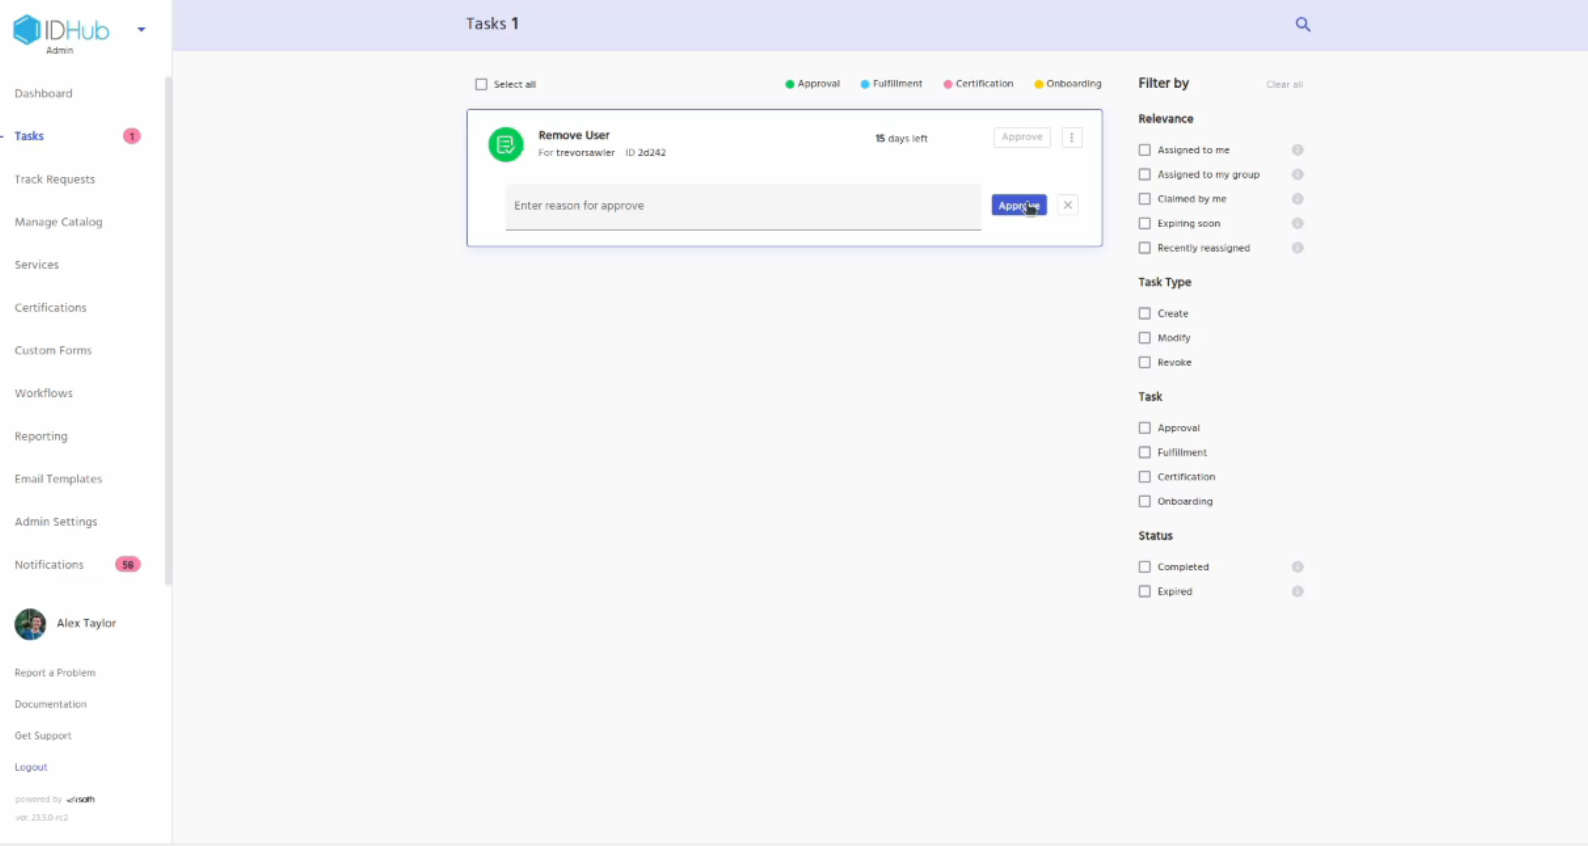
Goto tasks, claim and approve the request.
Verify the user is revoked from Entra ID application
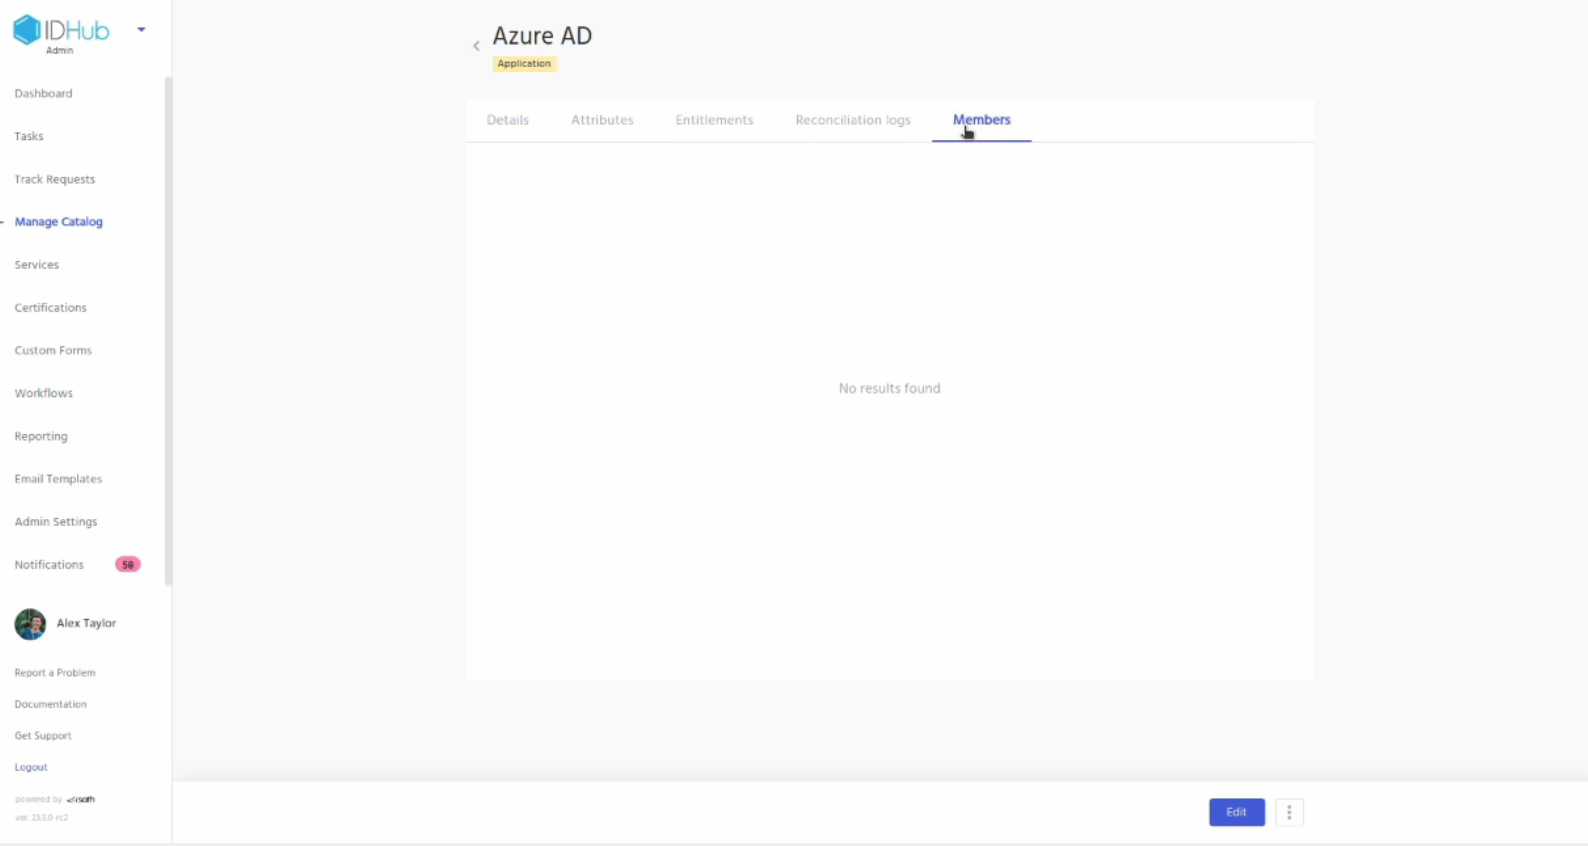
Now to verify if the user has been revoked from the Entra ID application, goto manage catalog, click on the Entra ID application and then click on the members tab, there you will see that the user who has been removed will also not be displayed there.
Add a User in Entra ID & Check Auto-Provisioning
Add a User in your Entra ID Instance
Now let’s create a new user in your Entra ID target system. Under Users Click on Add New button and you will see the following screen:
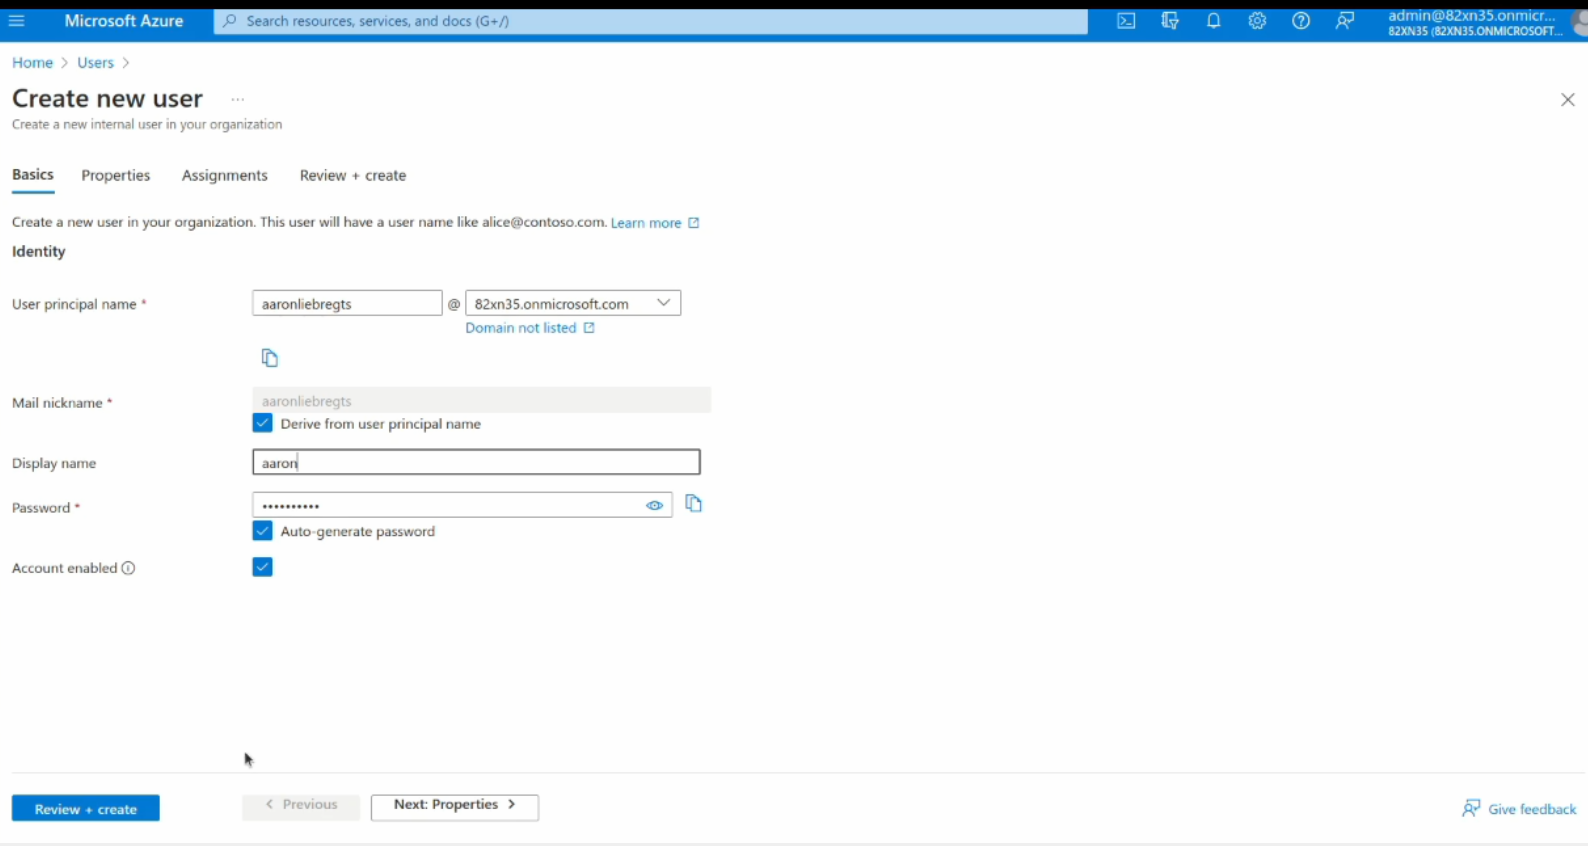
In this screen add the user principal name, display name and password and click on the Review & Create button below.
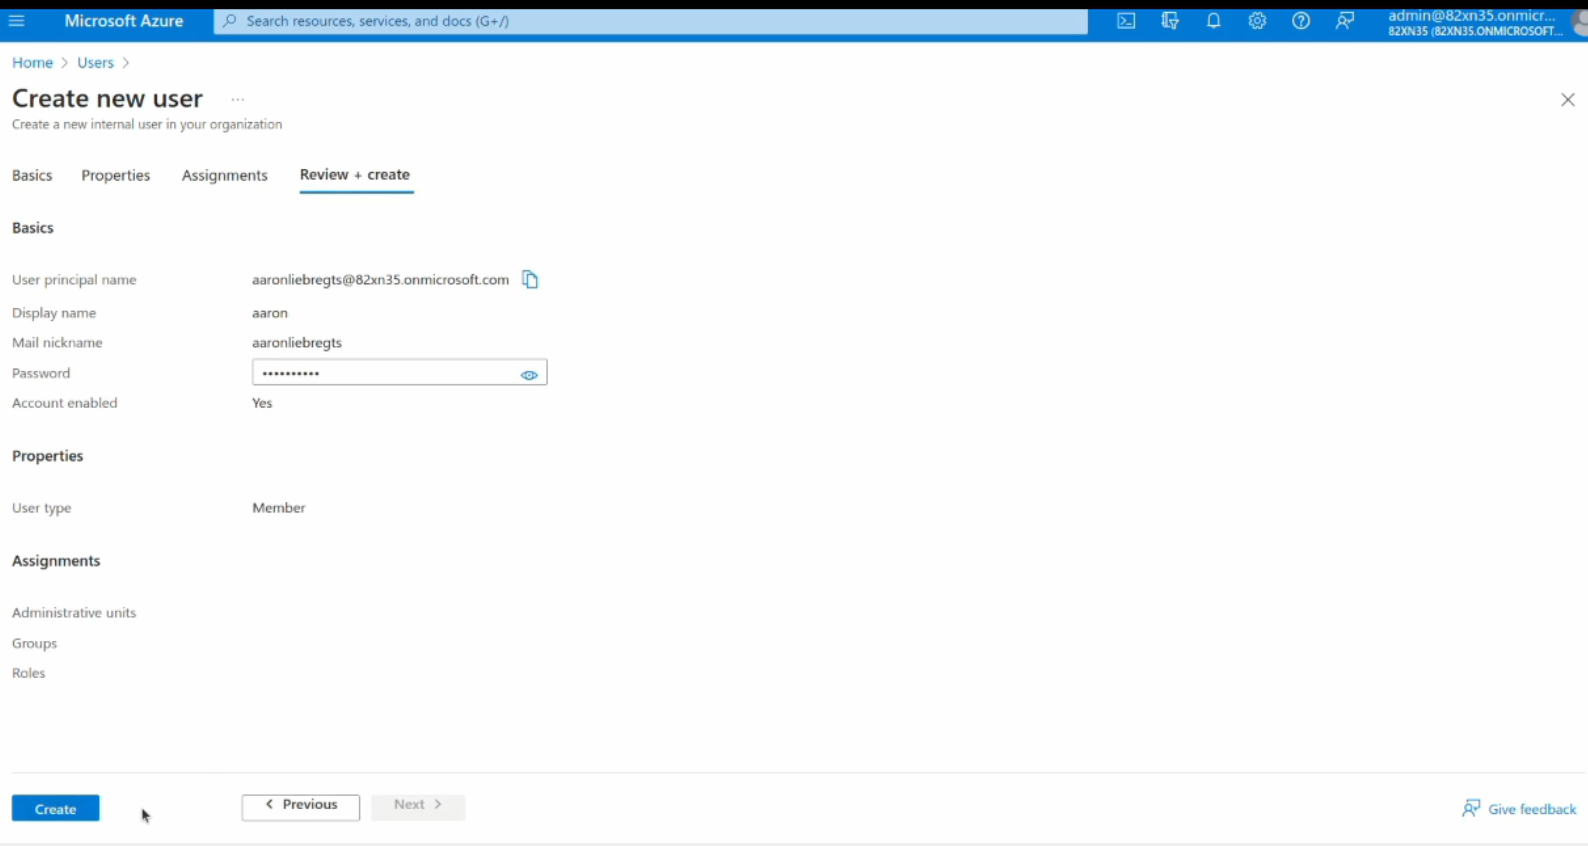
Another screen will display the confirmation page and you need to click on the create button to add the new user to your Entra ID instance.
Reconcile Accounts
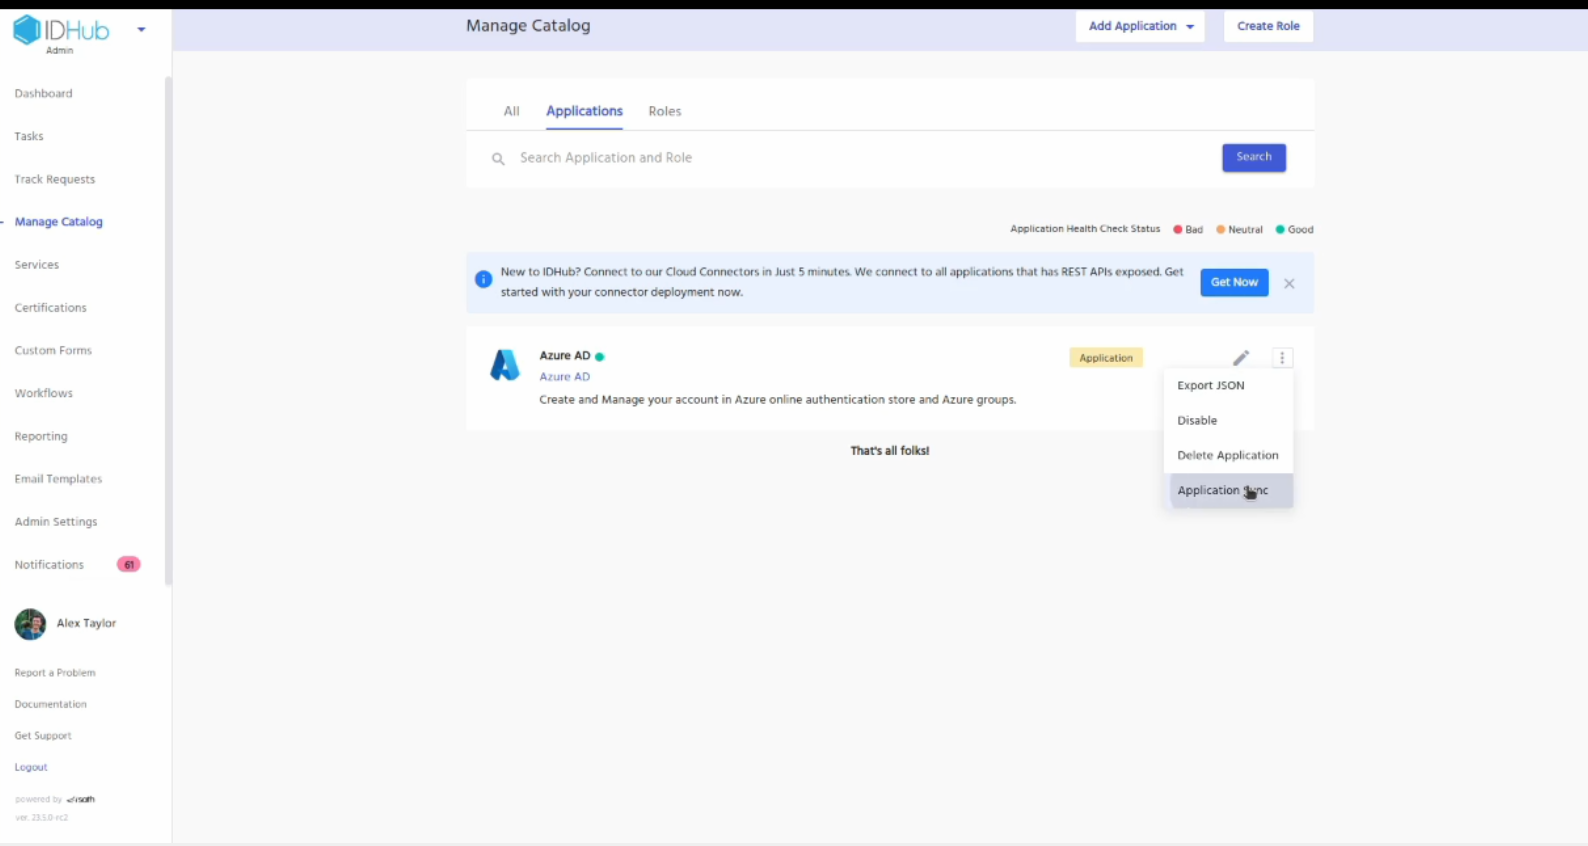
Now goto manage catalog, click on the 3 dots menu for the Entra ID application, click on the Application Sync menu
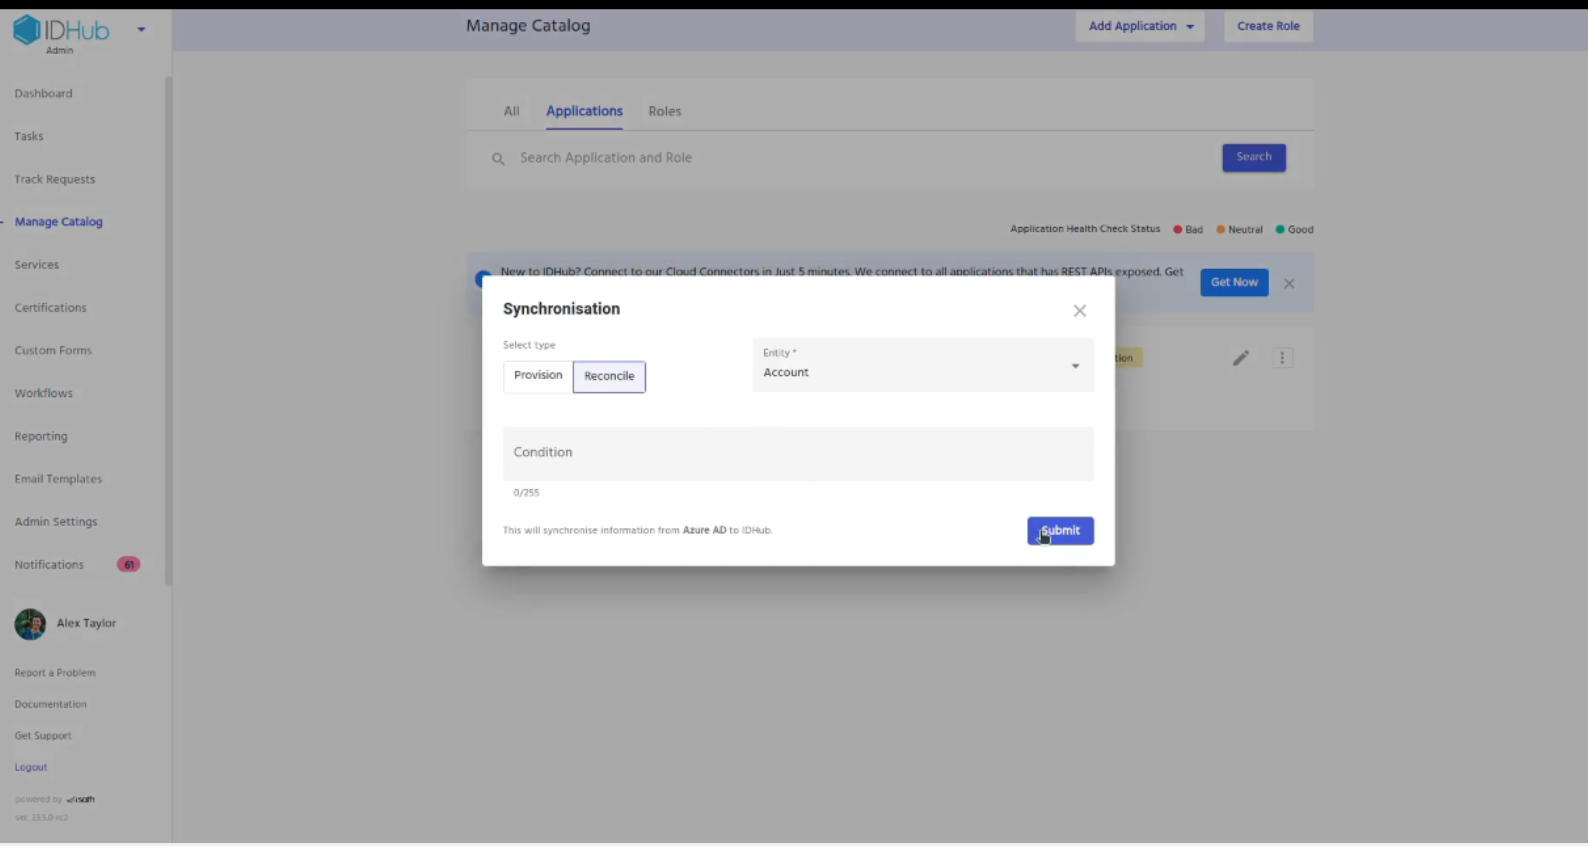
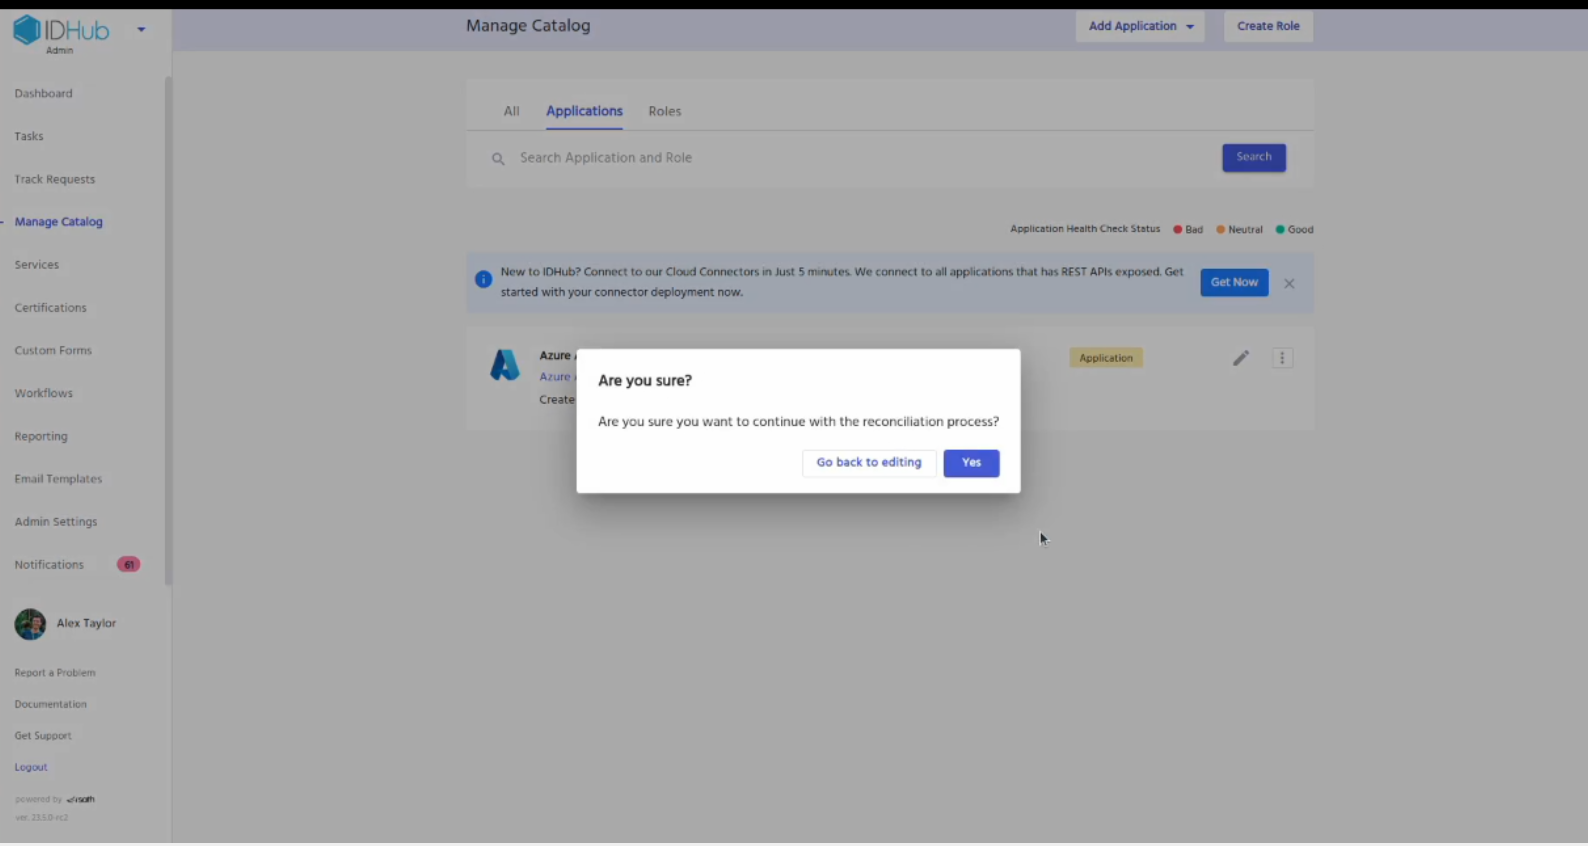
Pop-up window will be displayed. Click on the reconcile button and then hit the submit button.
Click on the yes button in the pop-up window.
Now again click on the application and then goto the application reconciliation logs. You will see that the sync is in progress. Wait for a few minutes for the sync to get completed.
Once finished click on the view link for the log, there you will see that the new user that you had created in your Entra ID target system has been automatically synced into IDHub.
NOTE: There is an auto-stream feature in Entra ID connector that we have developed, which will automatically reconcile accounts from your Entra ID instance to IDHub every few minutes.
Running Certification & Checking Auto-Revocation
Running the Certificate and Revoking Access
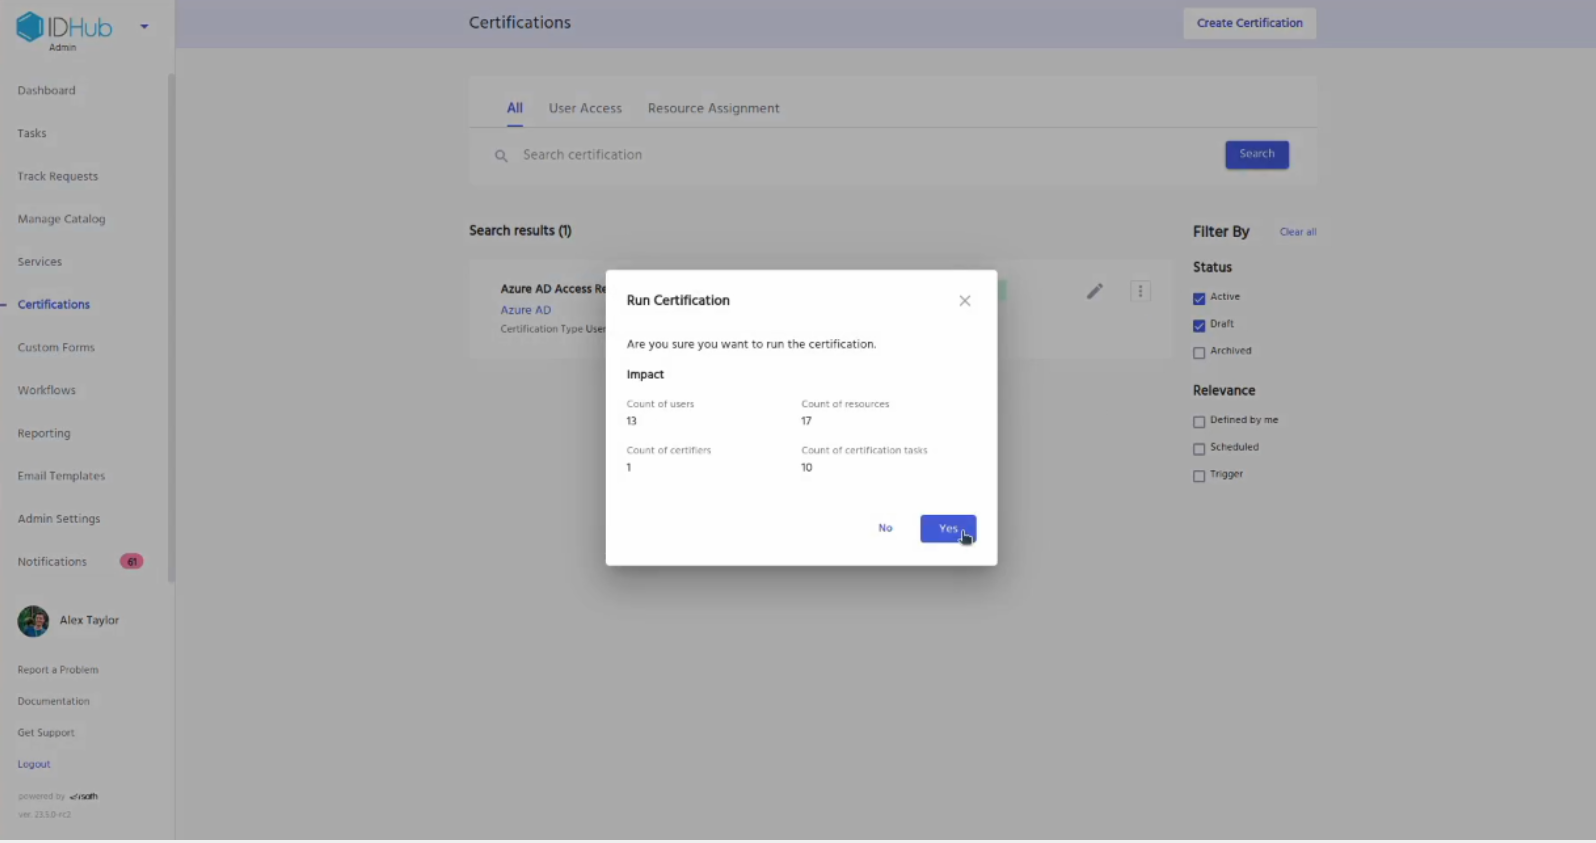
Now goto certifications and click on the 3 dots menu for the Entra ID Access Review certification and then click on the run now.
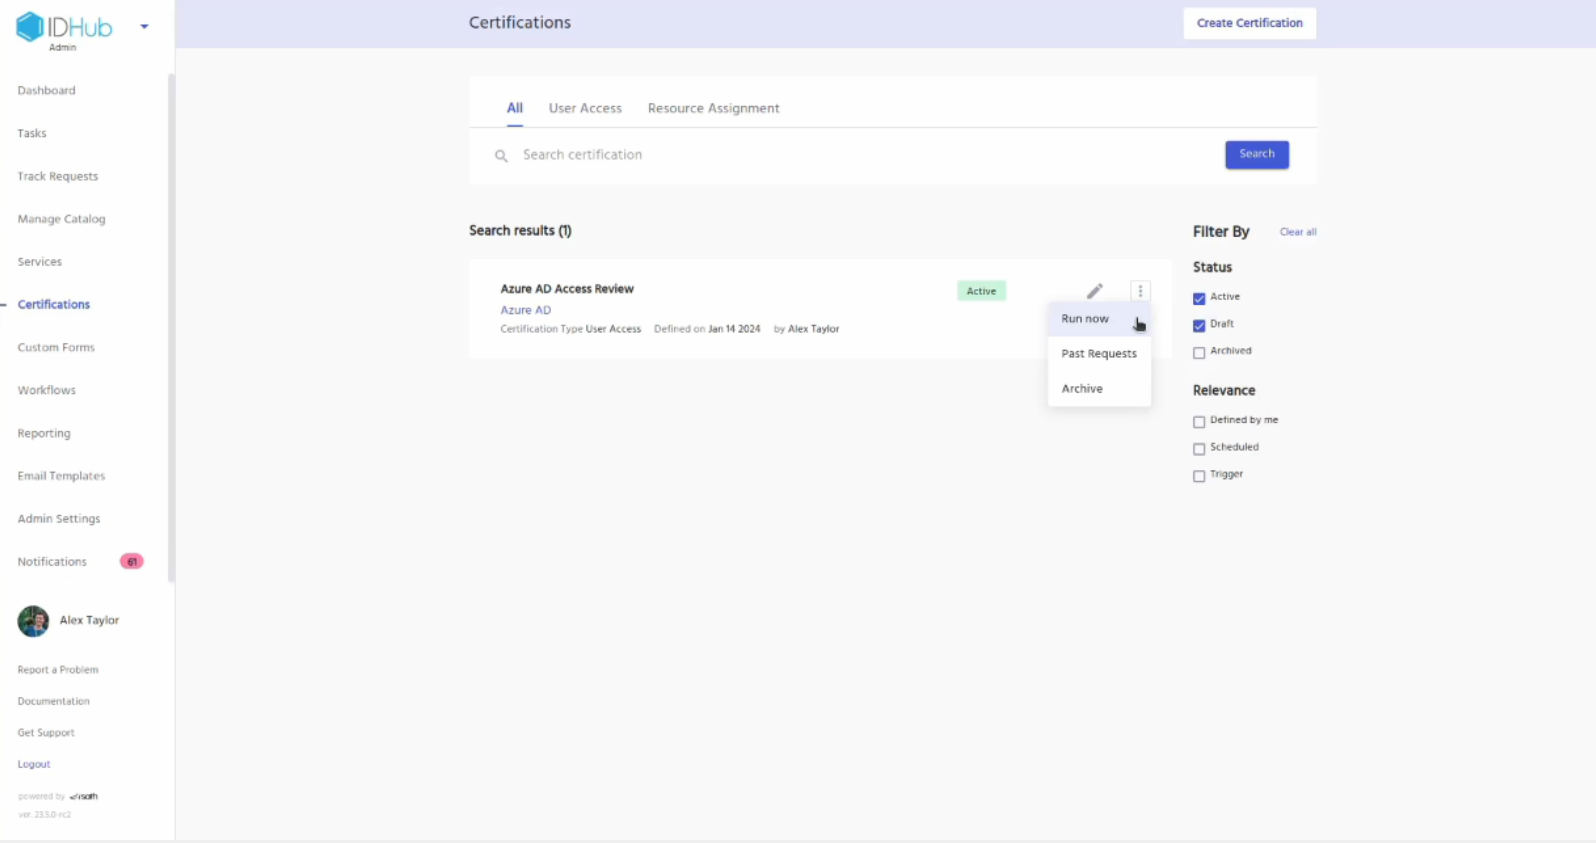
Click on the yes button in the pop-up window
Goto tasks and there you will see the certification tasks
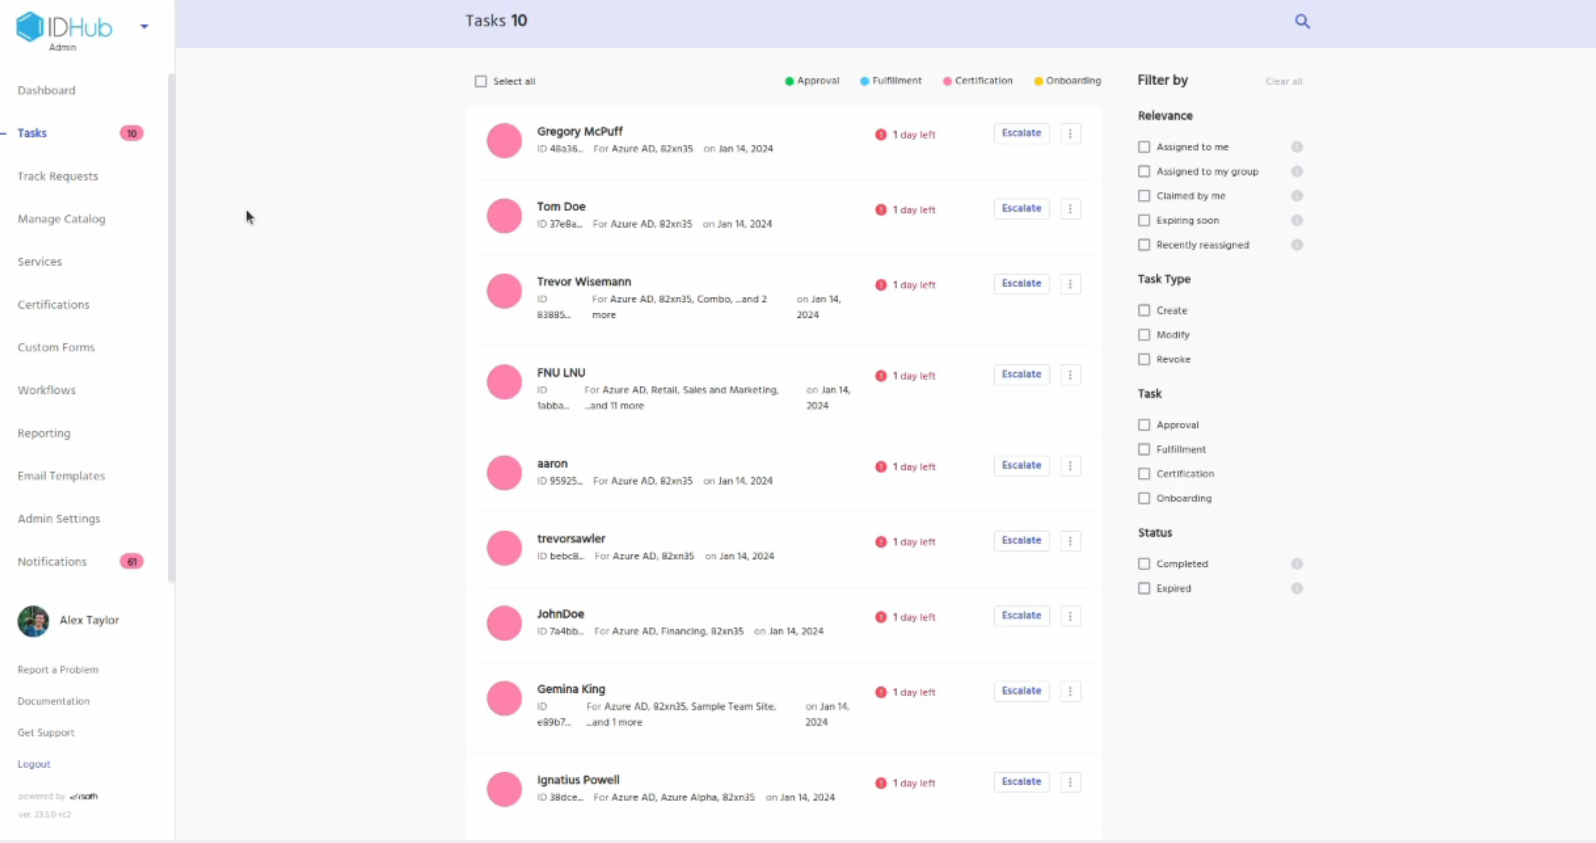
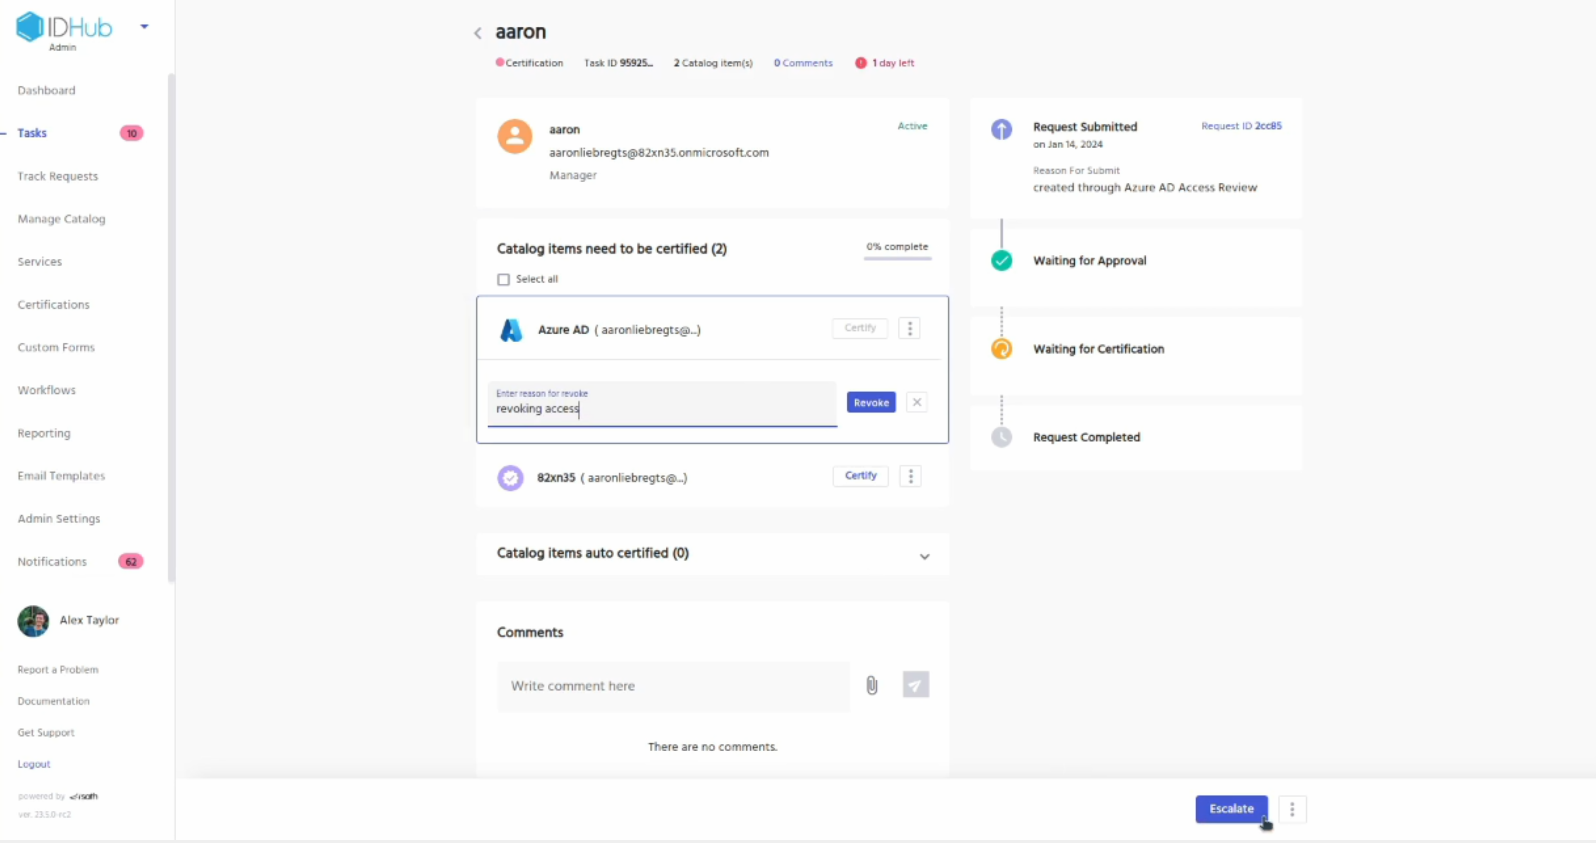
Click on one of the certification task
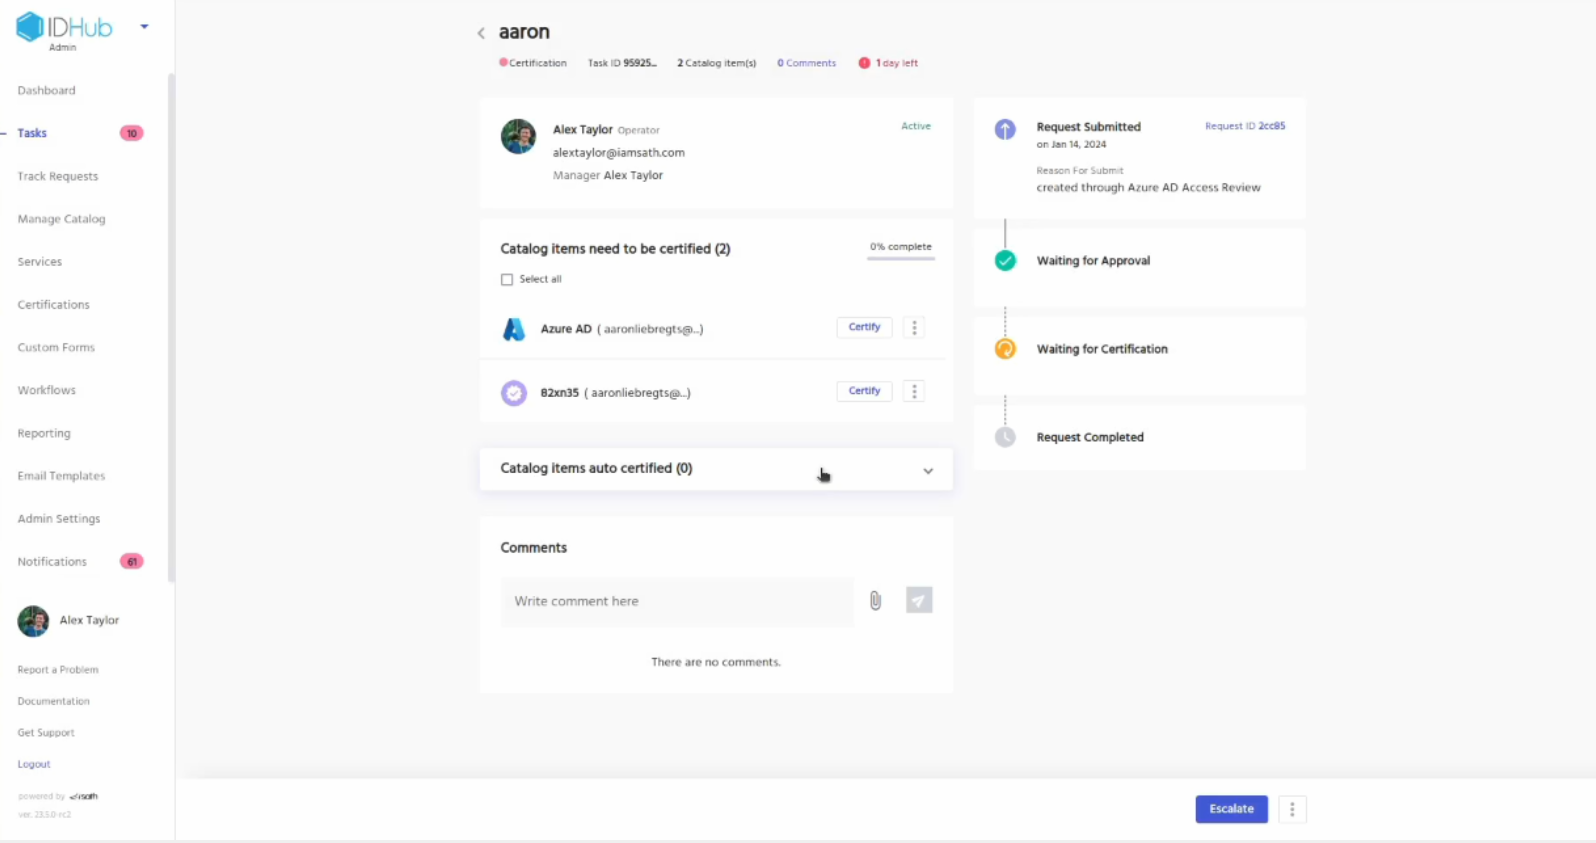
Let’s revoke access to Entra ID for the user. Click on the revoke button for Entra ID
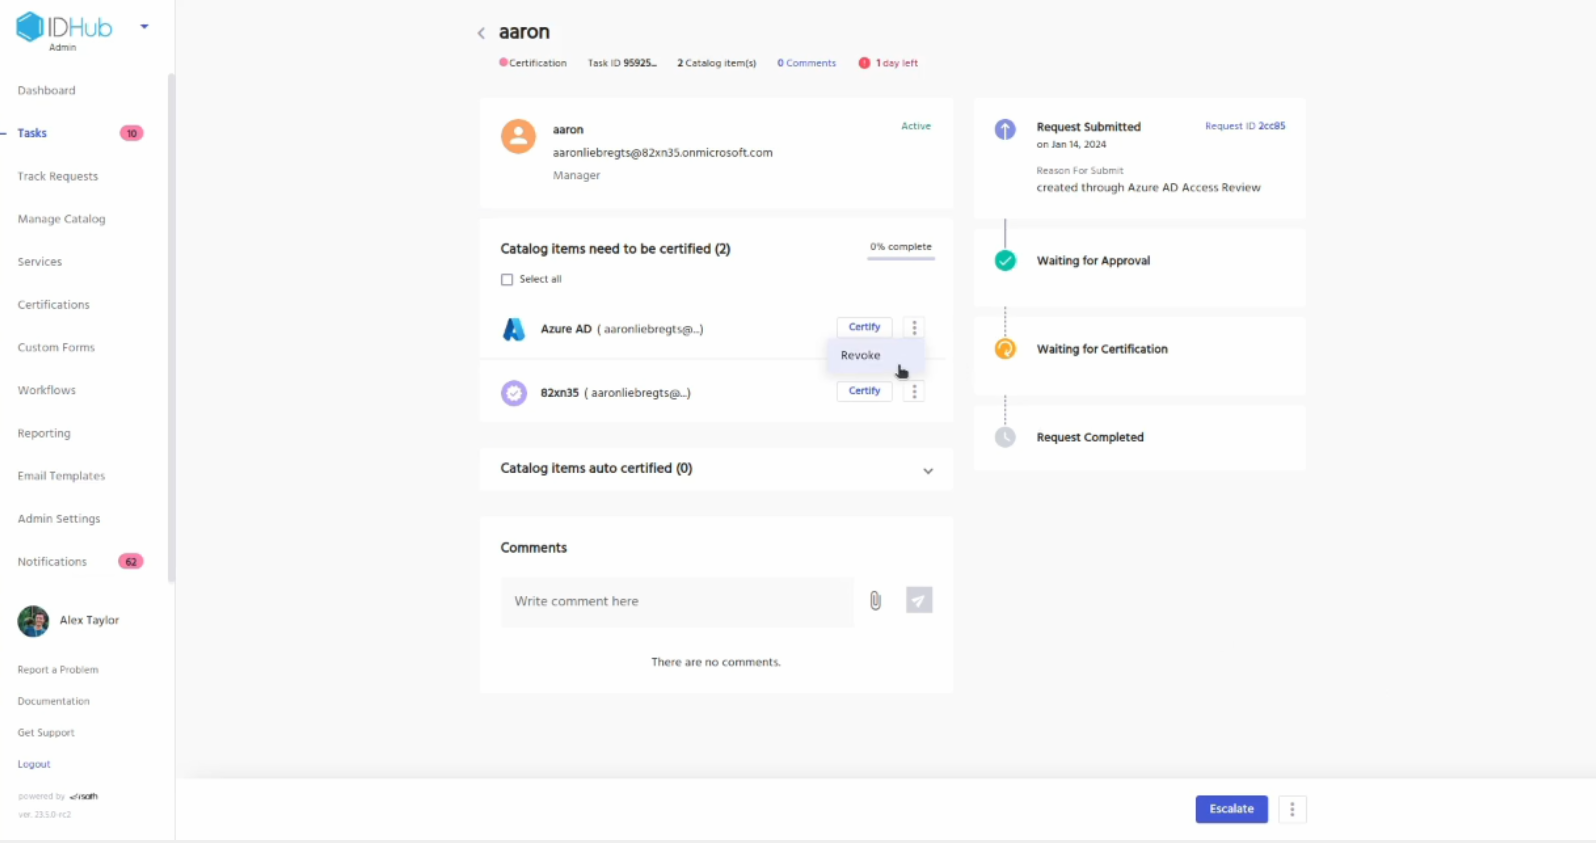
Enter a reason for the revocation and click on the revoke button.
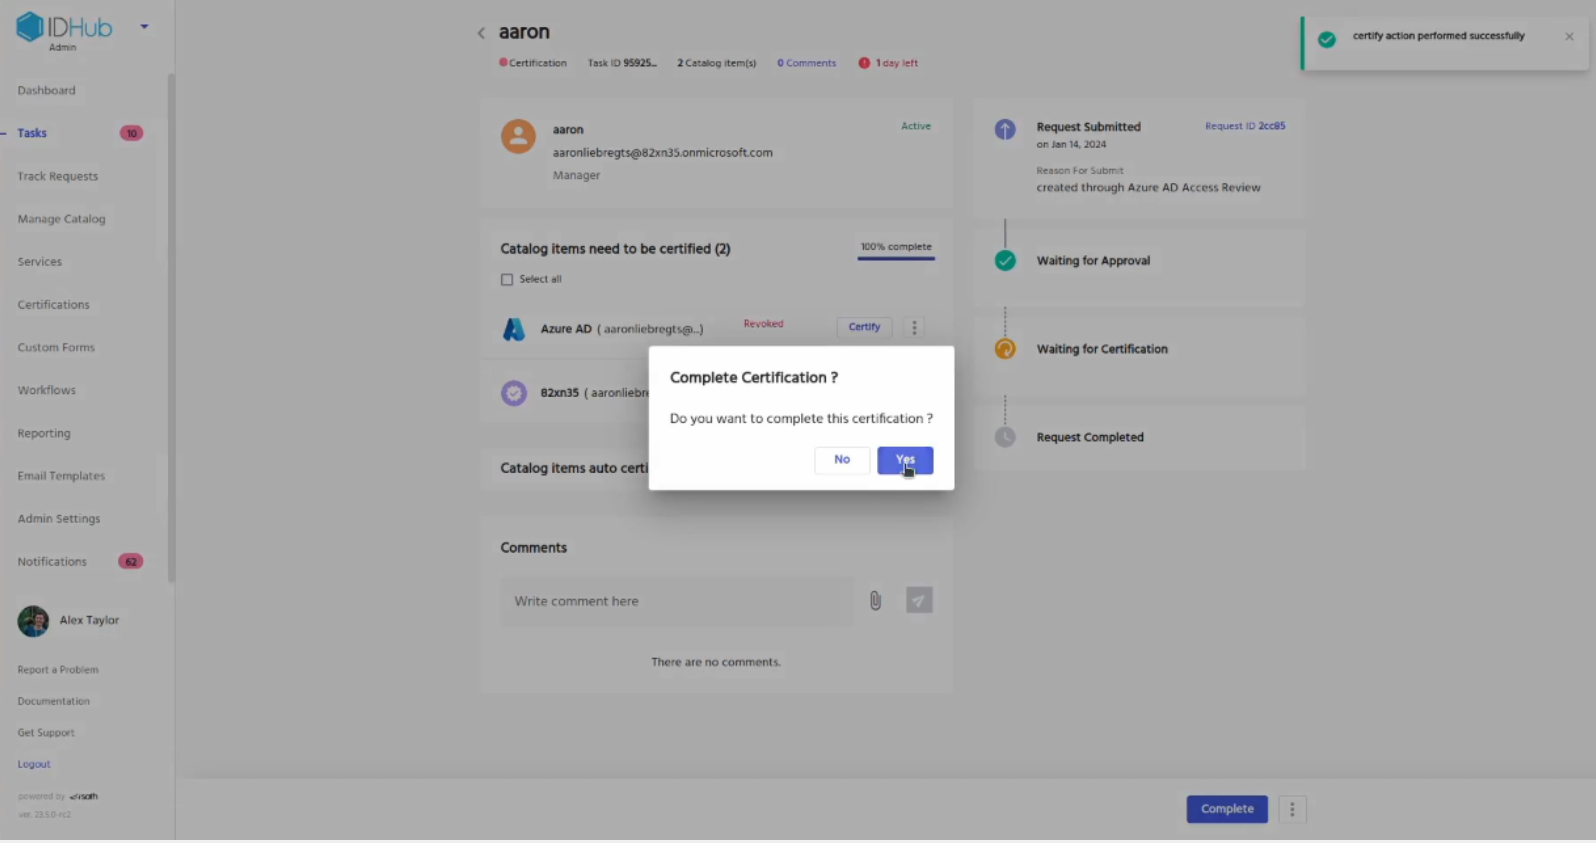
Similarly you can certify the other resources if you want and then click on the complete button.
Verifying if the user has been revoked
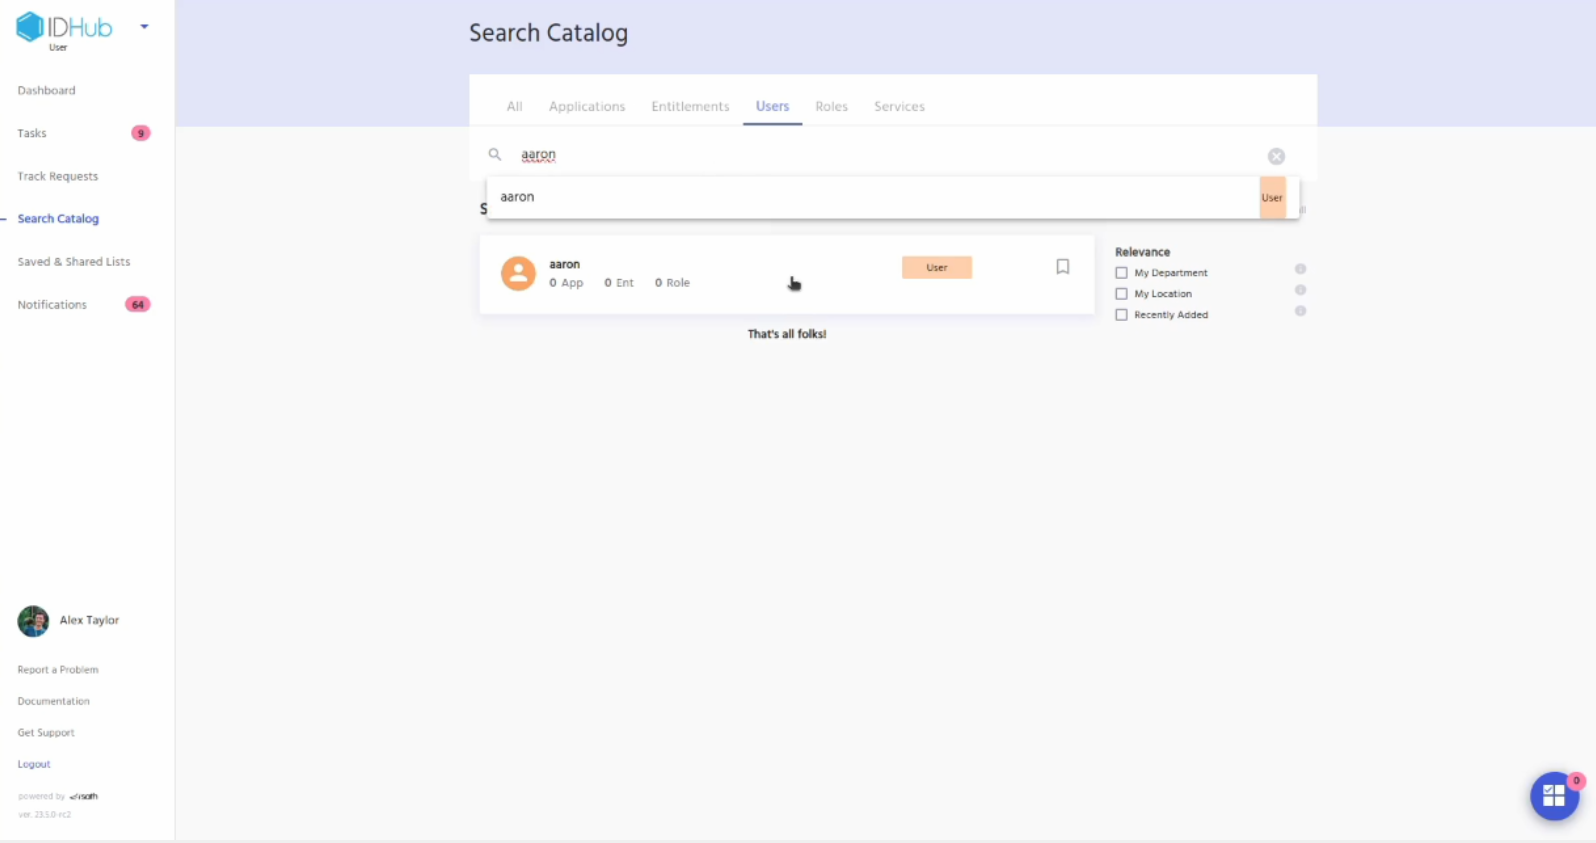
Go to IDHub user app, click on the search catalog and then click on the users tab. Search for the user whom you have just revoked access via certification.
Click on the user. A RHS will be displayed. Click on the AccessTo tab of the RHS. You will see that the Entra ID application has been revoked for the user.
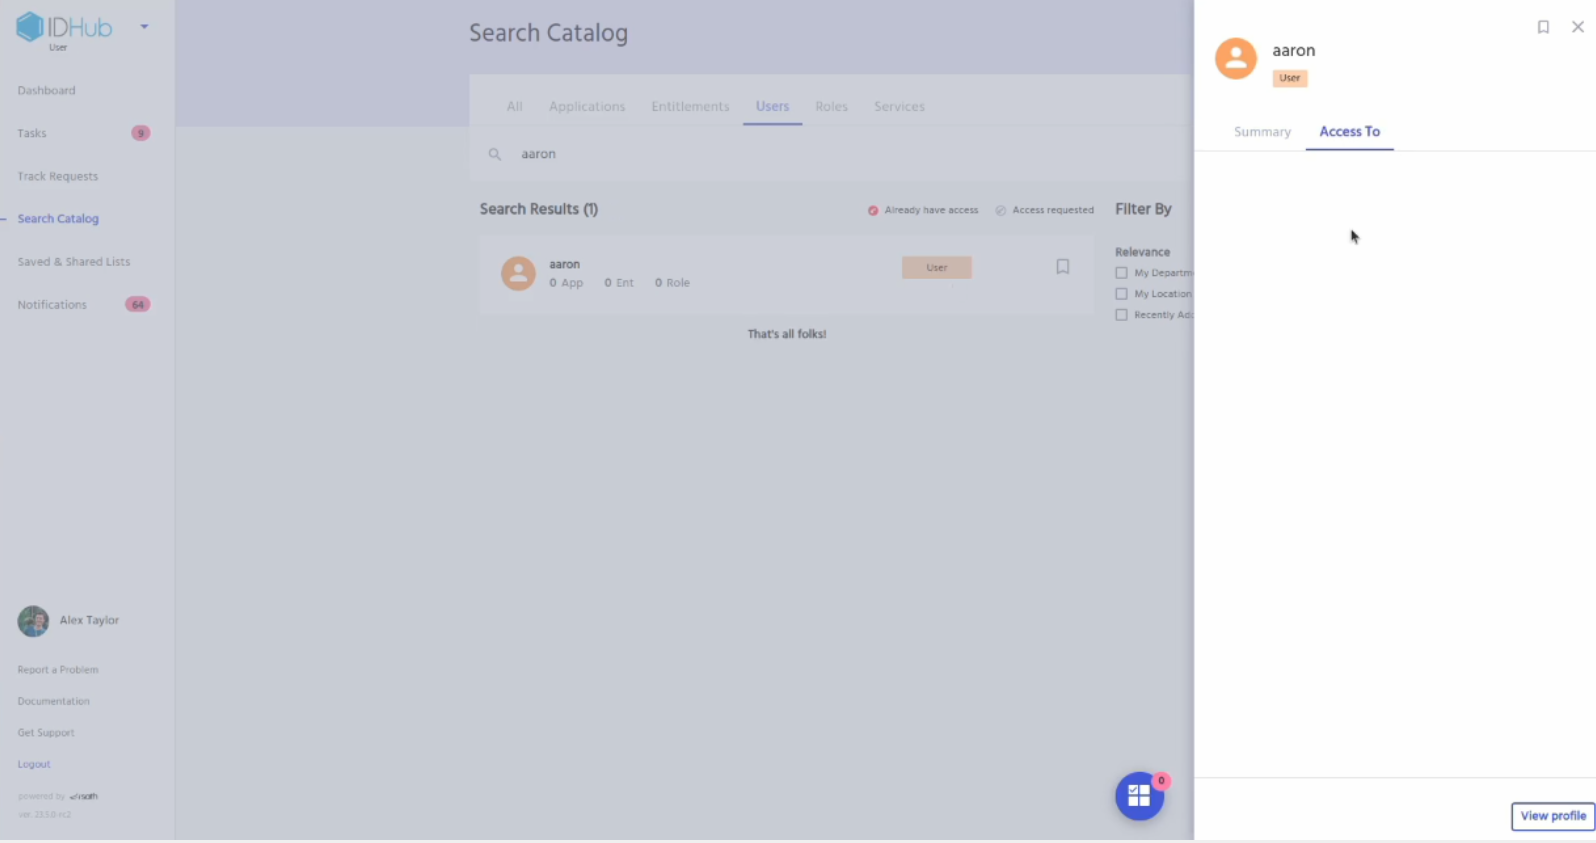
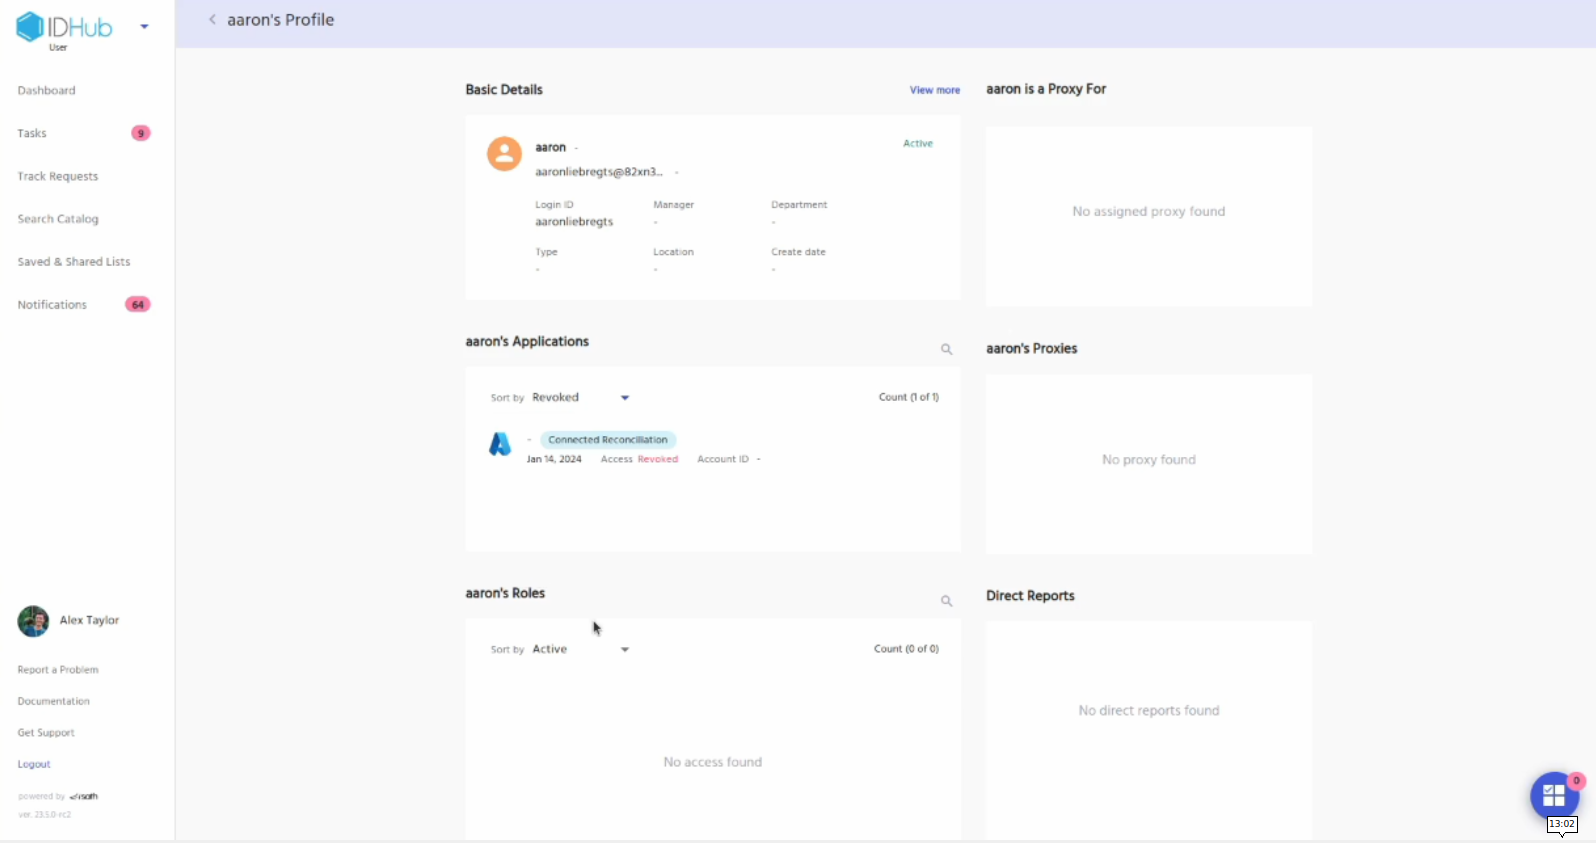
Click on the View profile button of the RHS. This will redirect you to the user profile page.
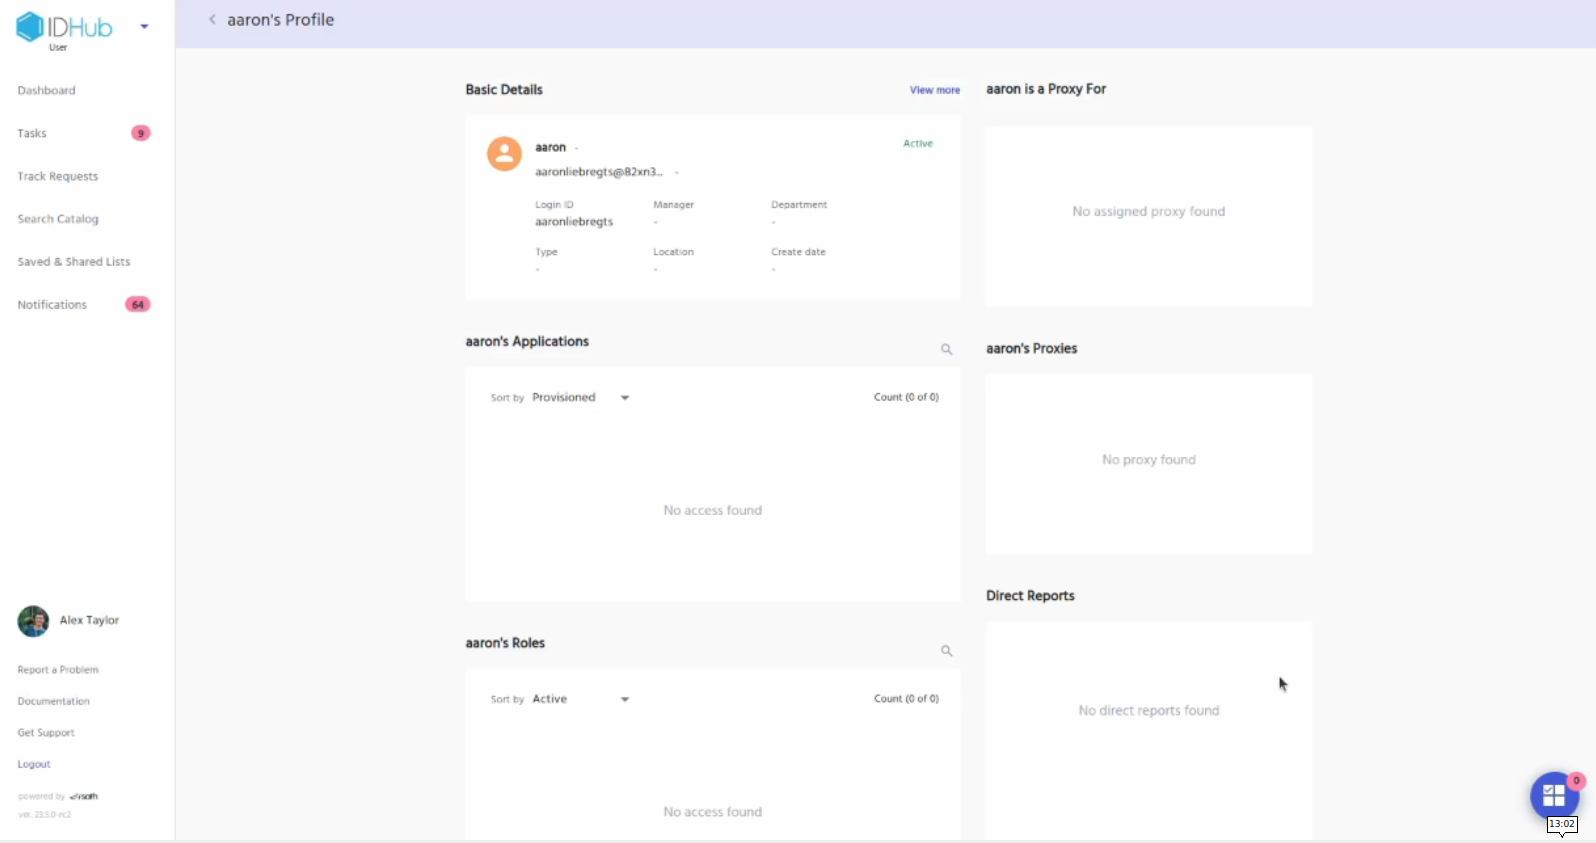
Under applications section, click on the drop-down and then select revoked, this will show the Entra ID application with revoked status.
Ending Notes
We've reached the end of this tutorial and IDHub team would like to extend our heartfelt thanks to you for taking the time to engage with this content. Your dedication to learning and growth is what fuels the creation of resources such as this.
We hope that this tutorial has been informative, helpful, and has enriched your knowledge on the topic. Your willingness to learn is admirable, and we hope that the insights provided here have added value to your journey.
If you have any questions or concerns, or if there are areas you wish to explore further, please feel free to reach out here. Your feedback is incredibly valuable, not only in improving these resources, but also in helping to shape future content.