Setup SSO via Entra ID
This document is a tutorial guide that elaborates on how to configure Entra ID SSO so that your users can log in to your IDHub tenant using Entra ID SSO
In this tutorial we have discussed the SAML-based Entra ID SSO setup. Alternatively, Entra ID SSO setup can be OIDC based as well, which we are not doing currently.
Access your KeyCloak Instance
The first step is to log into your KeyCloak. For logging into KeyCloak:-
- Login into your IDHub tenant
- Make sure that you have admin credentials to log into your IDHub tenant
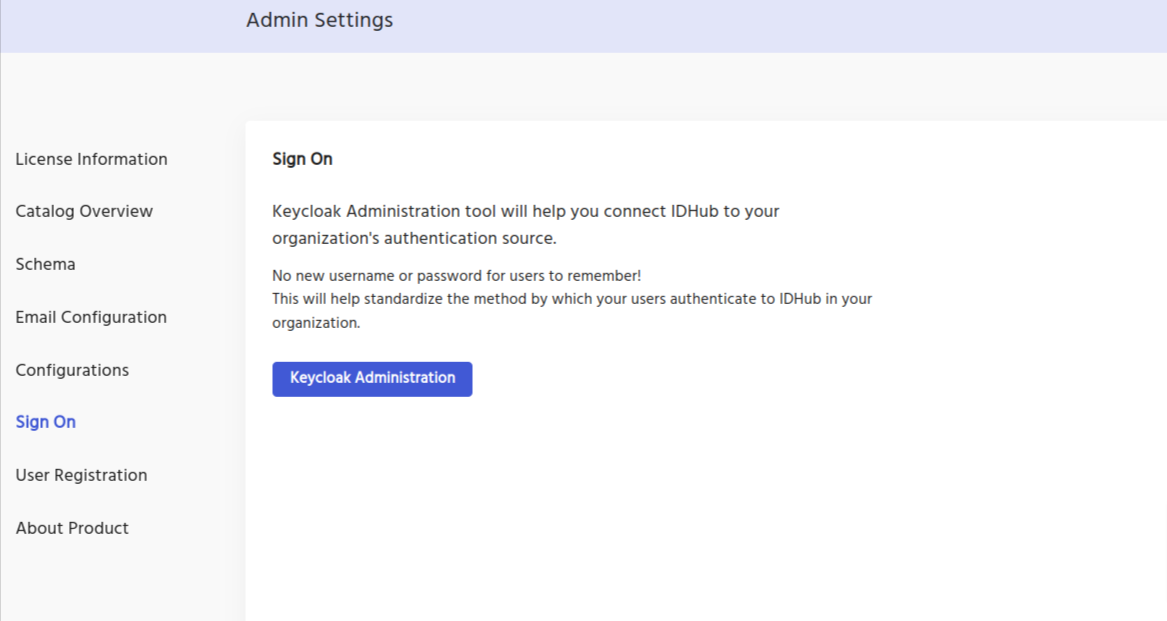
- Click on the
Admin Settingfrom the IDHub dashboard, - Click on
Sign On
Click on the KeyCloak Administration button, and then you will be redirected to your KeyCloak instance.
Creating the SAML client in KeyCloak
Why do you need itA SAML client needs to be created in KeyCloak since it will be used by KeyCloak internally for brokering with the external identity provider which in this case is Entra ID
The first step is to create a client in your KeyCloak realm. In order to do so:
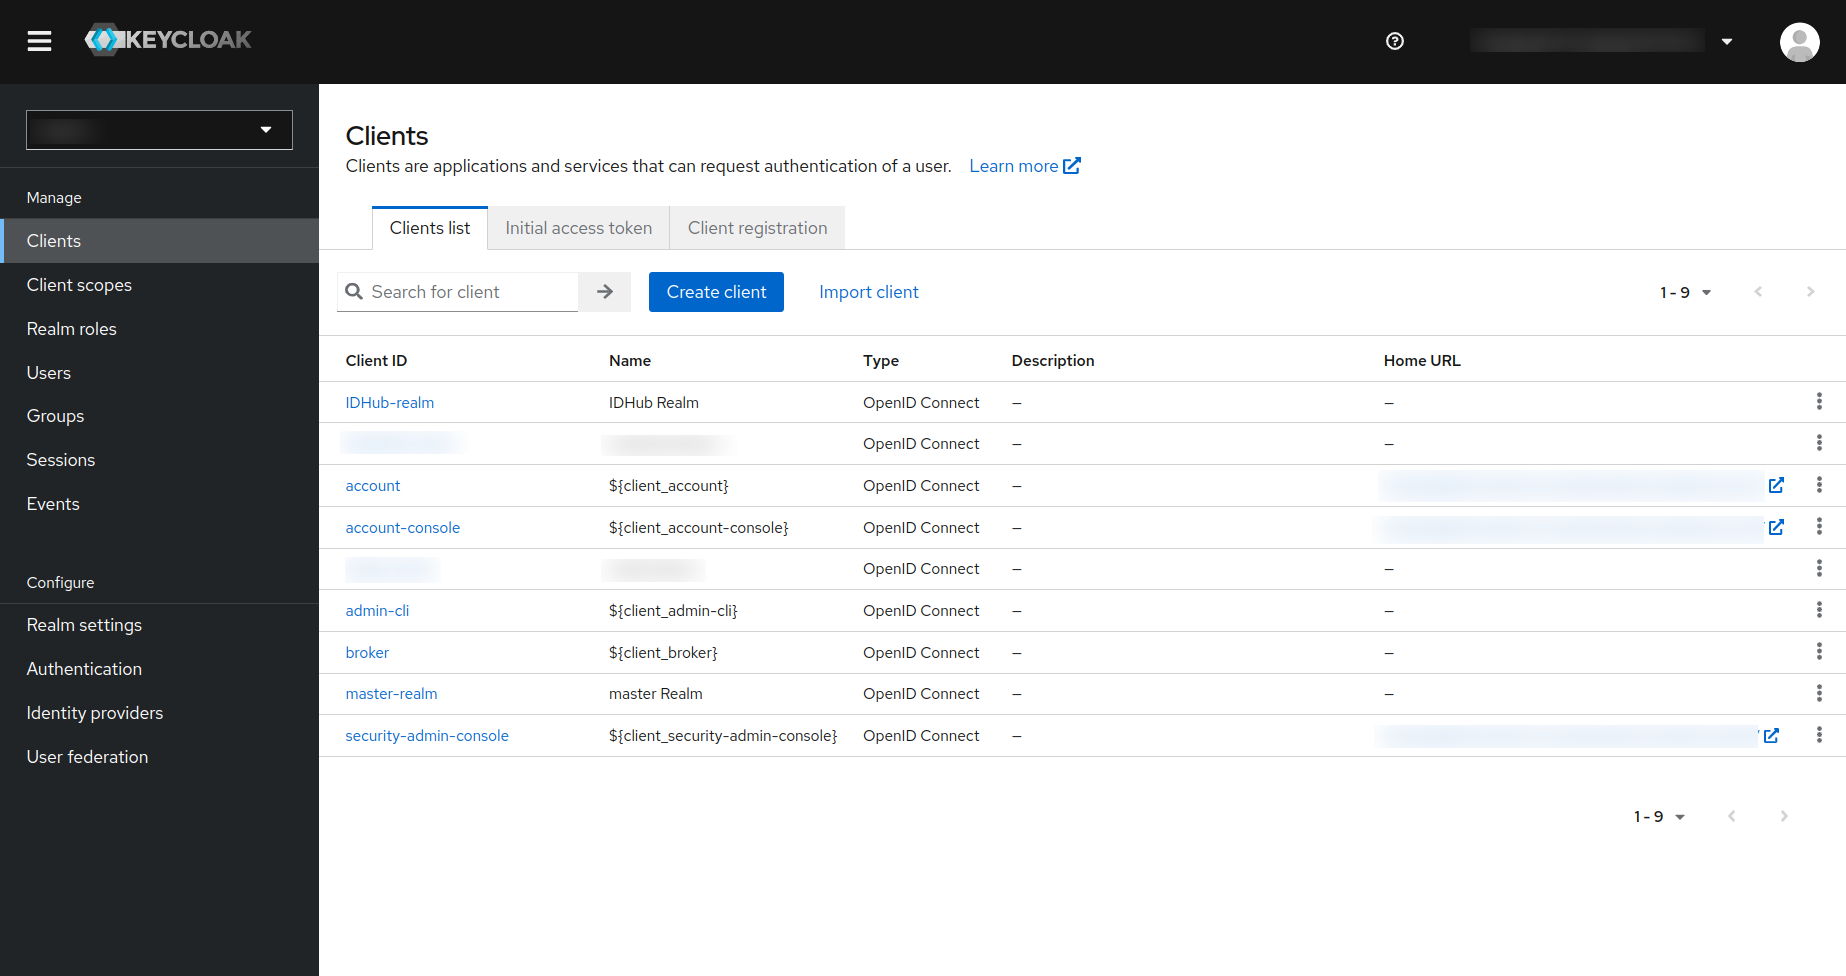
- Click on the
Clientslink in the left navigation bar in your KeyCloak Realm. - Click on the
Create Clientbutton.
Then you will be taken to the following page:
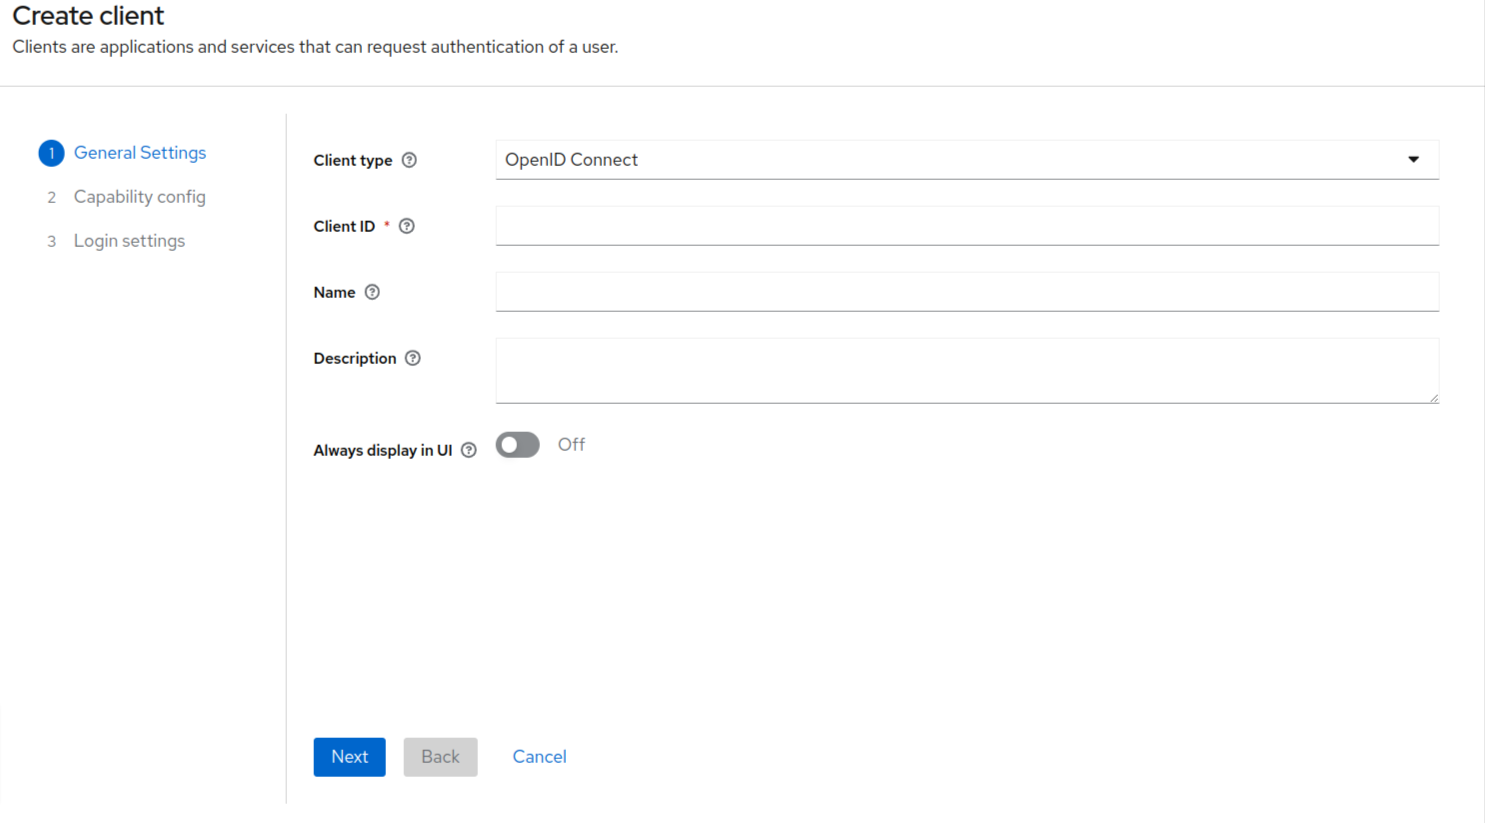
- You need to select the SAML from the Client Type drop-down.
- Since we are going to use the SAML method of setting up the Entra ID SSO, therefore the client type should be SAML here.
- Enter Client ID and name.
- Click on the next button at the bottom.
Client ID can be: “Saml” and name can be “Entra ID SSO”.
This is last step of creating the client.
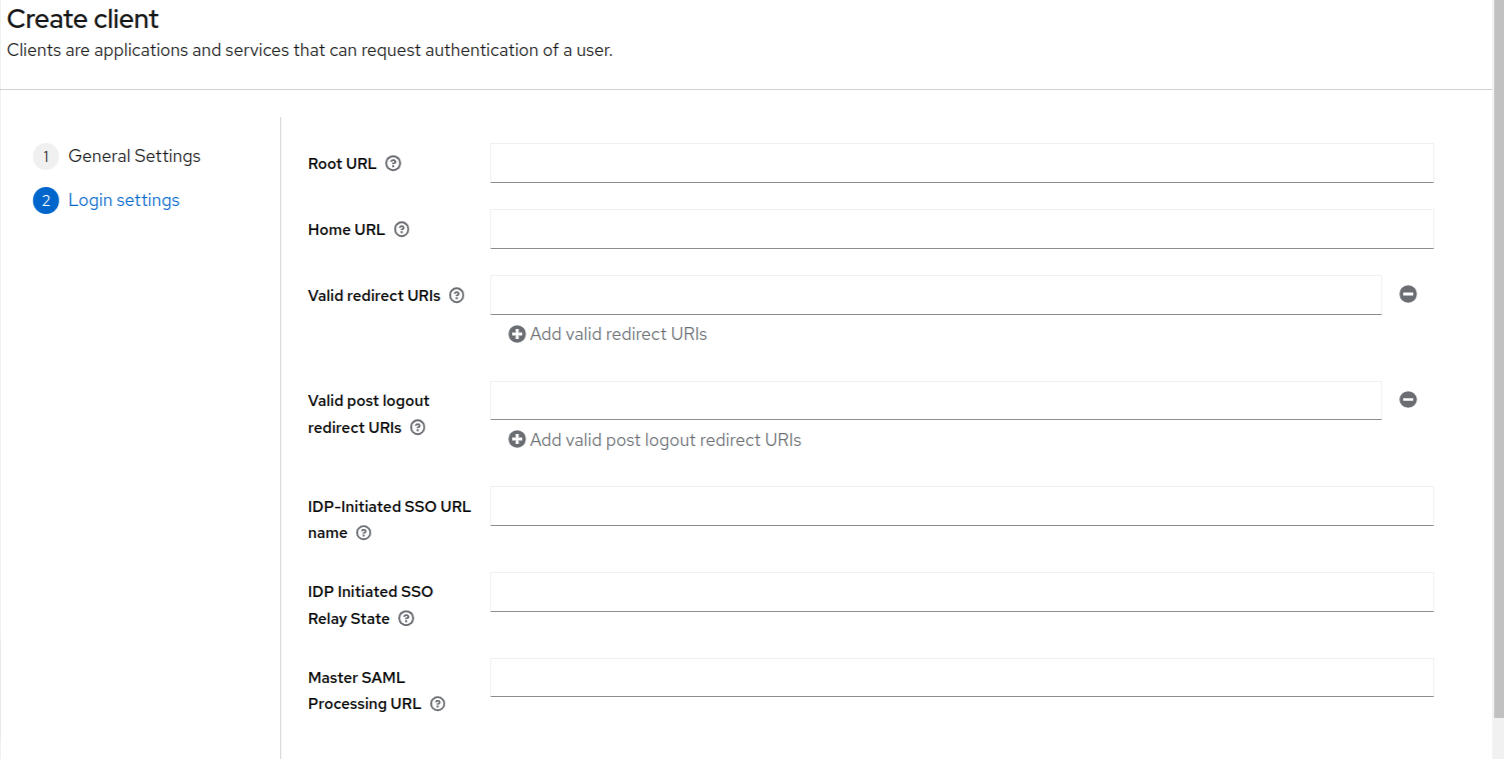
In this page, all the fields are non-mandatory fields. You can just set valid redirect URIs to be “*” and click on the save button at the bottom of the page to create the client.
Creating the Enterprise Application in Entra ID
Why do you need itAn Enterprise application needs to be created in your Entra ID instance which will act as the identity broker with KeyCloak.
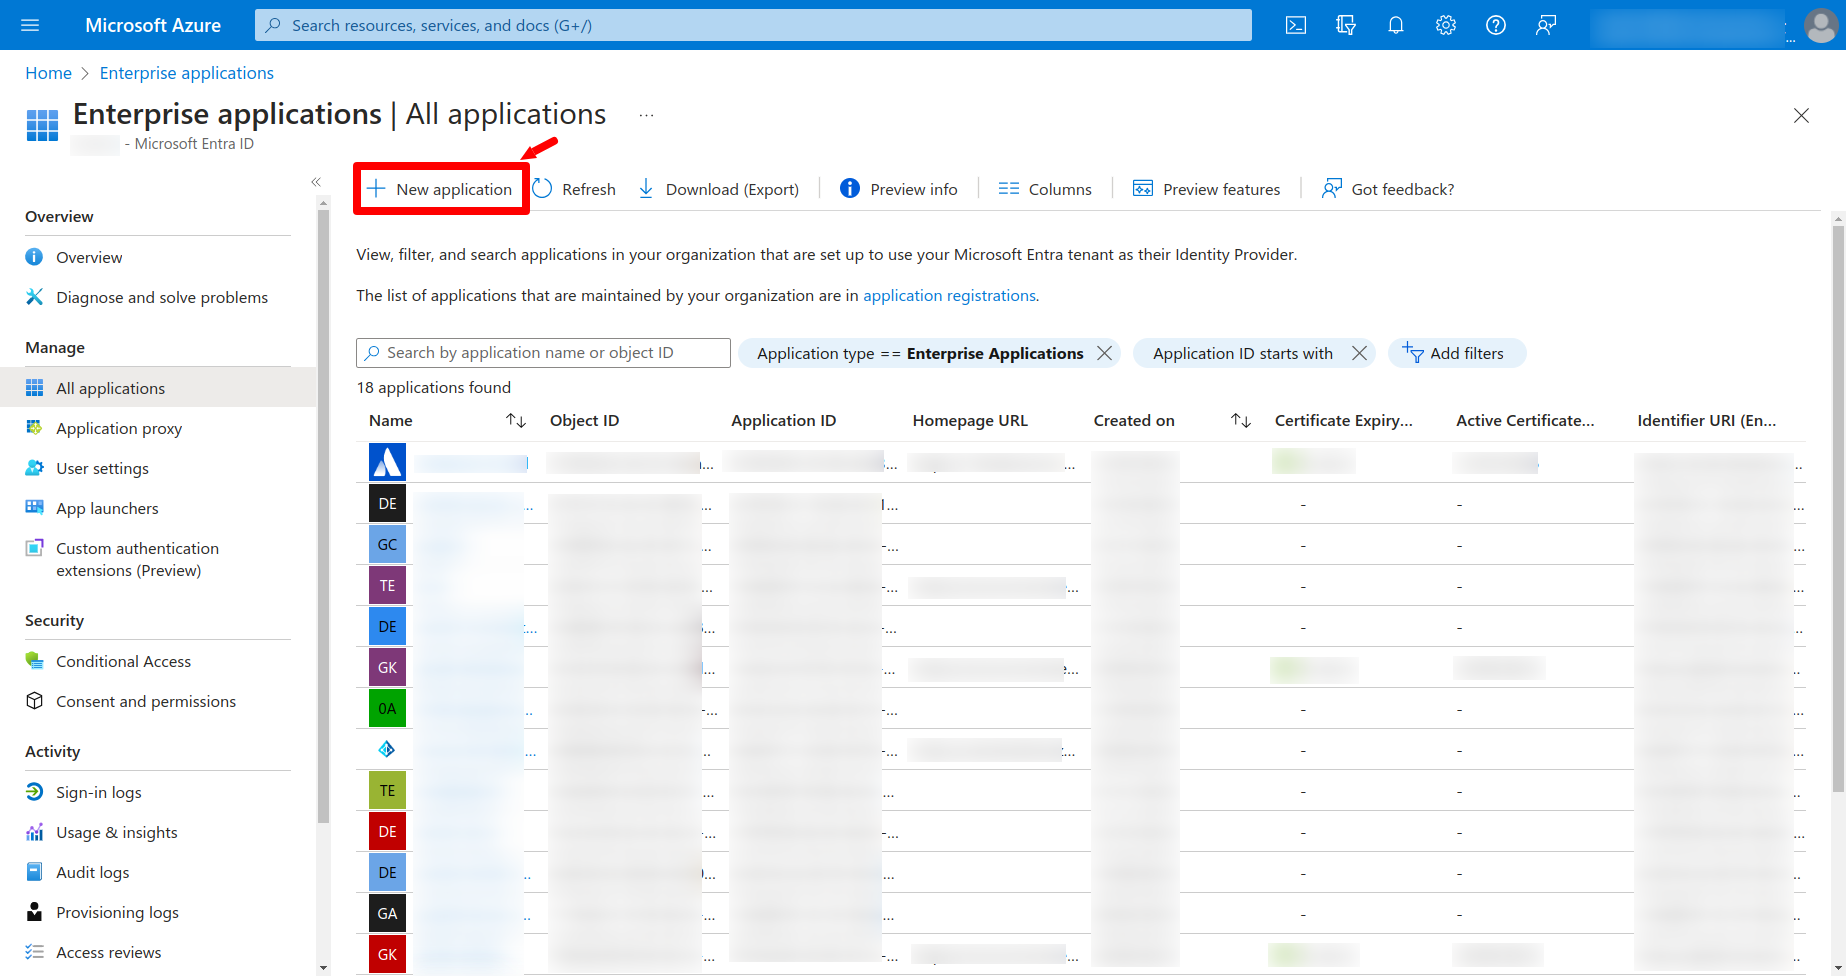
Login to your Entra ID instance and click on the Enterprise applications. Now click on the New Application button as is shown below:
After that you will be taken to the following screen:
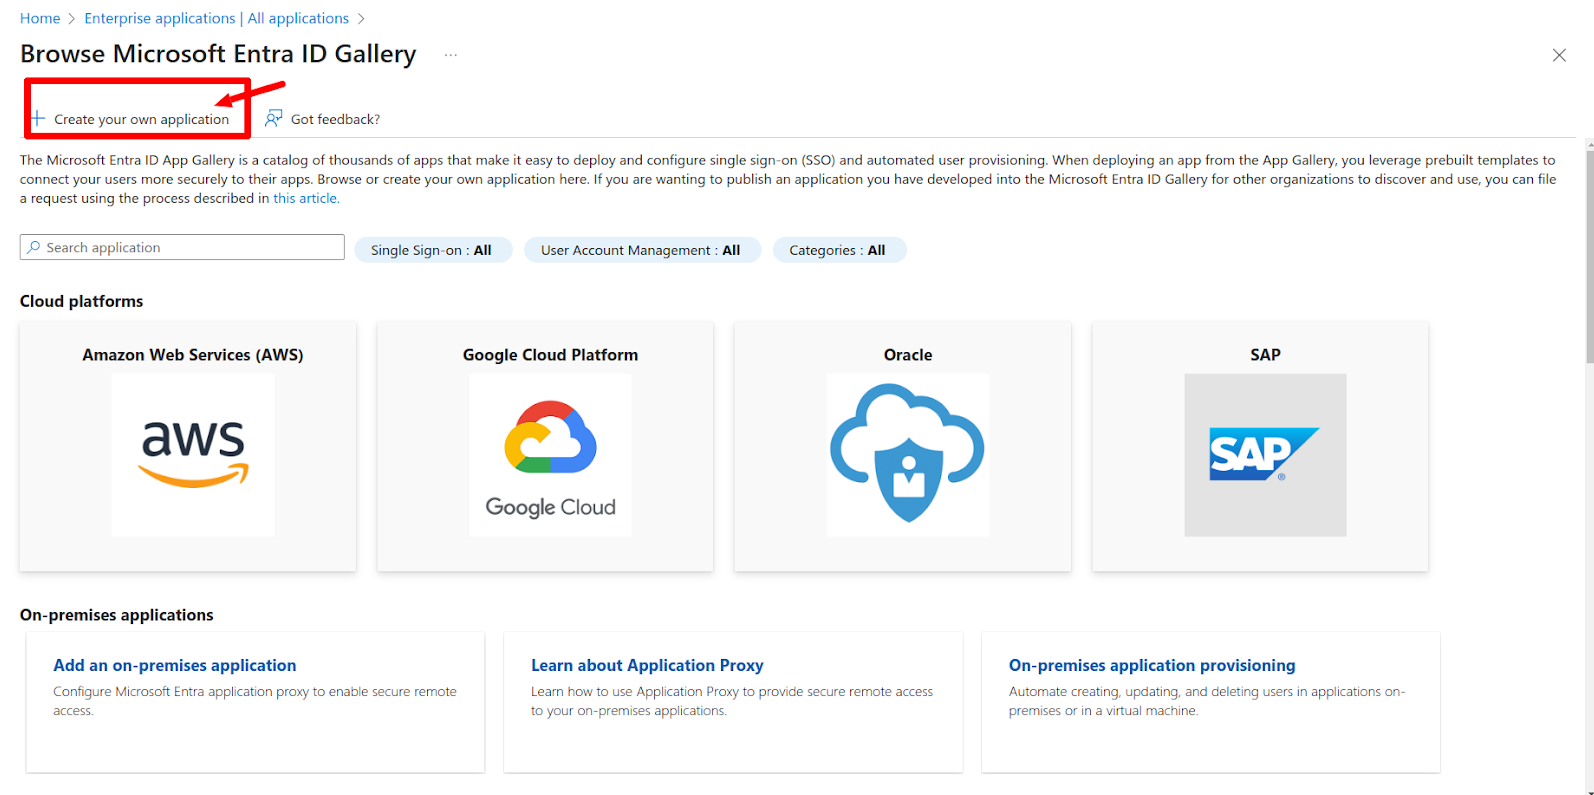
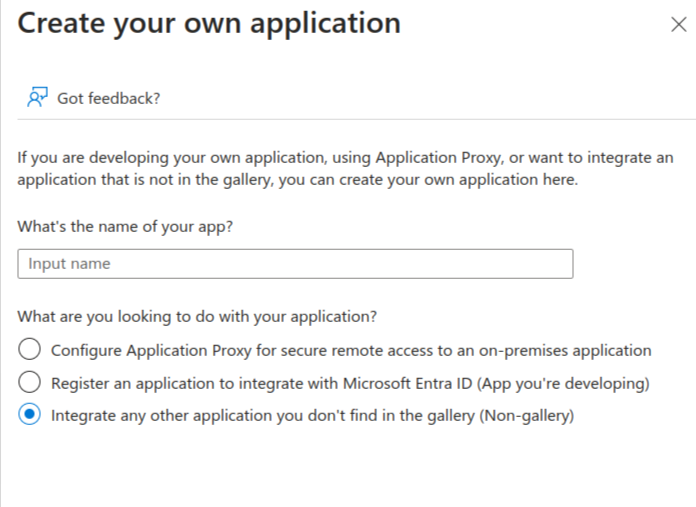
Click on the Create your own application button. Then enter the name of the application and hit the create button.
After that click on the Single Sign on link in the left navigation menu.
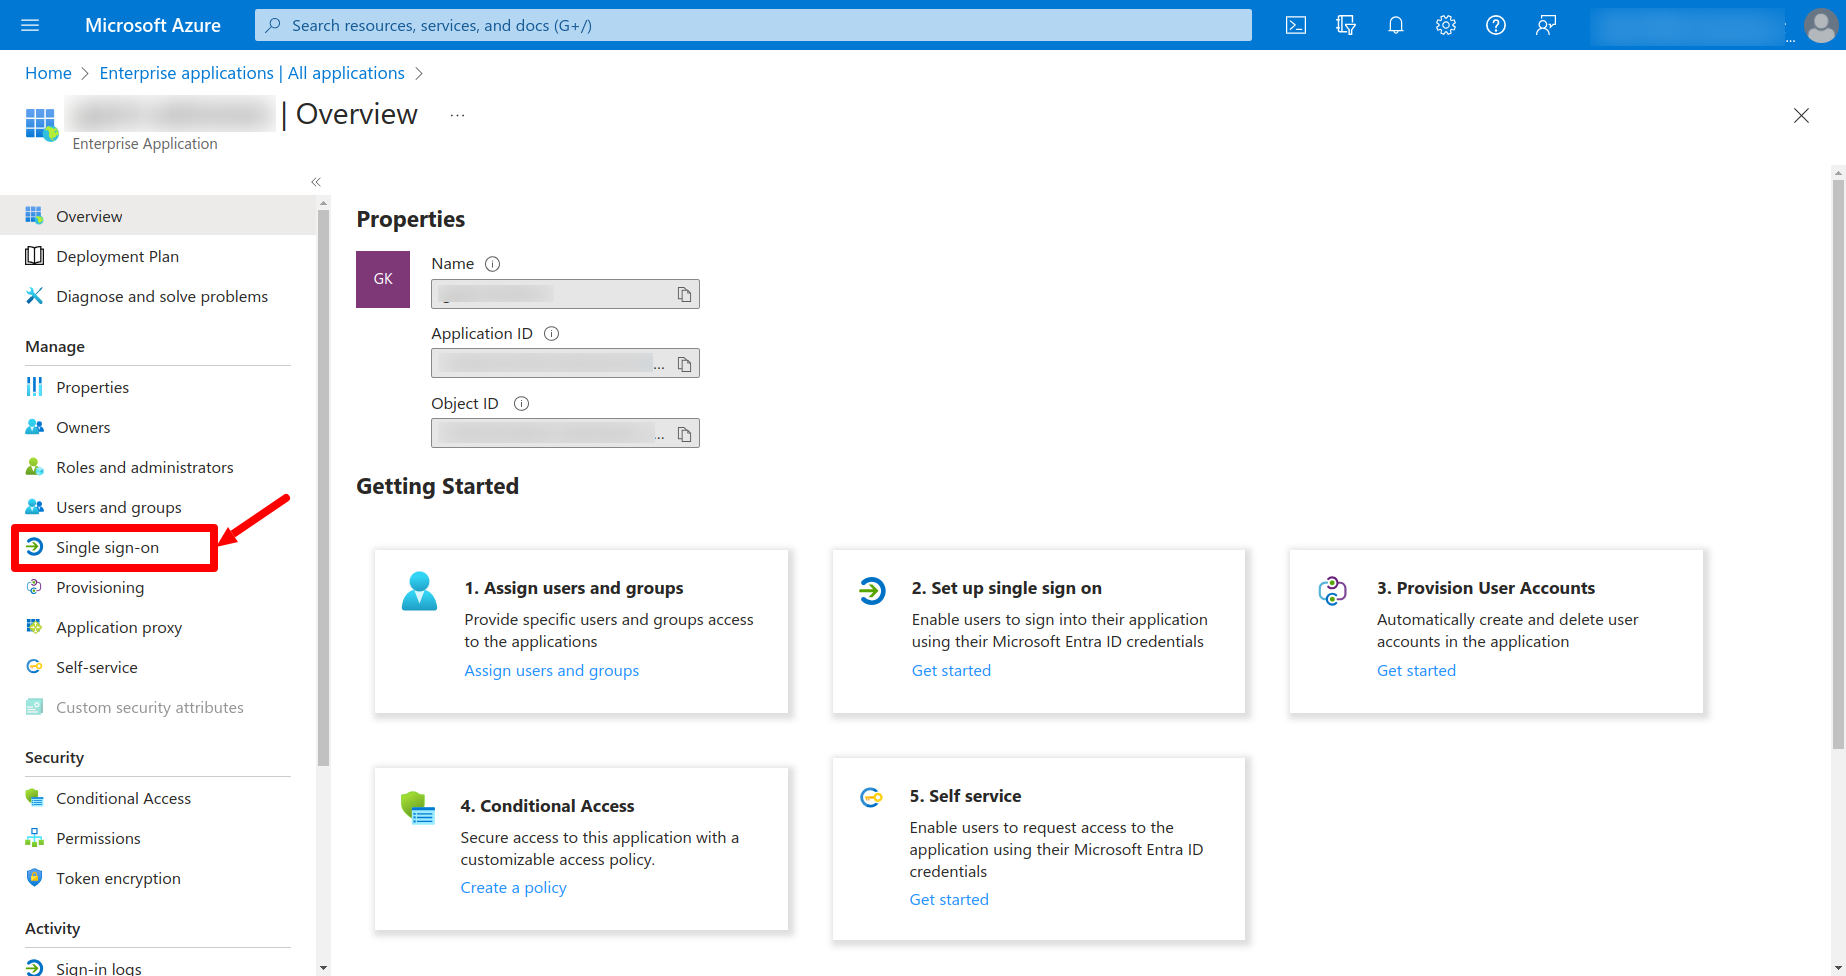
Click on the SAML button on the next page.
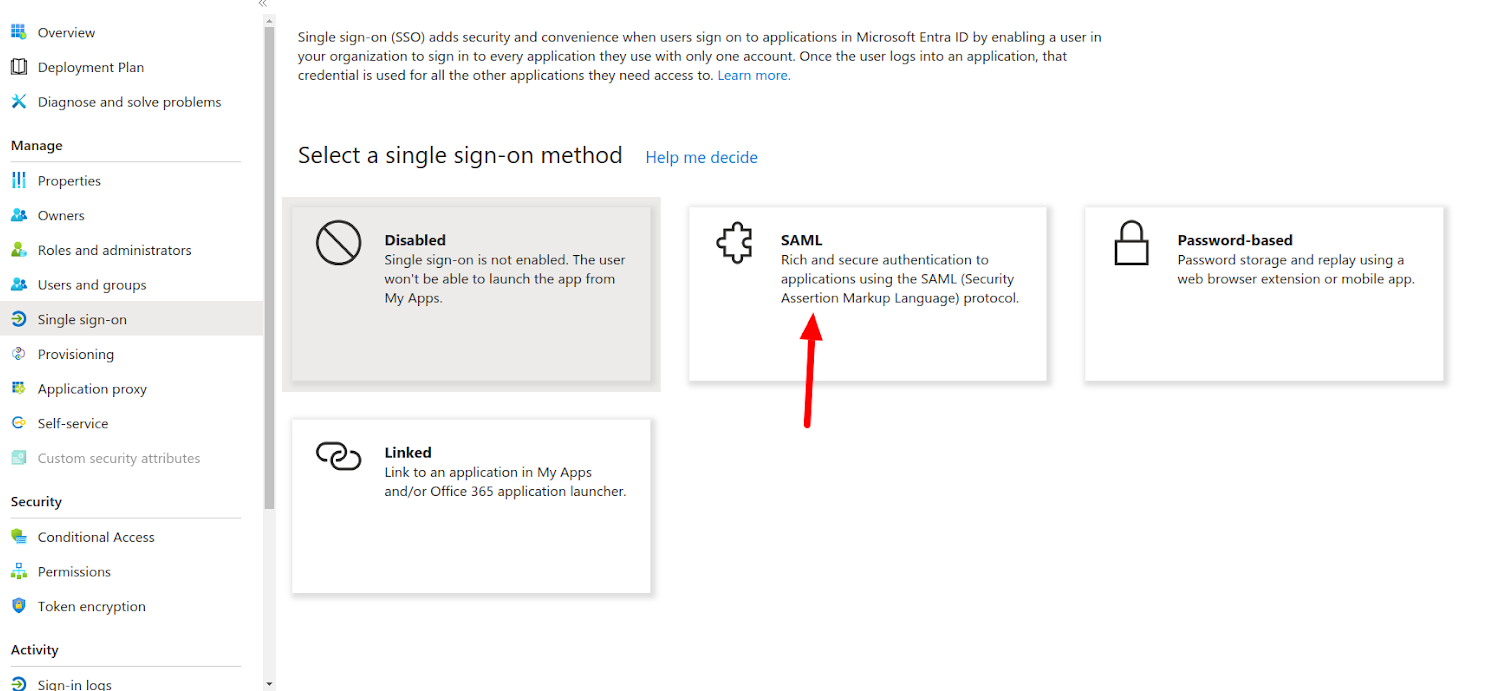
After that you will be redirected to the following page:
Copy the App Federation Metadata URL and keep it somewhere safe as you will require this in the next step.
Creating the First Login Flow
Why do you need itAn authentication flow needs to be configured in KeyCloak. In this tutorial we have described a specific flow which is applicable in scenarios where you do not need to implement additional checks before executing the single sign-on.
However, there can be alternate flows as well, which you can configure in KeyCloak as per your organizational internal policies. For detailed instructions on the KeyCloak authentication, you can refer their offical documentation here
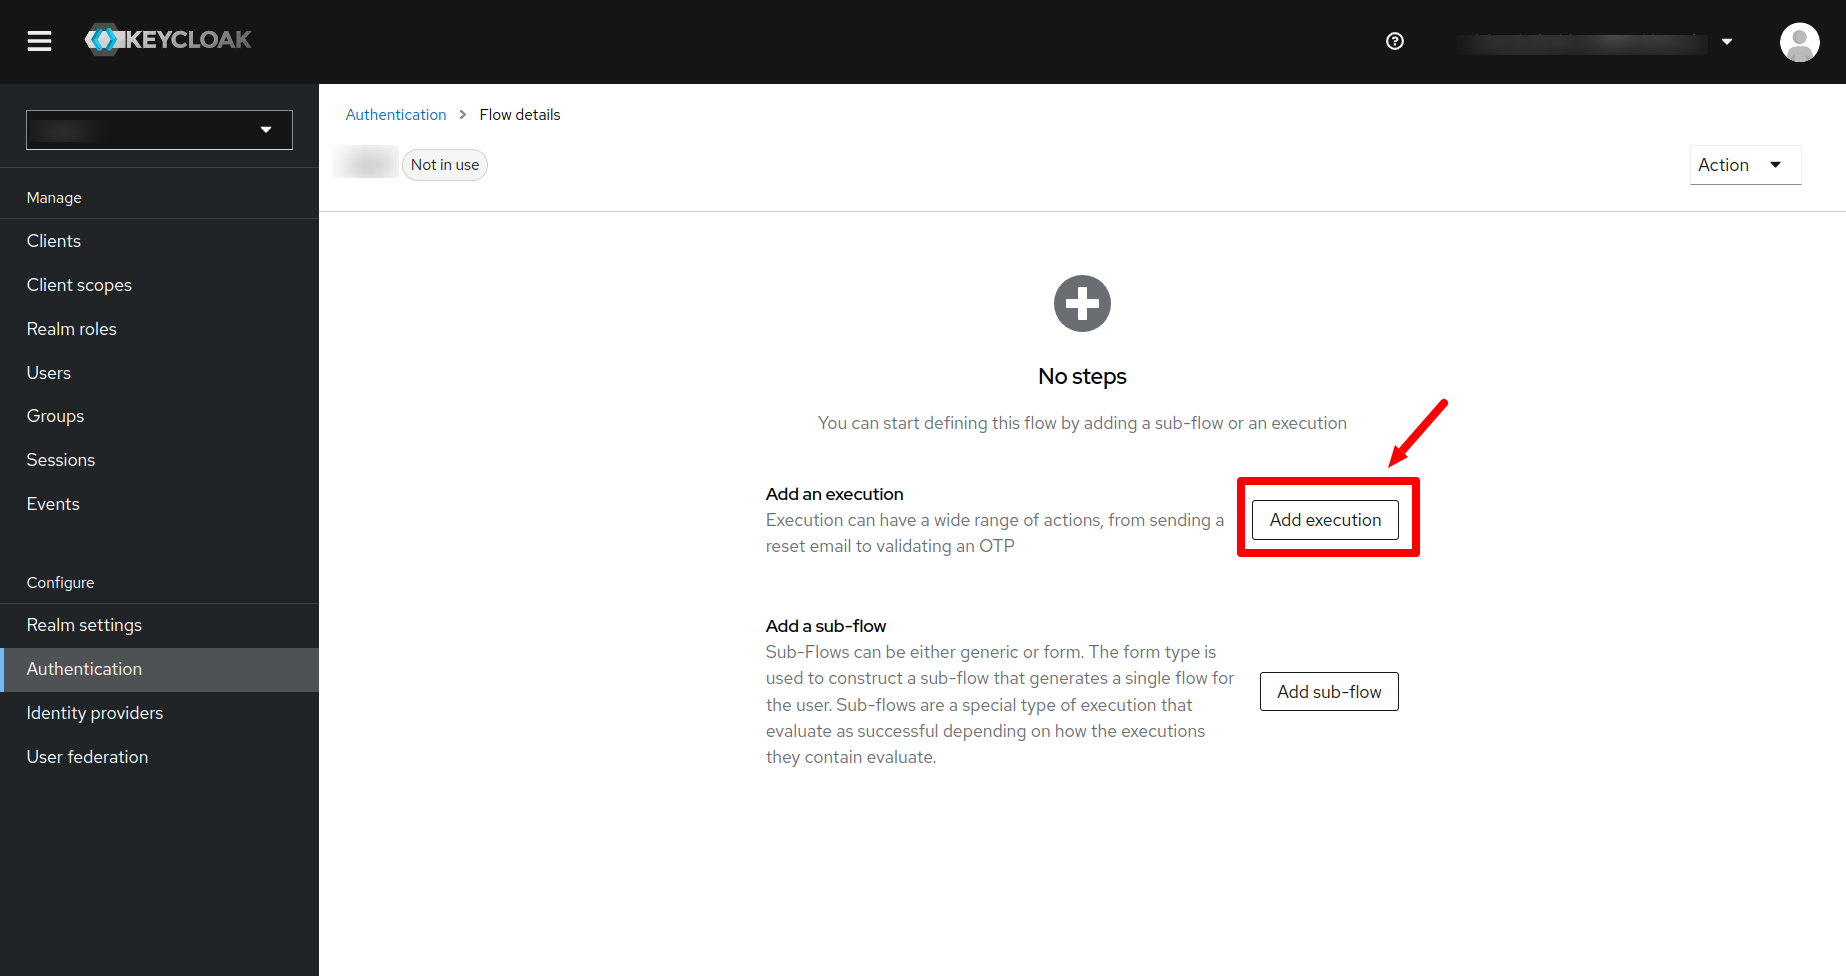
Click on the Authentication menu on the left side navigation bar of the KeyCloak and then click on the create flow button.
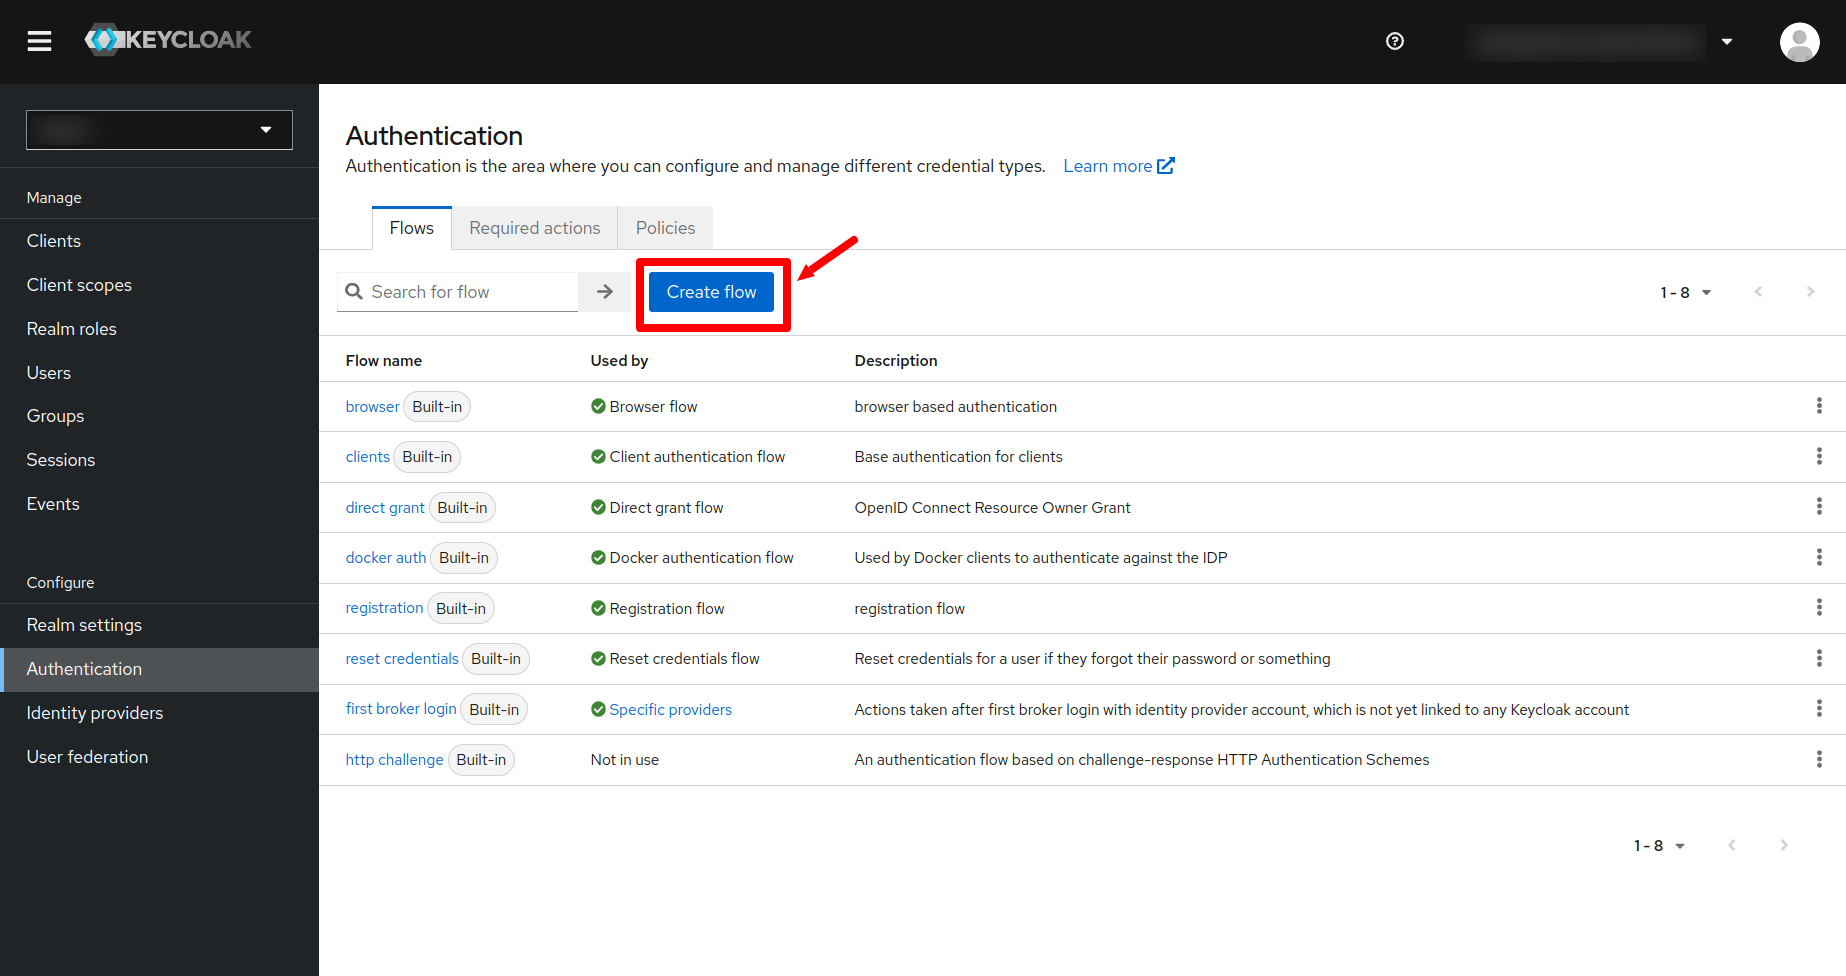
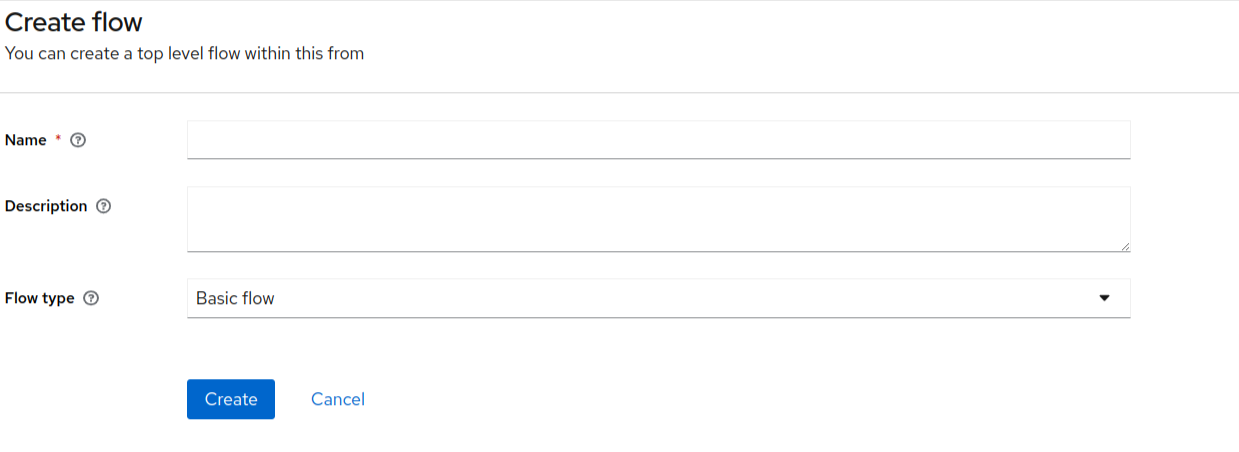
Enter the name of the flow and click on the create button.
In the next page click on the Add Execution button.
Search for Review Profile and click on the add button. Then you will see the following:
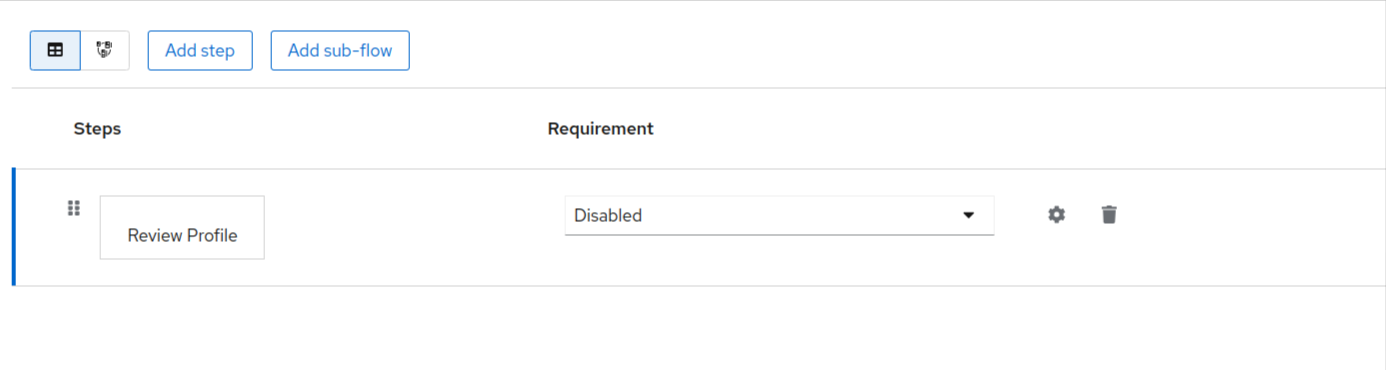
Under the requirement header, click on the dropdown and make that as required.
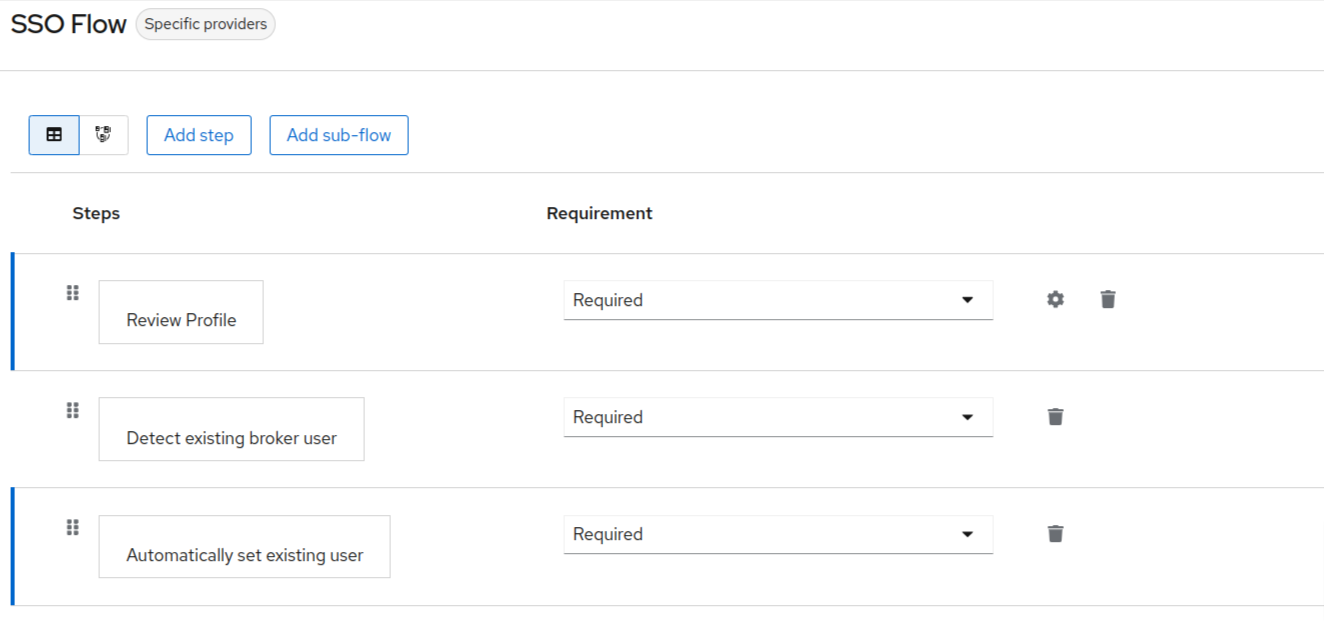
Repeating the above steps, add the following executions to the flow:
- Detect existing broker user
- Automatically set existing user.
The final executions for the flow would look something like this:
Creating the Identity provider in KeyCloak.
Why do you need itYou need to create the Identity provider in KeyCloak to configure the external identity provider for Entra ID in your KeyCloak instance.
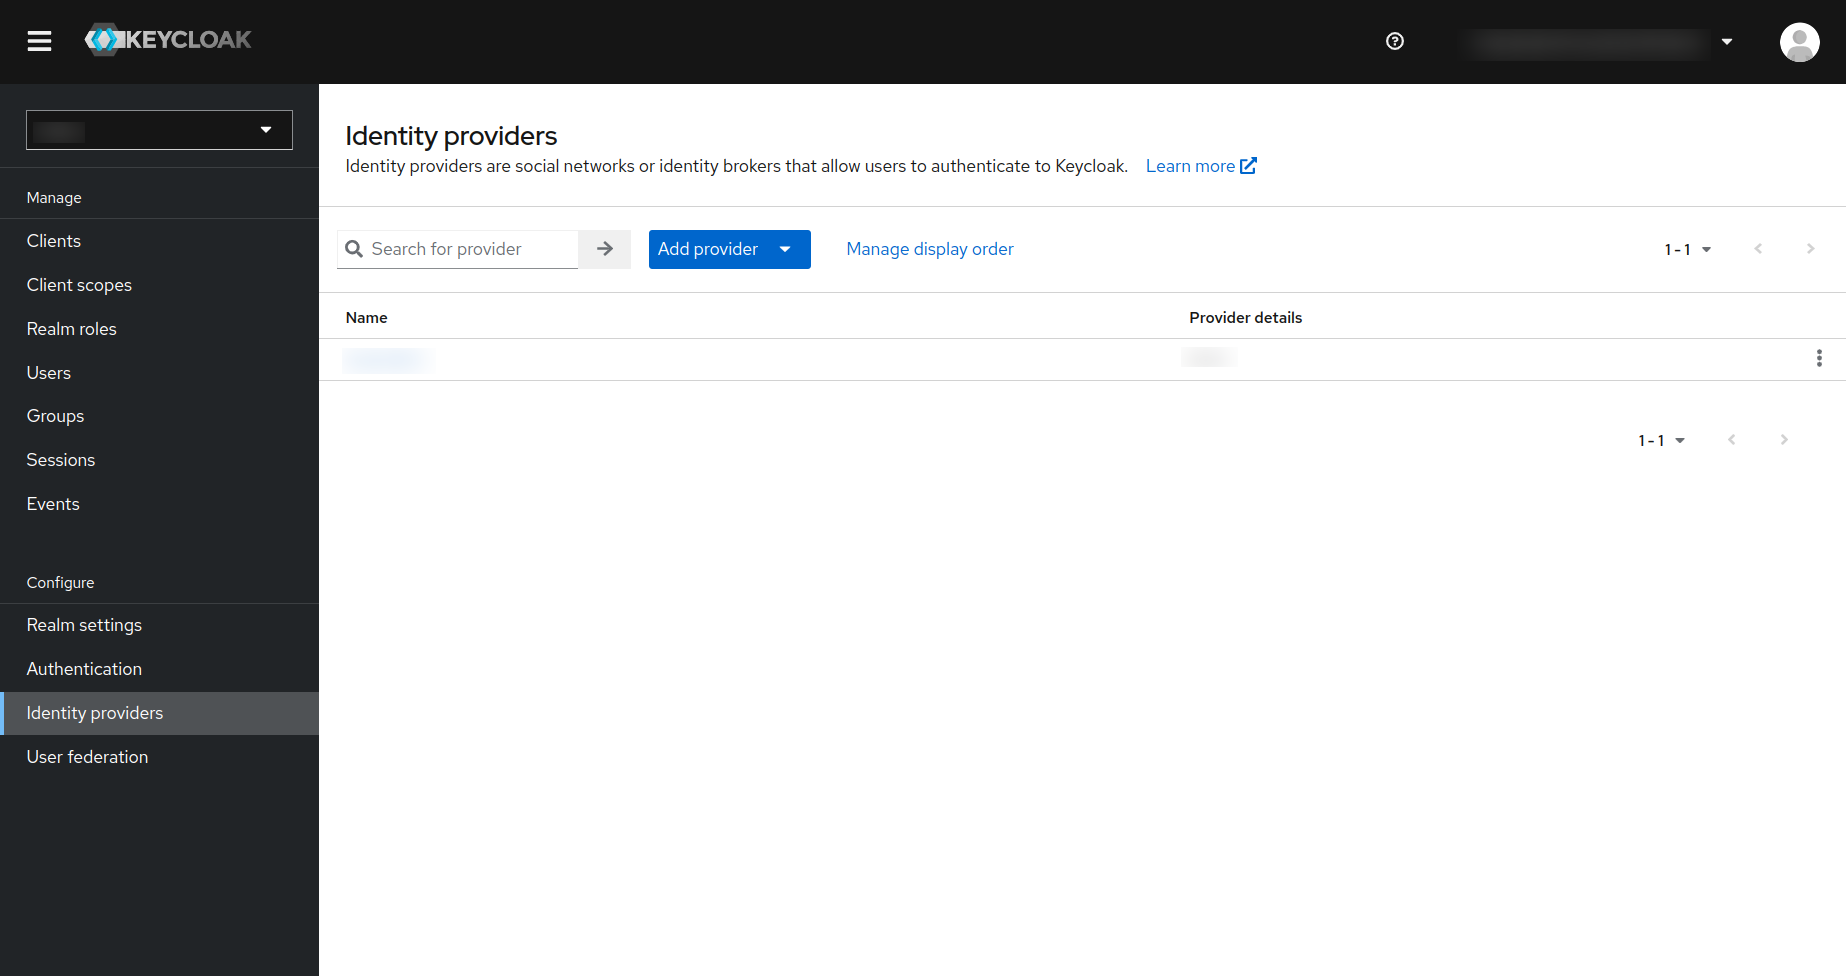
The next step is to create the identity provider in KeyCloak. To do so:
- Click on the
Identity providerin the left navigation menu in the keyCloak and you will be redirected to the following page. - In that page click on the
Add Providerbutton as is shown in the screenshot below:
In the drop-down that is displayed you need to click on the SAML 2.0 option. This will display the following page for adding the SAML provider.
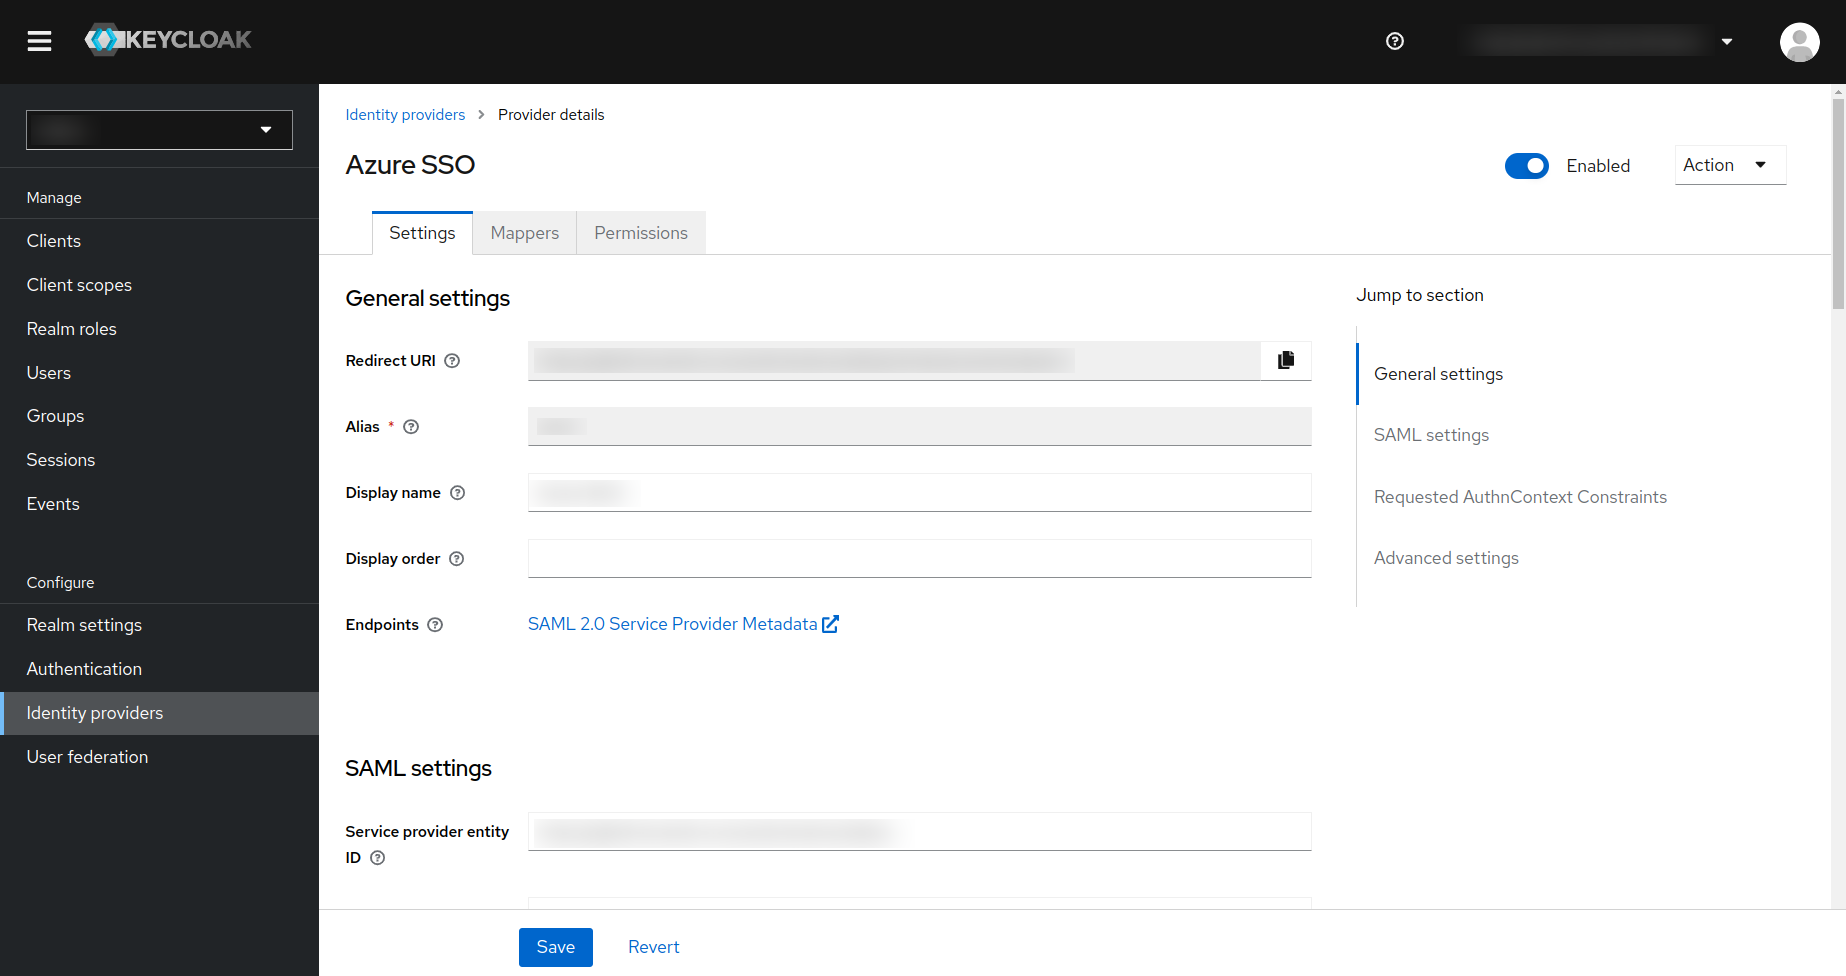
Enter the Alias name.
Alias that you have entered here will uniquely identify the identity provider since it will be used to build the unique redirect URI for the identity provider.
Actions that you need to do- Copy the Redirect URI and Service provider entity ID and keep it somewhere safe, as you will require this in later steps.
- Under the
SAML entity descriptor, copy and paste theApp Federation Meta dataurl that you have copied from the previous step and click on theAddbutton at the bottom of the page. - Make sure that you select the
First Loginflow (which you have created in the previous step) for the identity provider.
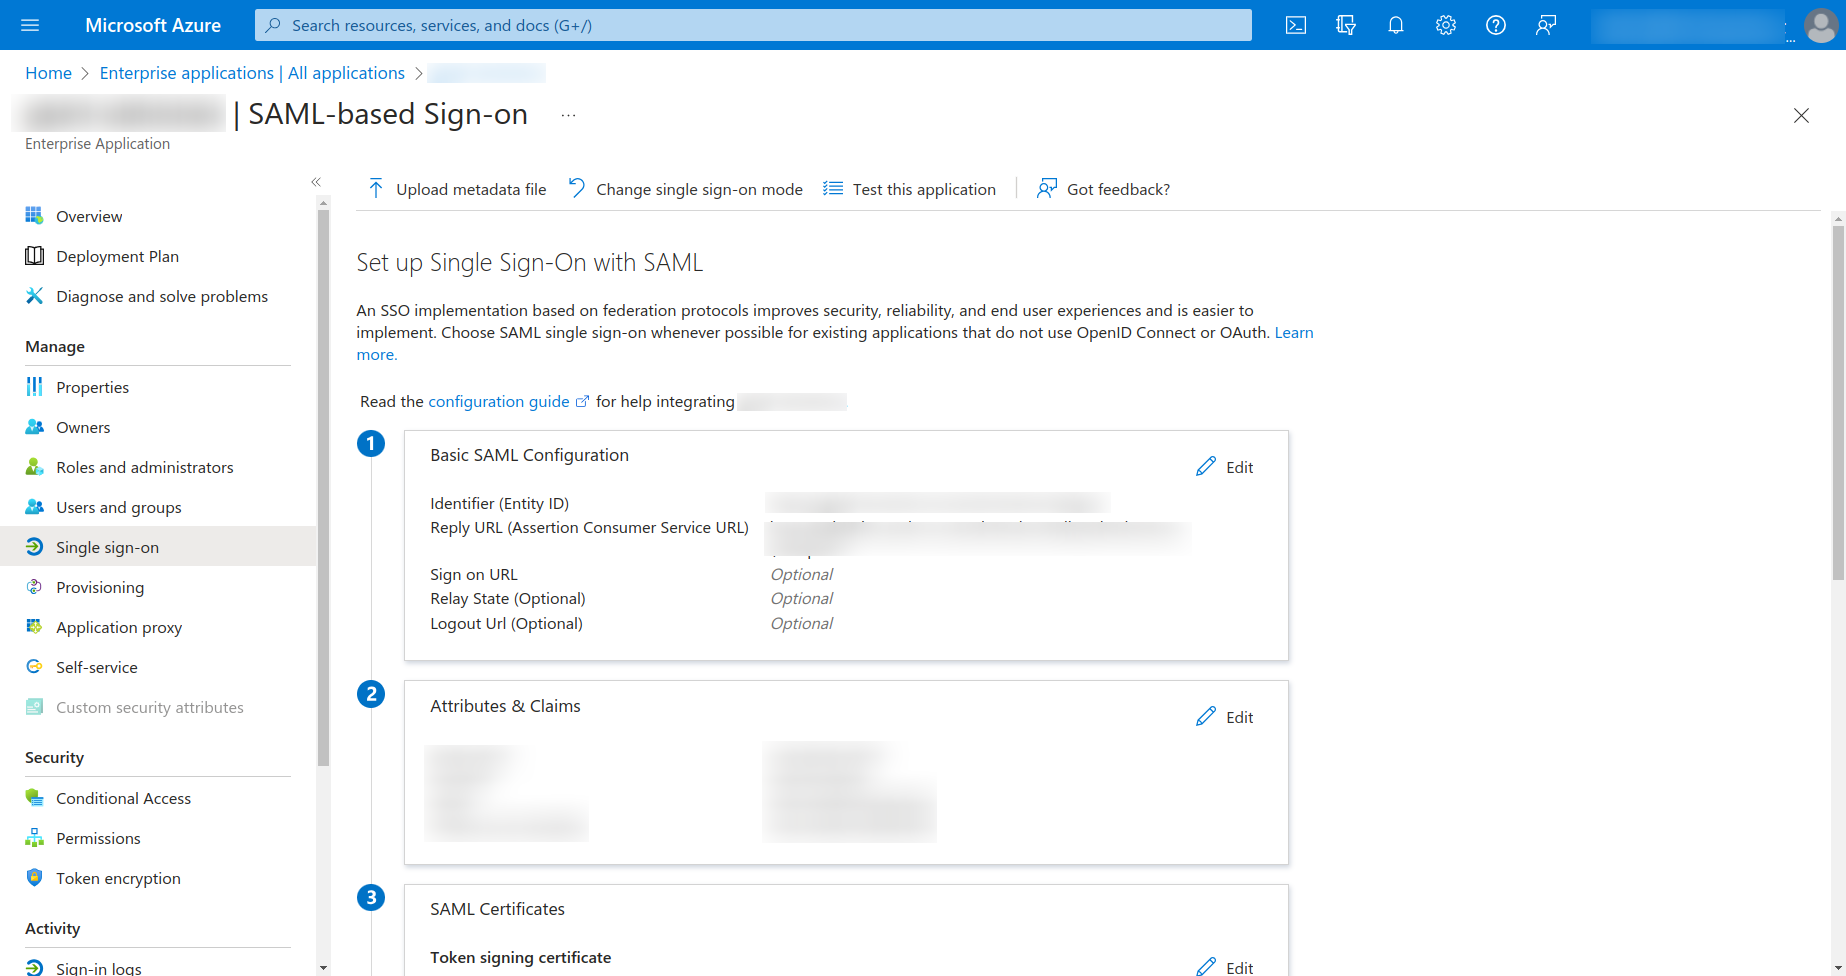
Configuring the Basic SAML settings in your Entra ID Enterprise Application
Open the Set-up Single Sign-On with SAML page of your Entra ID Enterprise application and then click on the EDIT button under the Basic SAML configuration section. (Refer to the previous step, on how to do so).
Then a right hand side bar will appear as is shown below:
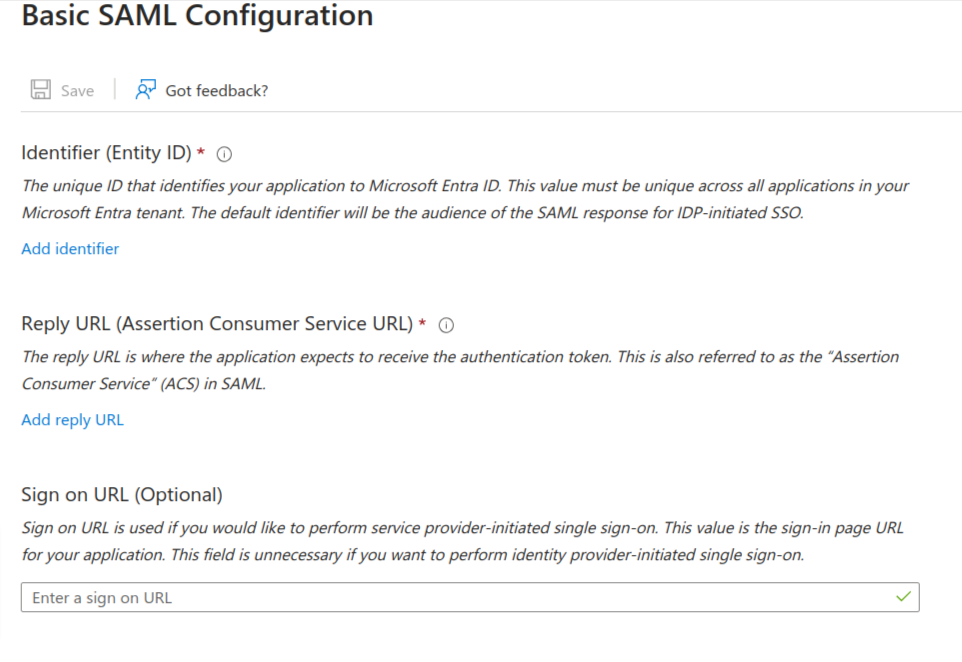
Here you need to do the following:
Take the Service provider entity ID (which you have copied from the previous step) and paste that in the Identifier (Entity ID) field
Take the Redirect URI (which you have copied from the previous step) and paste it in the Reply URL (Assertion Consumer Service URL)
After entering all the fields, click on the save button at the top of the page.
Configuring the Mappers in Entra ID Enterprise application
Open the Set-up Single Sign-On with SAML page of your Entra ID Enterprise application and then click on the EDIT button under the Attributes and claims section. (Refer to the previous step, on how to do so).
Under the Unique User Identifier (Name ID) claim click on the same.
In this page the
namespacefield is used to identify the field in KeyCloak identity provider. So this is basically the matching of the KeyCloak identity provider mapper and the Entra ID mapper that you set here.In this tutorial, we have recommended
user.mailnicknameas the source attribute of the Unique user identifier in Entra ID mapper. However, that is not a mandatory requirement. May be you would like to setuser.userPrincipleNameas the source attribute of Unique user identifier. Therefore you can choose either one of them here.
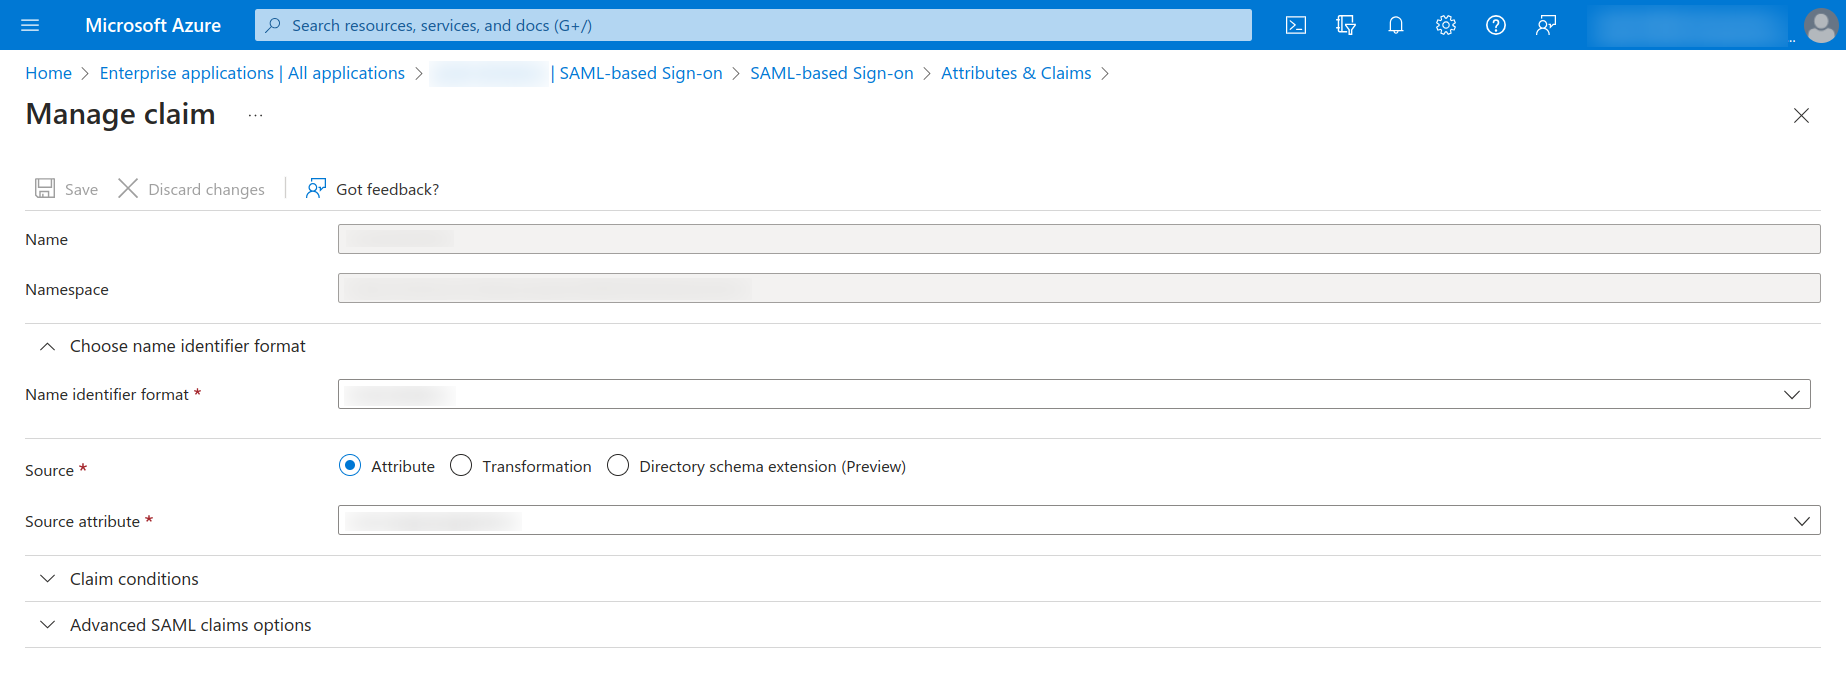 Change the source attribute to
 user.mailnickname and click on the save button at the top.
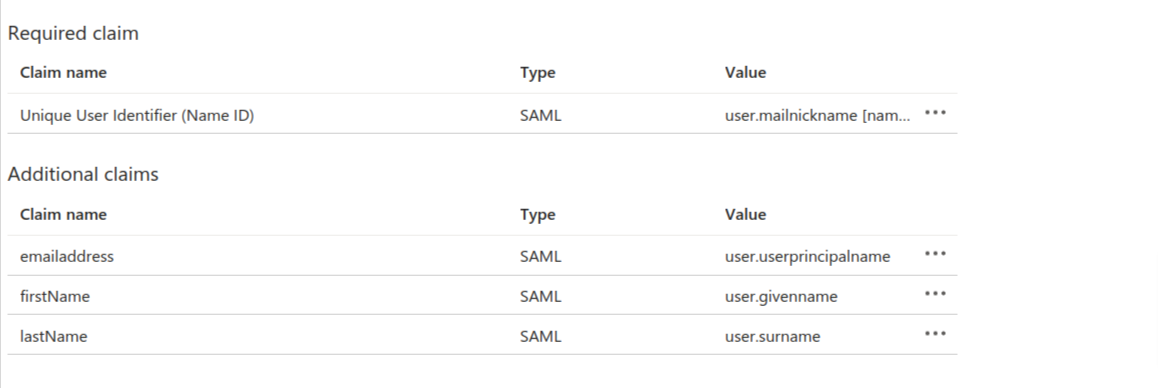
Then get back to the previous page and delete the user.mail value claim under the Additional Claims section, as is shown in the screenshot below. (This is automatically generated and would not be required)
For the other additional claims, you can delete the namespace URI that is generated and rename the claims if you want. To do this, you just need to click on the claims, which will take you to the next page. There you can delete the automatically generated namespace URI as well as provide a different name for the claims for better readability.
The final mappers might look something like this:
Creating the mappers for the Identity provider in the Keycloak.
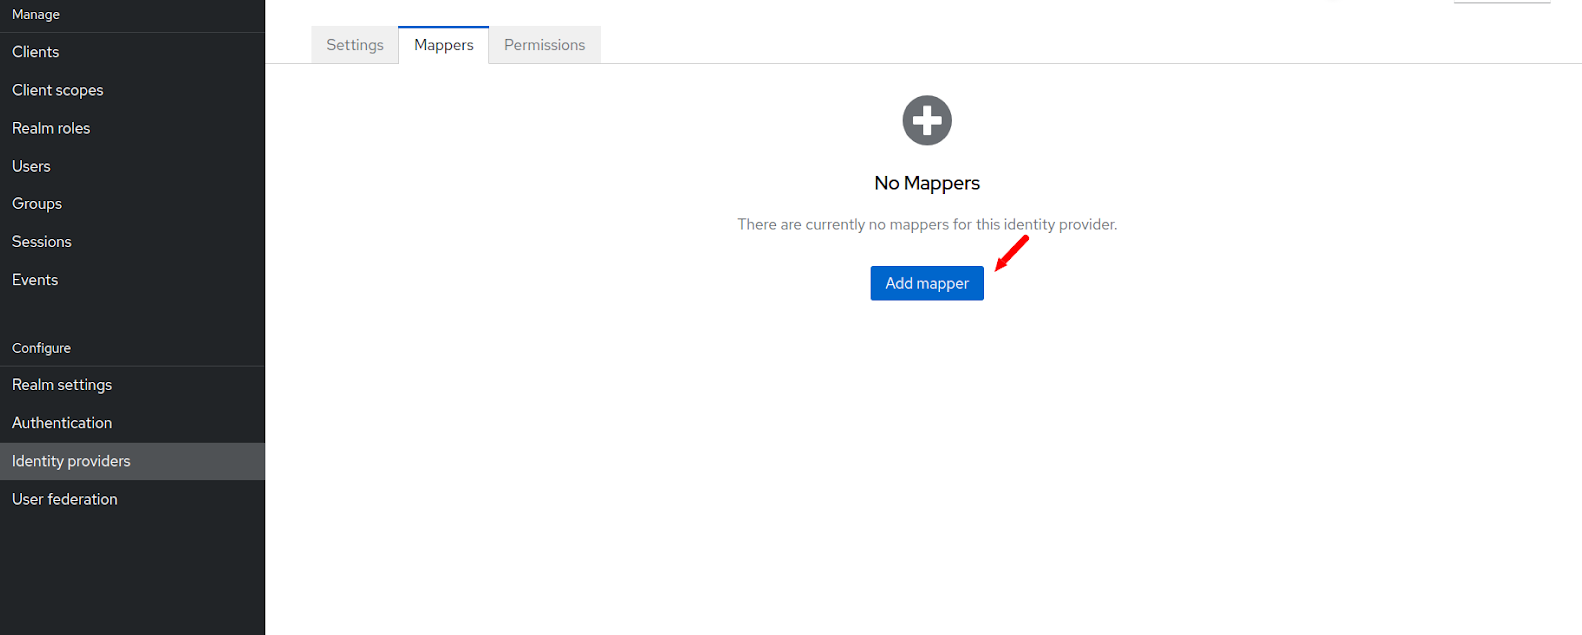
Click on the identity provider link on the left side navigation menu of the KeyCloak and then click on the identity provider that you created in the previous step. Now click on the mapper tab there.
Then click on the Add Mapper button.
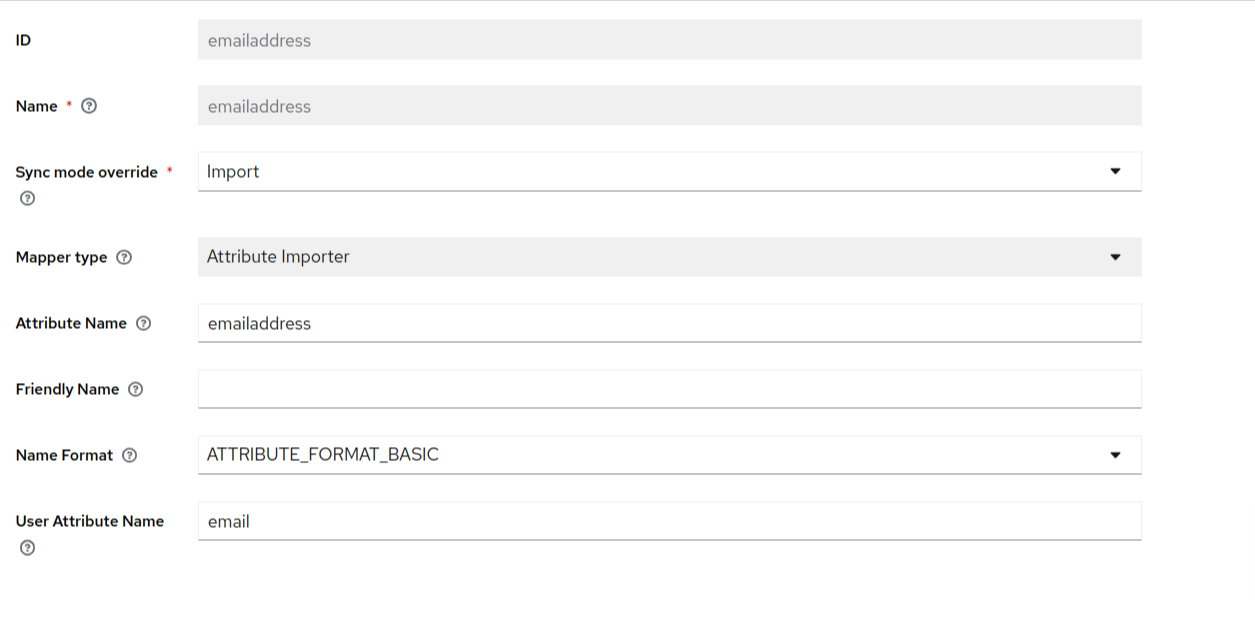
In the next page you have to enter the mappers for the email address.
Enter the name of the mapper and then in the sync mode override drop-down select import.
Under the mapper type, select “Attribute importer”. Although non-mandatory, you can also enter the attribute name and user attribute name.
After entering the required information, hit the save button. The final mapper can look something like this:
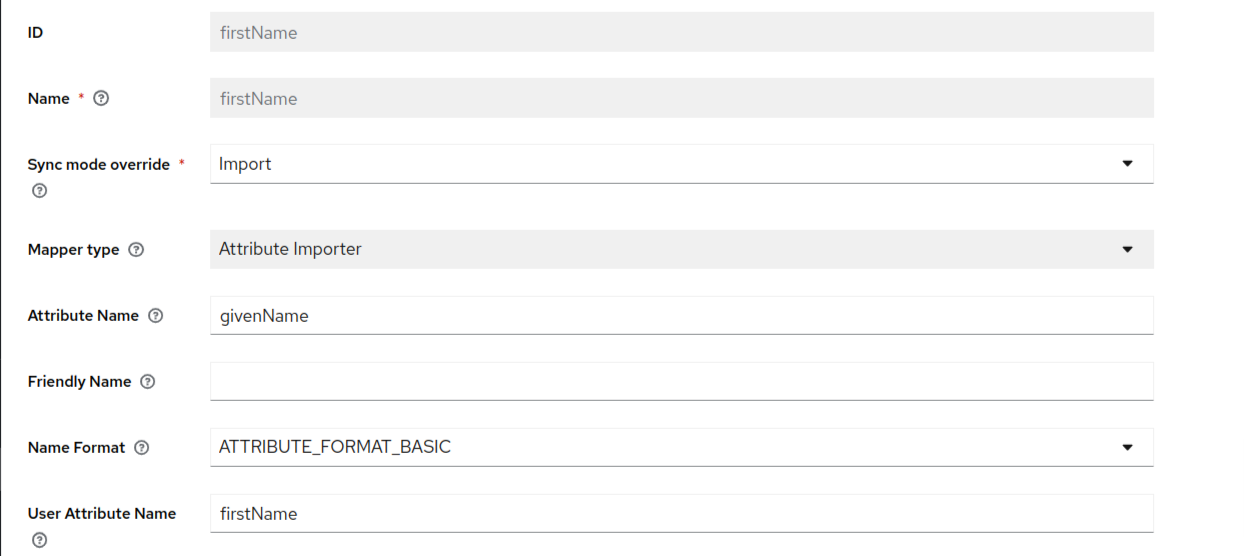
Now, using the above described process, create the firstname and last name mappers as well.
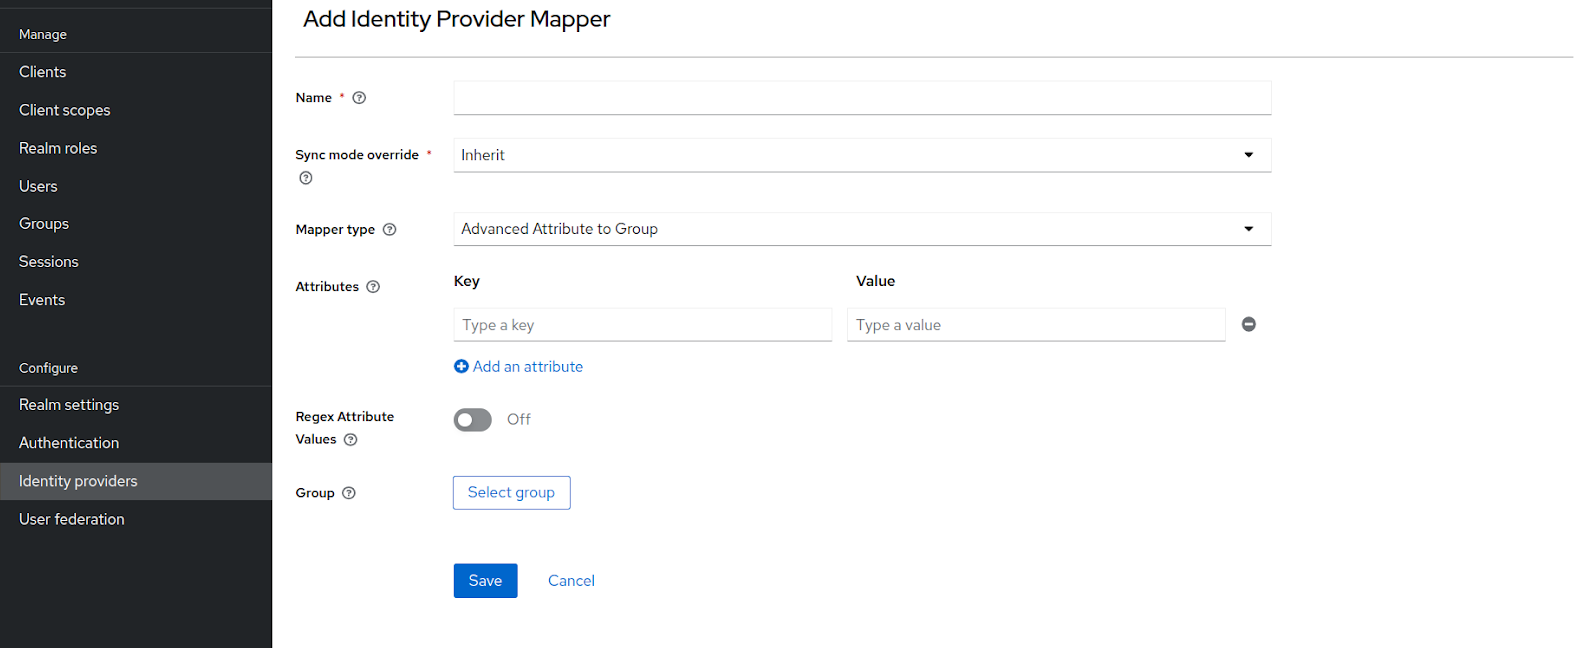
Additional Mappers in KeyCloakIf you want to map additional fields, then in KeyCloak you can add more fields as well, using which you can map those additional attributes. Some of those fields are as follows
- Gender
- Locale
- Family Name
- Middle Name
- Birth Date
You can also create a custom attribute in KeyCloak and add that as mapper in KeyCloak. Click Here to learn more about how to add a custom attribute in your KeyCloak Realm.
The first name mapper can look something like:
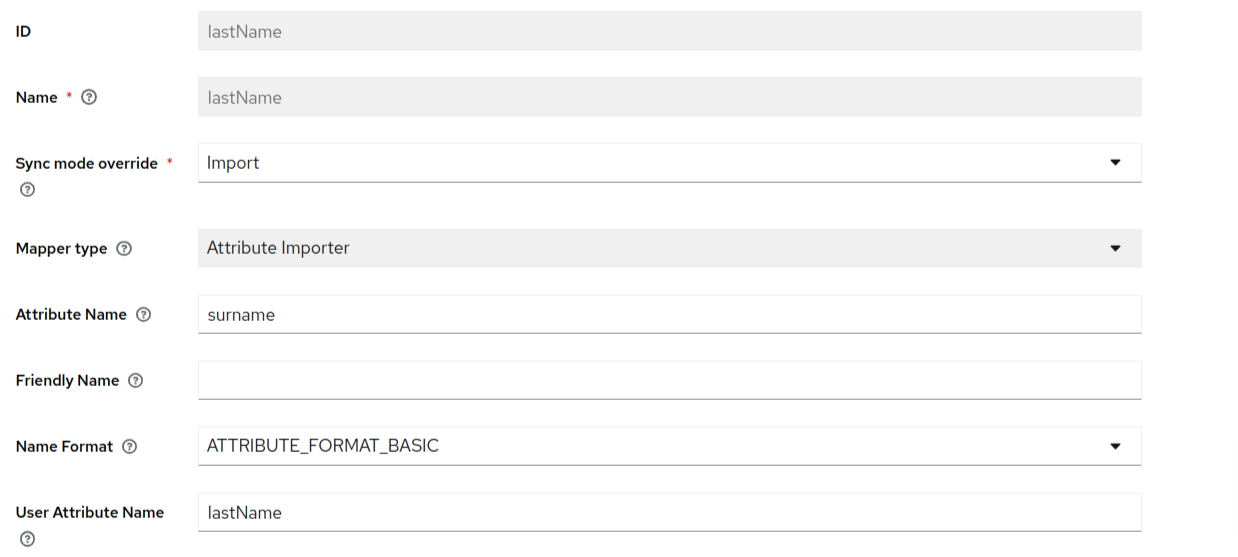
And the last name mapper can look something like:
Sync Mode Choices- We recommend that you make the sync mode to “Force” for the identity provider in the keycloak. This will always update the user during every login with your identity provider. However this is not mandatory. The other sync modes available in KeyCloak are as follows:
- Legacy
- Import
- Inherit
- For more information on these Sync Modes Click Here
Testing the Entra ID SSO
Login to your tenant and then you will see the Login with Entra ID SSO button.
Click on the Login with Entra ID SSO button and then enter the credentials of the Entra ID user in order to test whether that user is able to login to your IDHub tenant using their Entra ID credentials.

Make sure that the user with which you are testing the Entra ID SSO setup, is already a registered user in your IDHub tenant.
Ending Notes
If you have any questions or concerns, or if there are areas you wish to explore further, please feel free to reach out here. Your feedback is incredibly valuable, not only in improving these resources, but also in helping to shape future content.