IDHub User Proxies - Video
Learn all about IDHub Proxies; how to add, edit, delete, and assign Proxies to other Users.
IDHub User Proxies – Video Transcript
Hello, in this video, I’ll demonstrate how to add, edit, and remove a proxy.
To begin, let’s log in as organization Sath.
We’re going to log in as End-User Tyler. Tyler is a basic user within IDHub, with no managerial or administrator permissions. Although any user within IDHub can add, edit, and remove a proxy.
From the dashboard, we’ll go ahead and navigate to the “my profile” page.
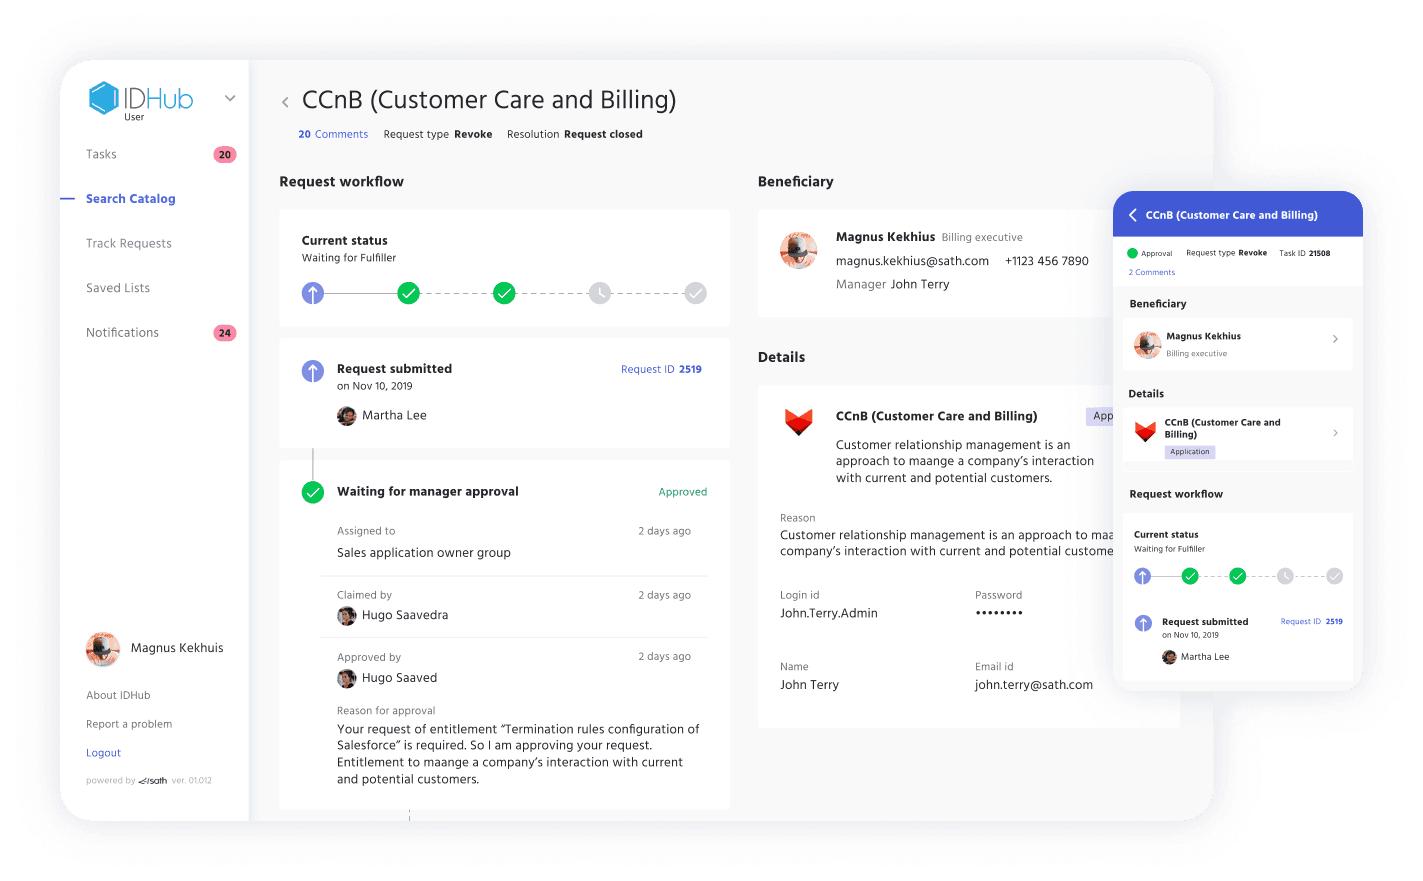
Within this page, we can see all of the basic details of the user.
Who the user’s manager is, what department they work in, all of their access, and any proxies that they’ve created, and any proxies that have been assigned to them.
So to begin, we’ll go ahead and click on this “Add Proxy” button.
That’ll bring up a right-hand panel where we can edit our proxy dates.
Tyler is going to be out of the office from May 10th to the 14th.
He can assign this proxy to any user within the organization, or he can assign the proxy to his manager, who is Joanna.
We’ll go ahead and assign this proxy to Joanna. Click the “assign proxy” button, and a proxy has been assigned.
We’re going to log out as Tyler, and log back into IDHub as Joanna, to view the proxy.
And we’ll navigate to the “my profile” page by clicking on the “my profile” button on the dashboard.
And we can view all of Joanna’s basic details here, all of our access, and any direct reports. And we can see Tyler is one of them.
We can also see that Tyler has assigned her this proxy. If she had multiple proxies assigned to her, they would be listed out here.
Let’s say Joanna called Tyler and said, could you please assign that proxy to Jack? Tyler can go back into his profile, and he can reassign that proxy by editing it to Jack.
And there are two ways to do it. We can click on the ellipsis here to edit, or you can click “view more” which will bring up all the proxies that he has created.
And click on the ellipsis here, and click edit.
We’ll go ahead and remove Joanna, and add Jack, and click “edit proxy”. Notice how it’s changed here.
We’ll go ahead and log out of Tyler’s account, log back in as Joanna, to validate that the proxy has been removed from her assigned to proxies, by navigating to her profile page again.
And we can see here that there are no assigned proxies to her and we’ll log out of Joanna’s account and log into Jack’s account, to validate that Jack has been assigned that proxy.
And we’ll navigate to his profile by clicking on that “my profile” button.
And we can see here that Tyler did in fact, assign Jack that proxy for those same dates.
So we’ll go ahead and log out of Jack’s account, back into Tyler’s account.
And let’s say Tyler decided that he wasn’t going to be out of office for those days. He’s going to remove that proxy, and it’s going to fall off of Jack’s account.
So we’ll go back into Tyler’s profile.
And we’re going to edit or not edit. Excuse me, remove this proxy, which we can do from here, and click remove. Are you sure you want to remove Jack as your proxy? Yes.
And so Jack will fall off of that “My proxy”, so now we have no proxies.
Let’s go ahead and log out of Tyler’s account, log into Jack’s.
And from his “my profile” page, we’ll validate that the proxy has been removed.
Navigate to his profile, and within his details, we can see that there are no proxies assigned to Jack.
That concludes this demonstration on how to add, edit, and remove a proxy.
I hope you enjoyed the video, and I encourage you to check out some more of our Sath IDHub videos.
Thank you so much for your time, and have a great day.
Improve defenses and drastically cut your daily workload.